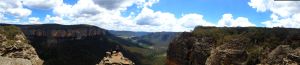
Ash wanted to head to Surface Paradise so we thought it might be nice to drop him off for a day out and drive up to check out a couple of the touristy waterfalls on Tamborine Mountain.
We knew Jason was up visiting family in Brisbane so we threw him a shout out to meet us there.
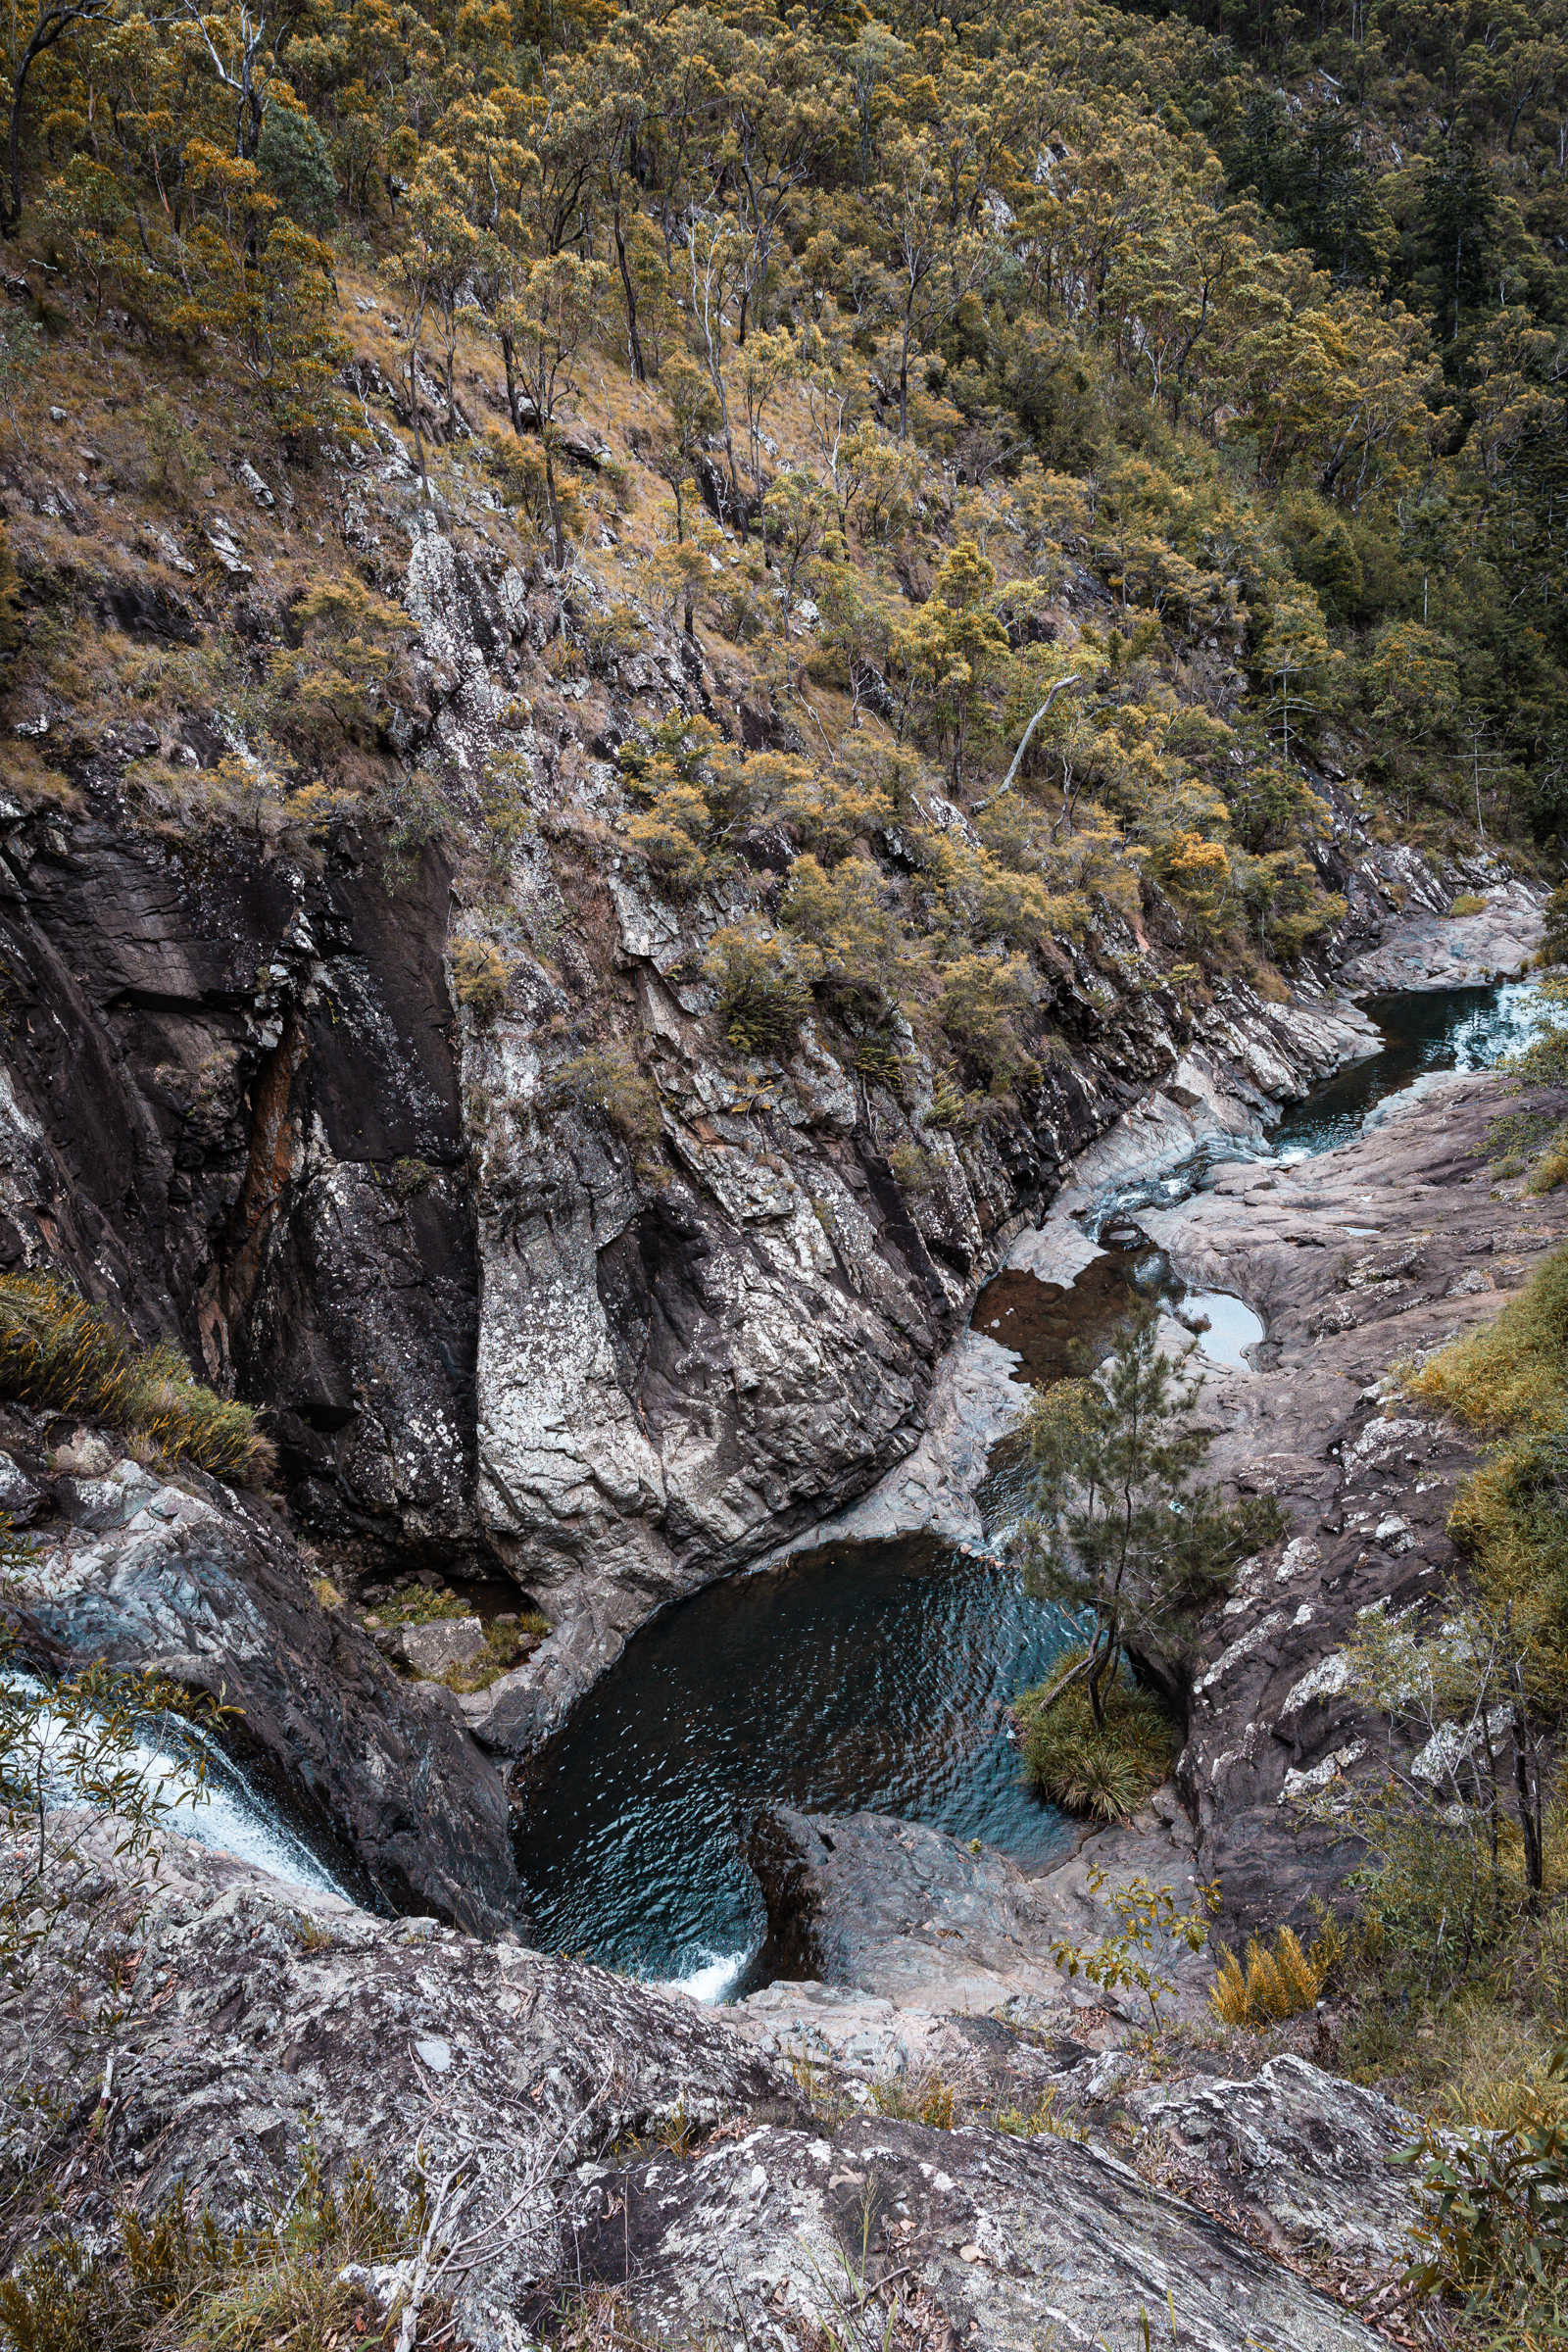
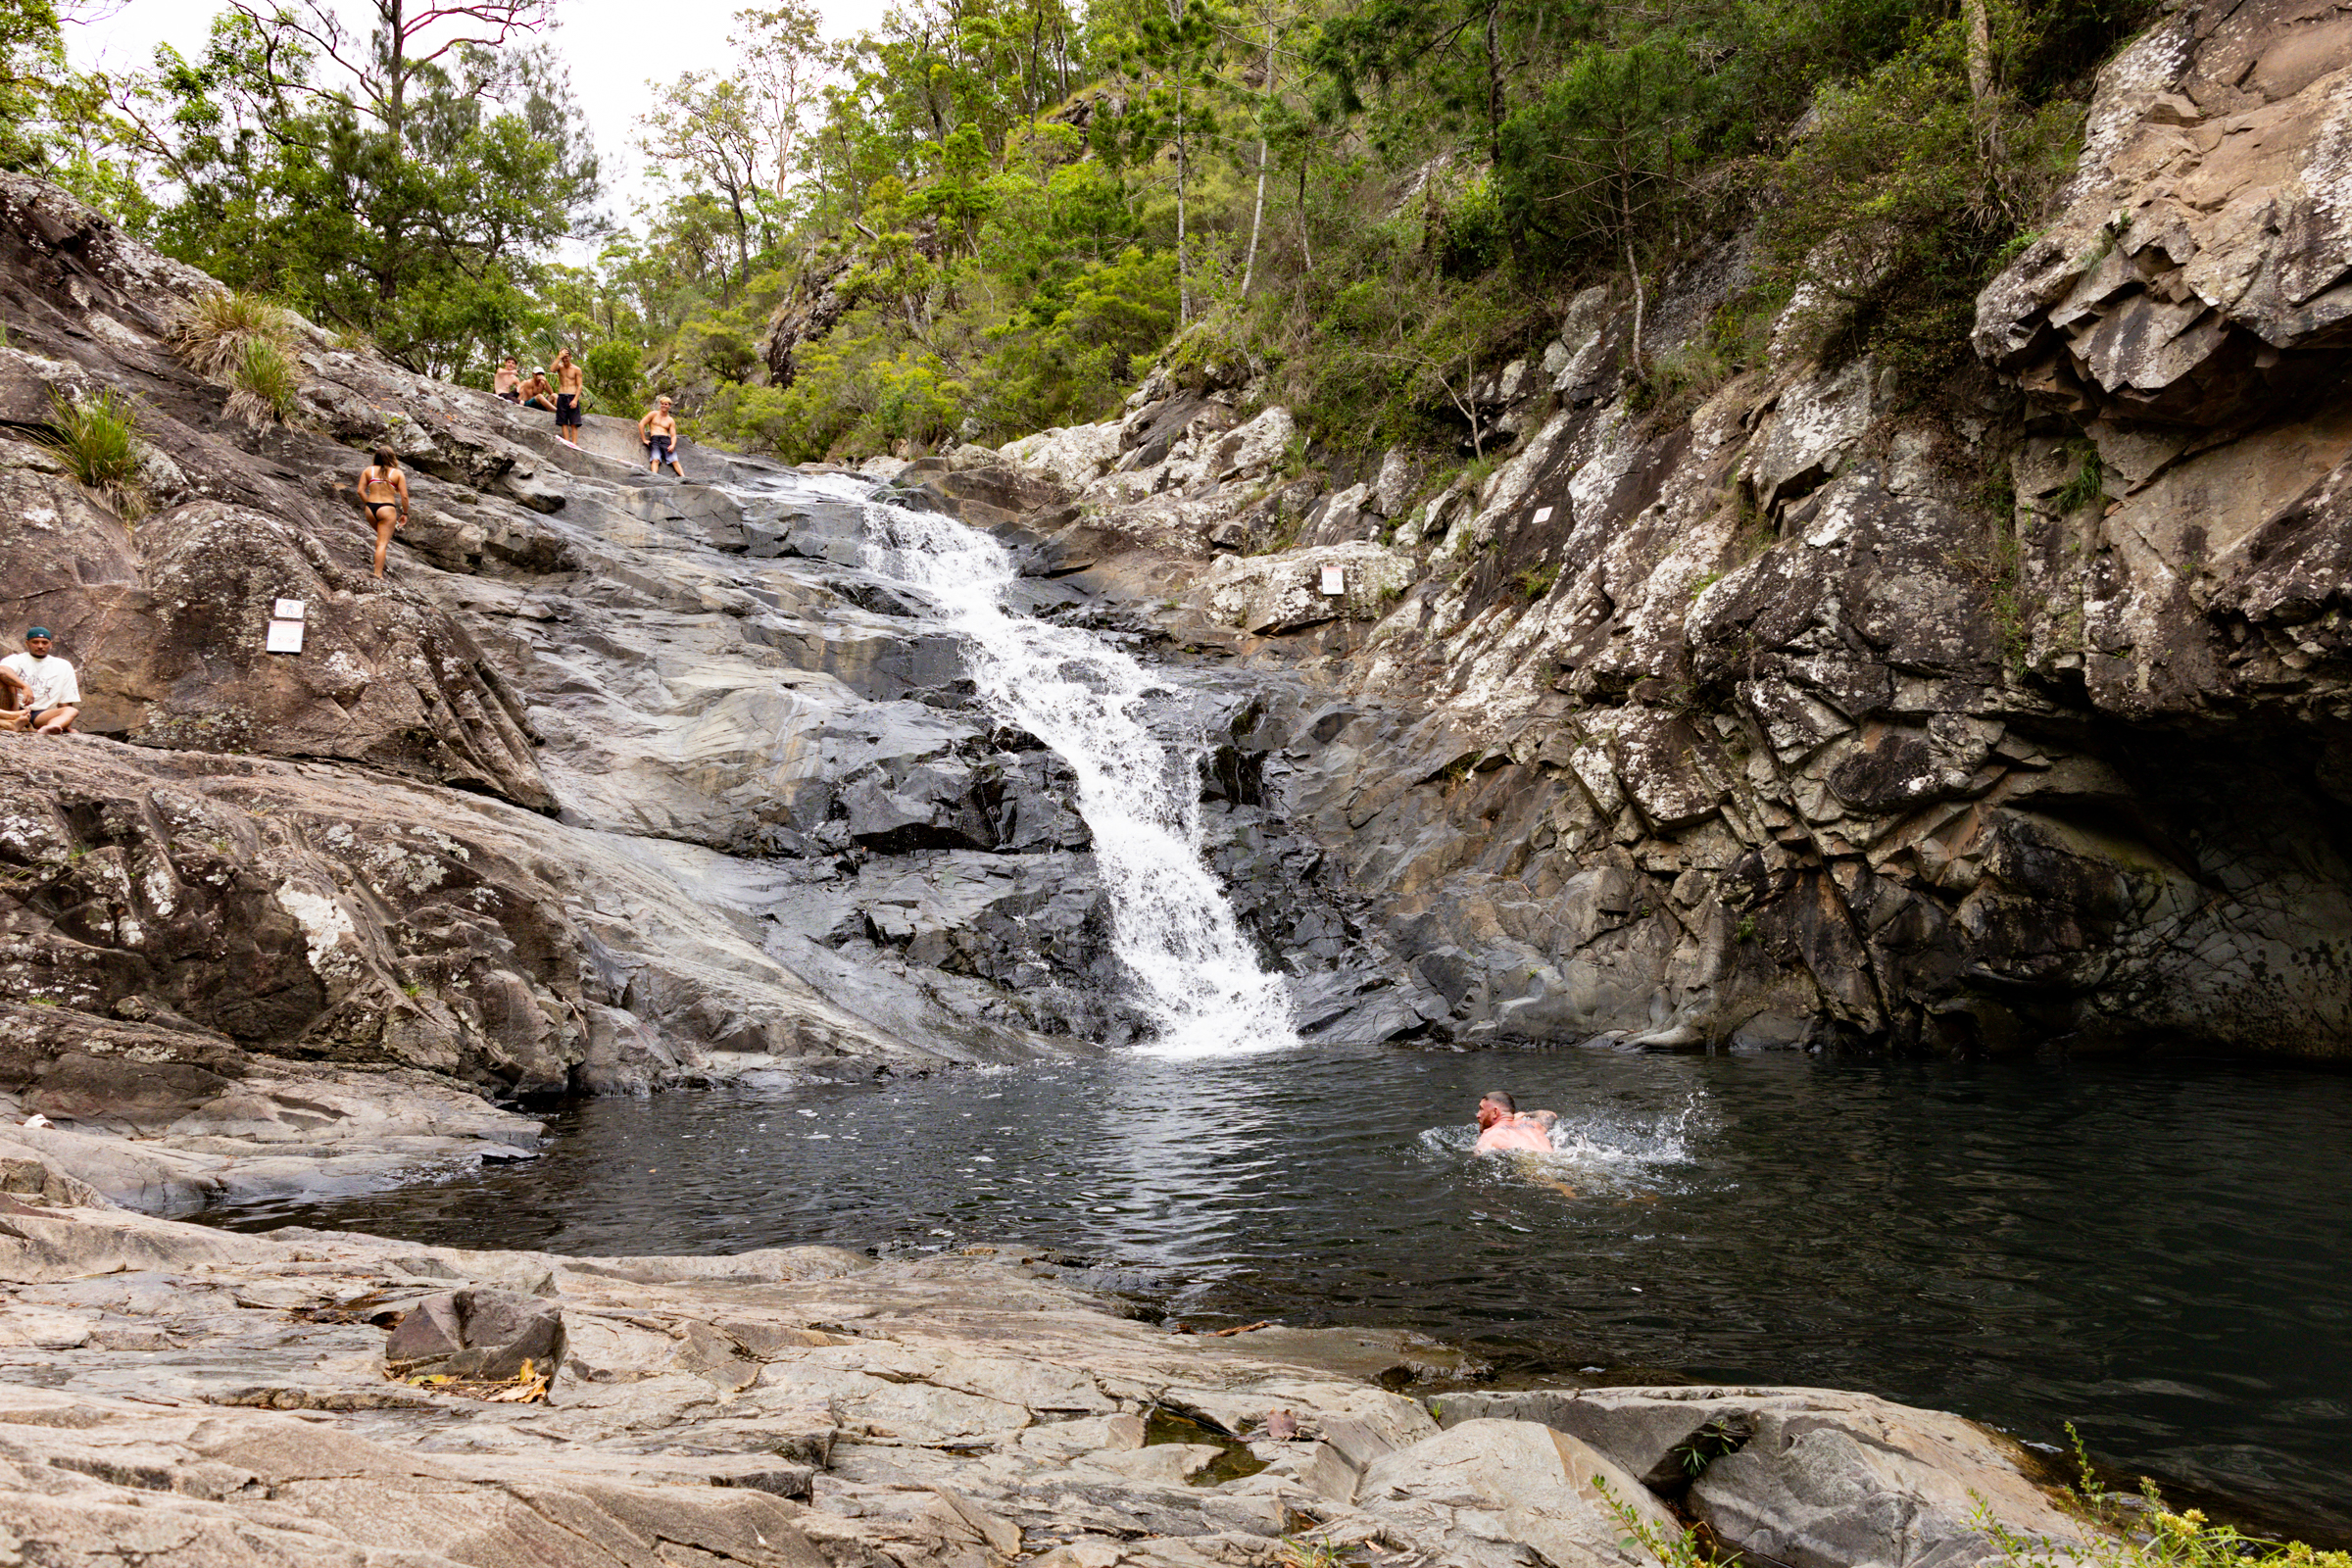
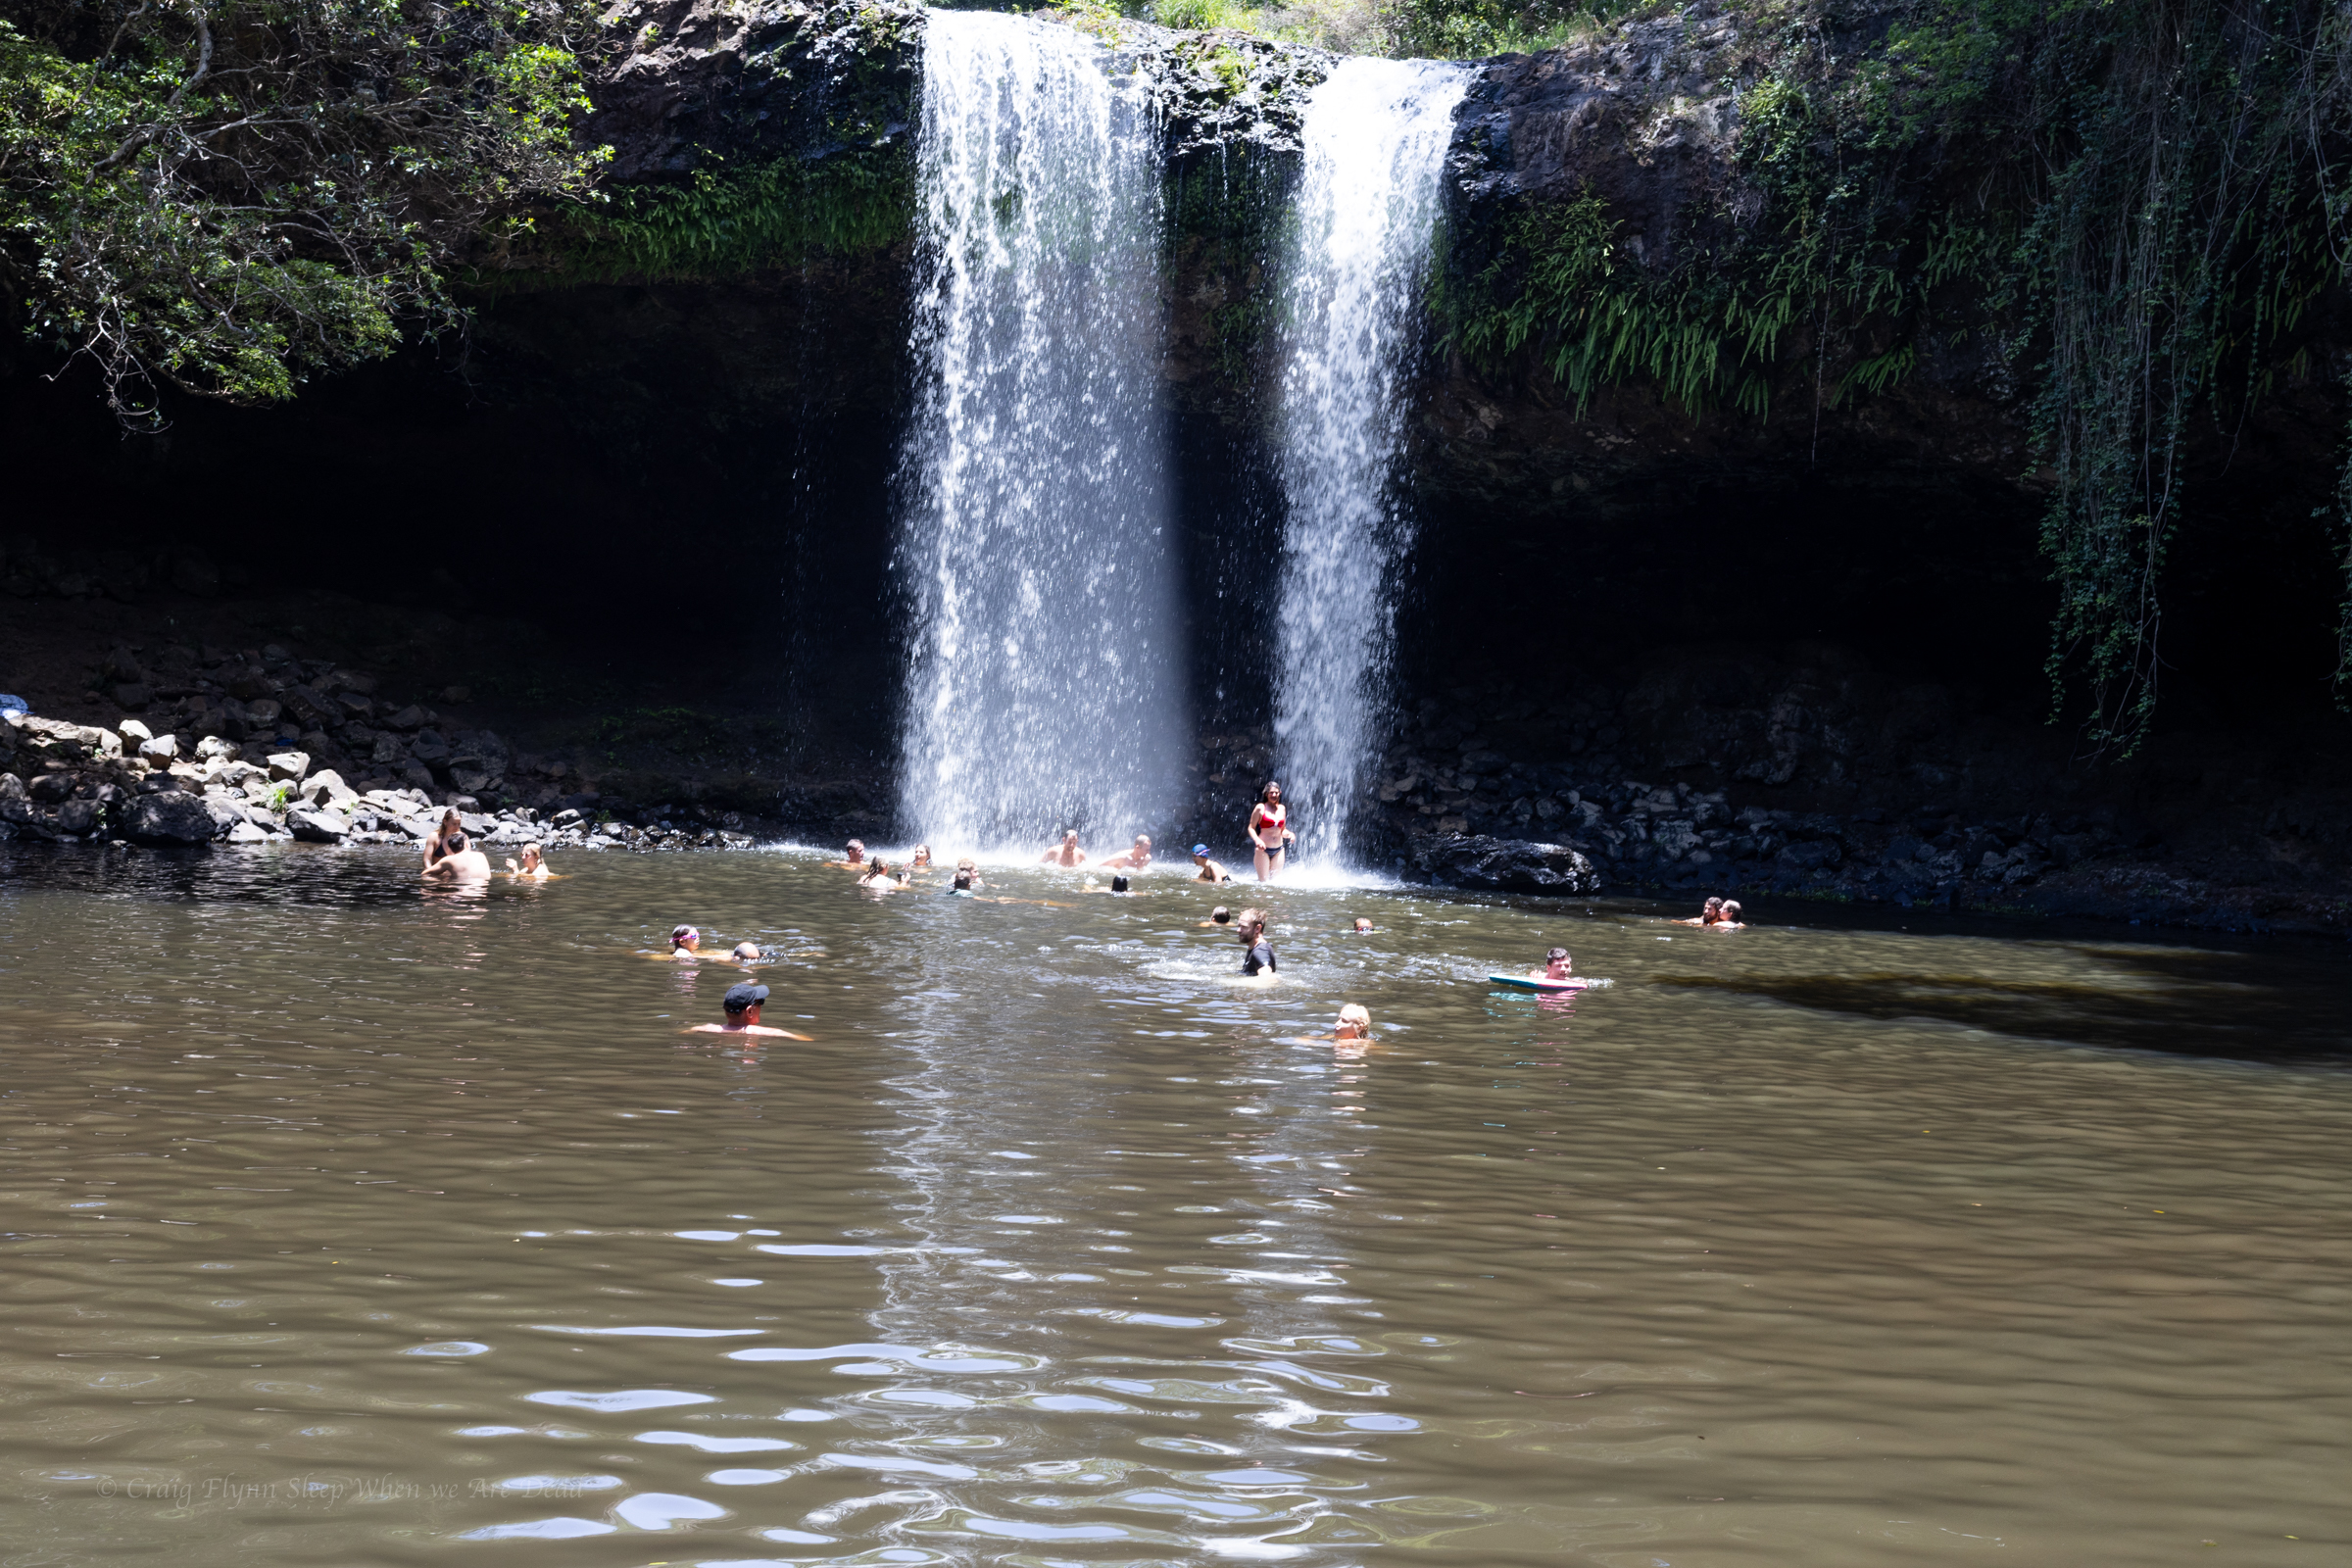
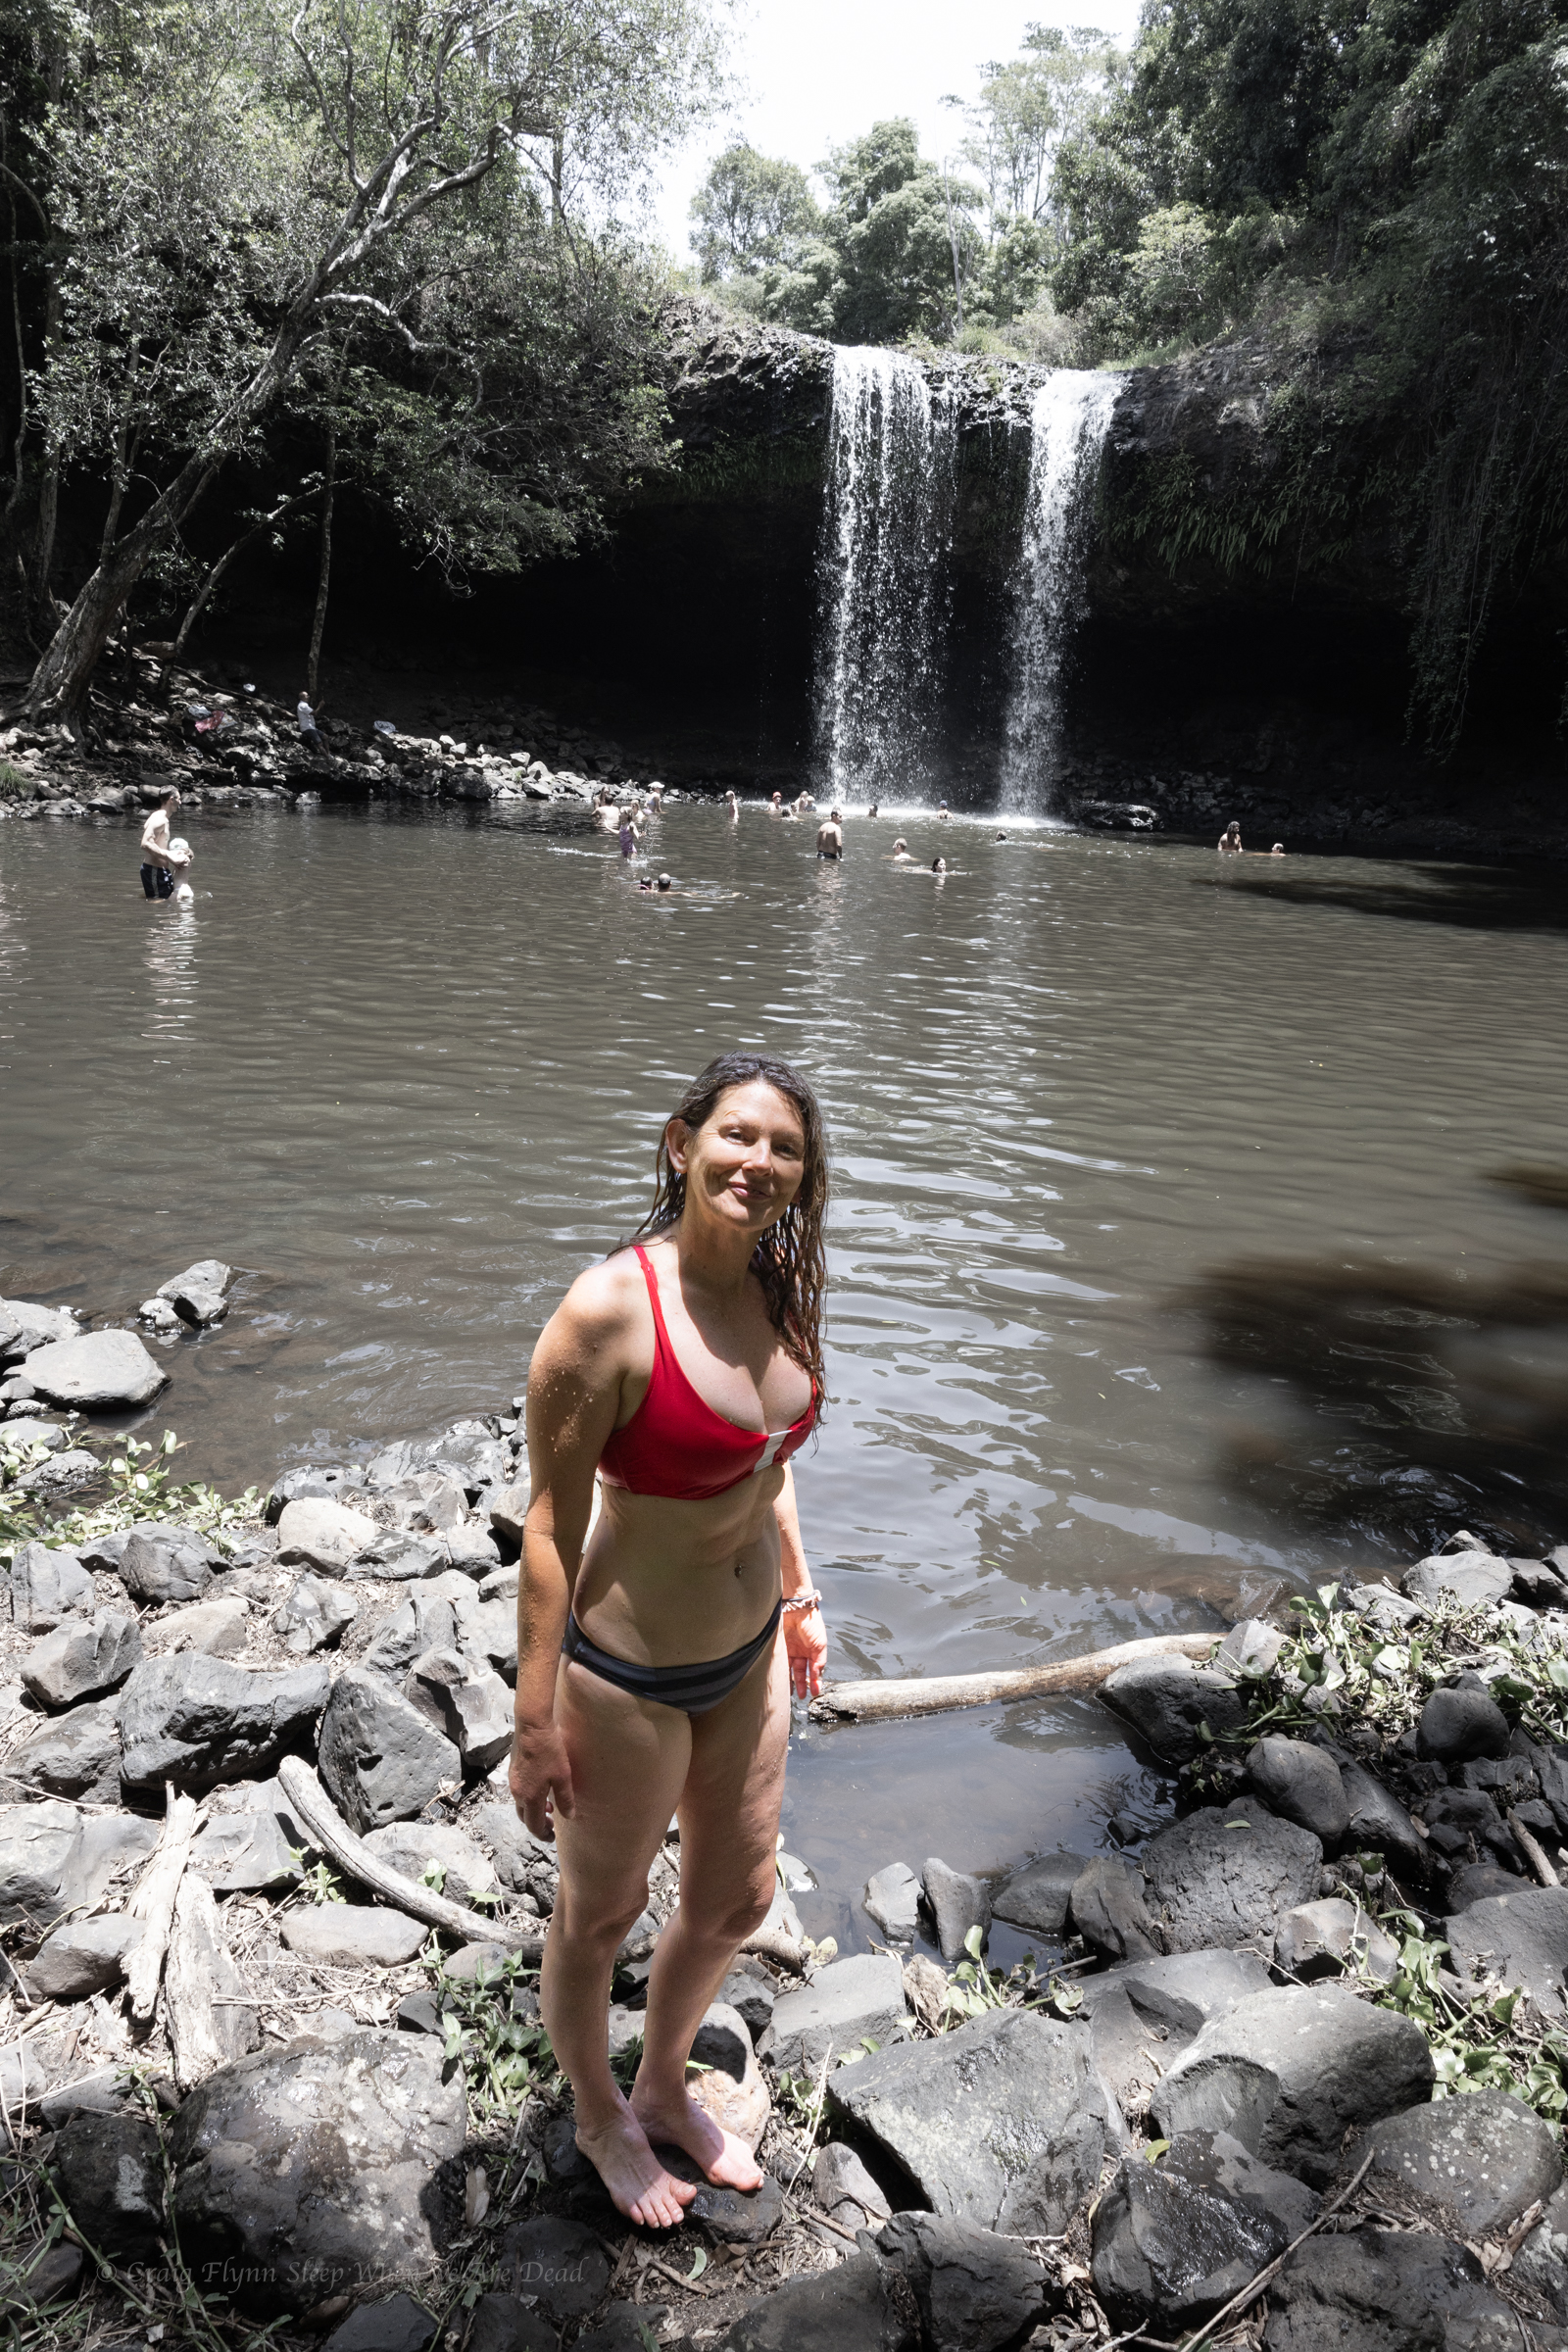
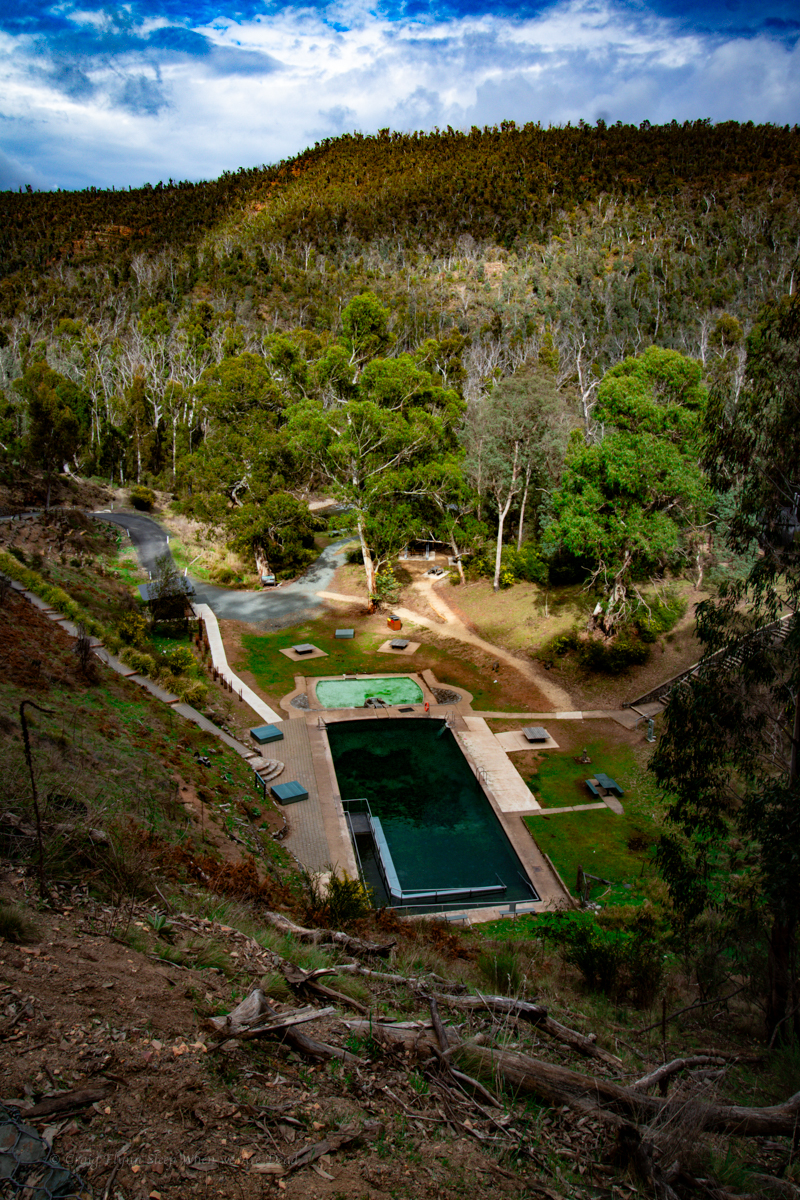
Our first stop was Cedar Creek falls.
This is another popular swimming spot and it has limited parking. We needed to park way back at the turn off (Junction of Tambourine Mountain Road and Cedar Creek Falls Road.) which gave us an extra 800m walk each way.
Locals at the end of the road had set up a paid (donation) parking lot in their paddock and the kids had an esky set up sell cold drinks. Kylie half jokingly wondered if said locals rushed out of a morning on public holidays and filled the car park up with their own cars before the crowds appeared. Clever them if so as their paddock was just about full.
And to be fair, imagine having this place pretty much as your private back yard extension before the crowds discovered it and the tourists (like us) rolled in.
From the car park a boardwalk style trail leads you down past a nice picnic area beside the creek then down to a lookout above the main falls.
The trail then continues down to the base of a lower cascade and a nice swimming hole.
There are two main pools accessible from the trail.
A series of other cascades and pools are off limits due to safety concerns and rangers were on and to remind people of the need to comply.
We have a dip and laze about then head back up the mountain to check out Curtis Falls.
There’s a much bigger car park here but it’s equally full, luckily people are leaving and we get a park close to the trail head. Winning.
There is no swimming allowed in this one but is a lovely walk along a shaded creek and a very pretty waterfall.
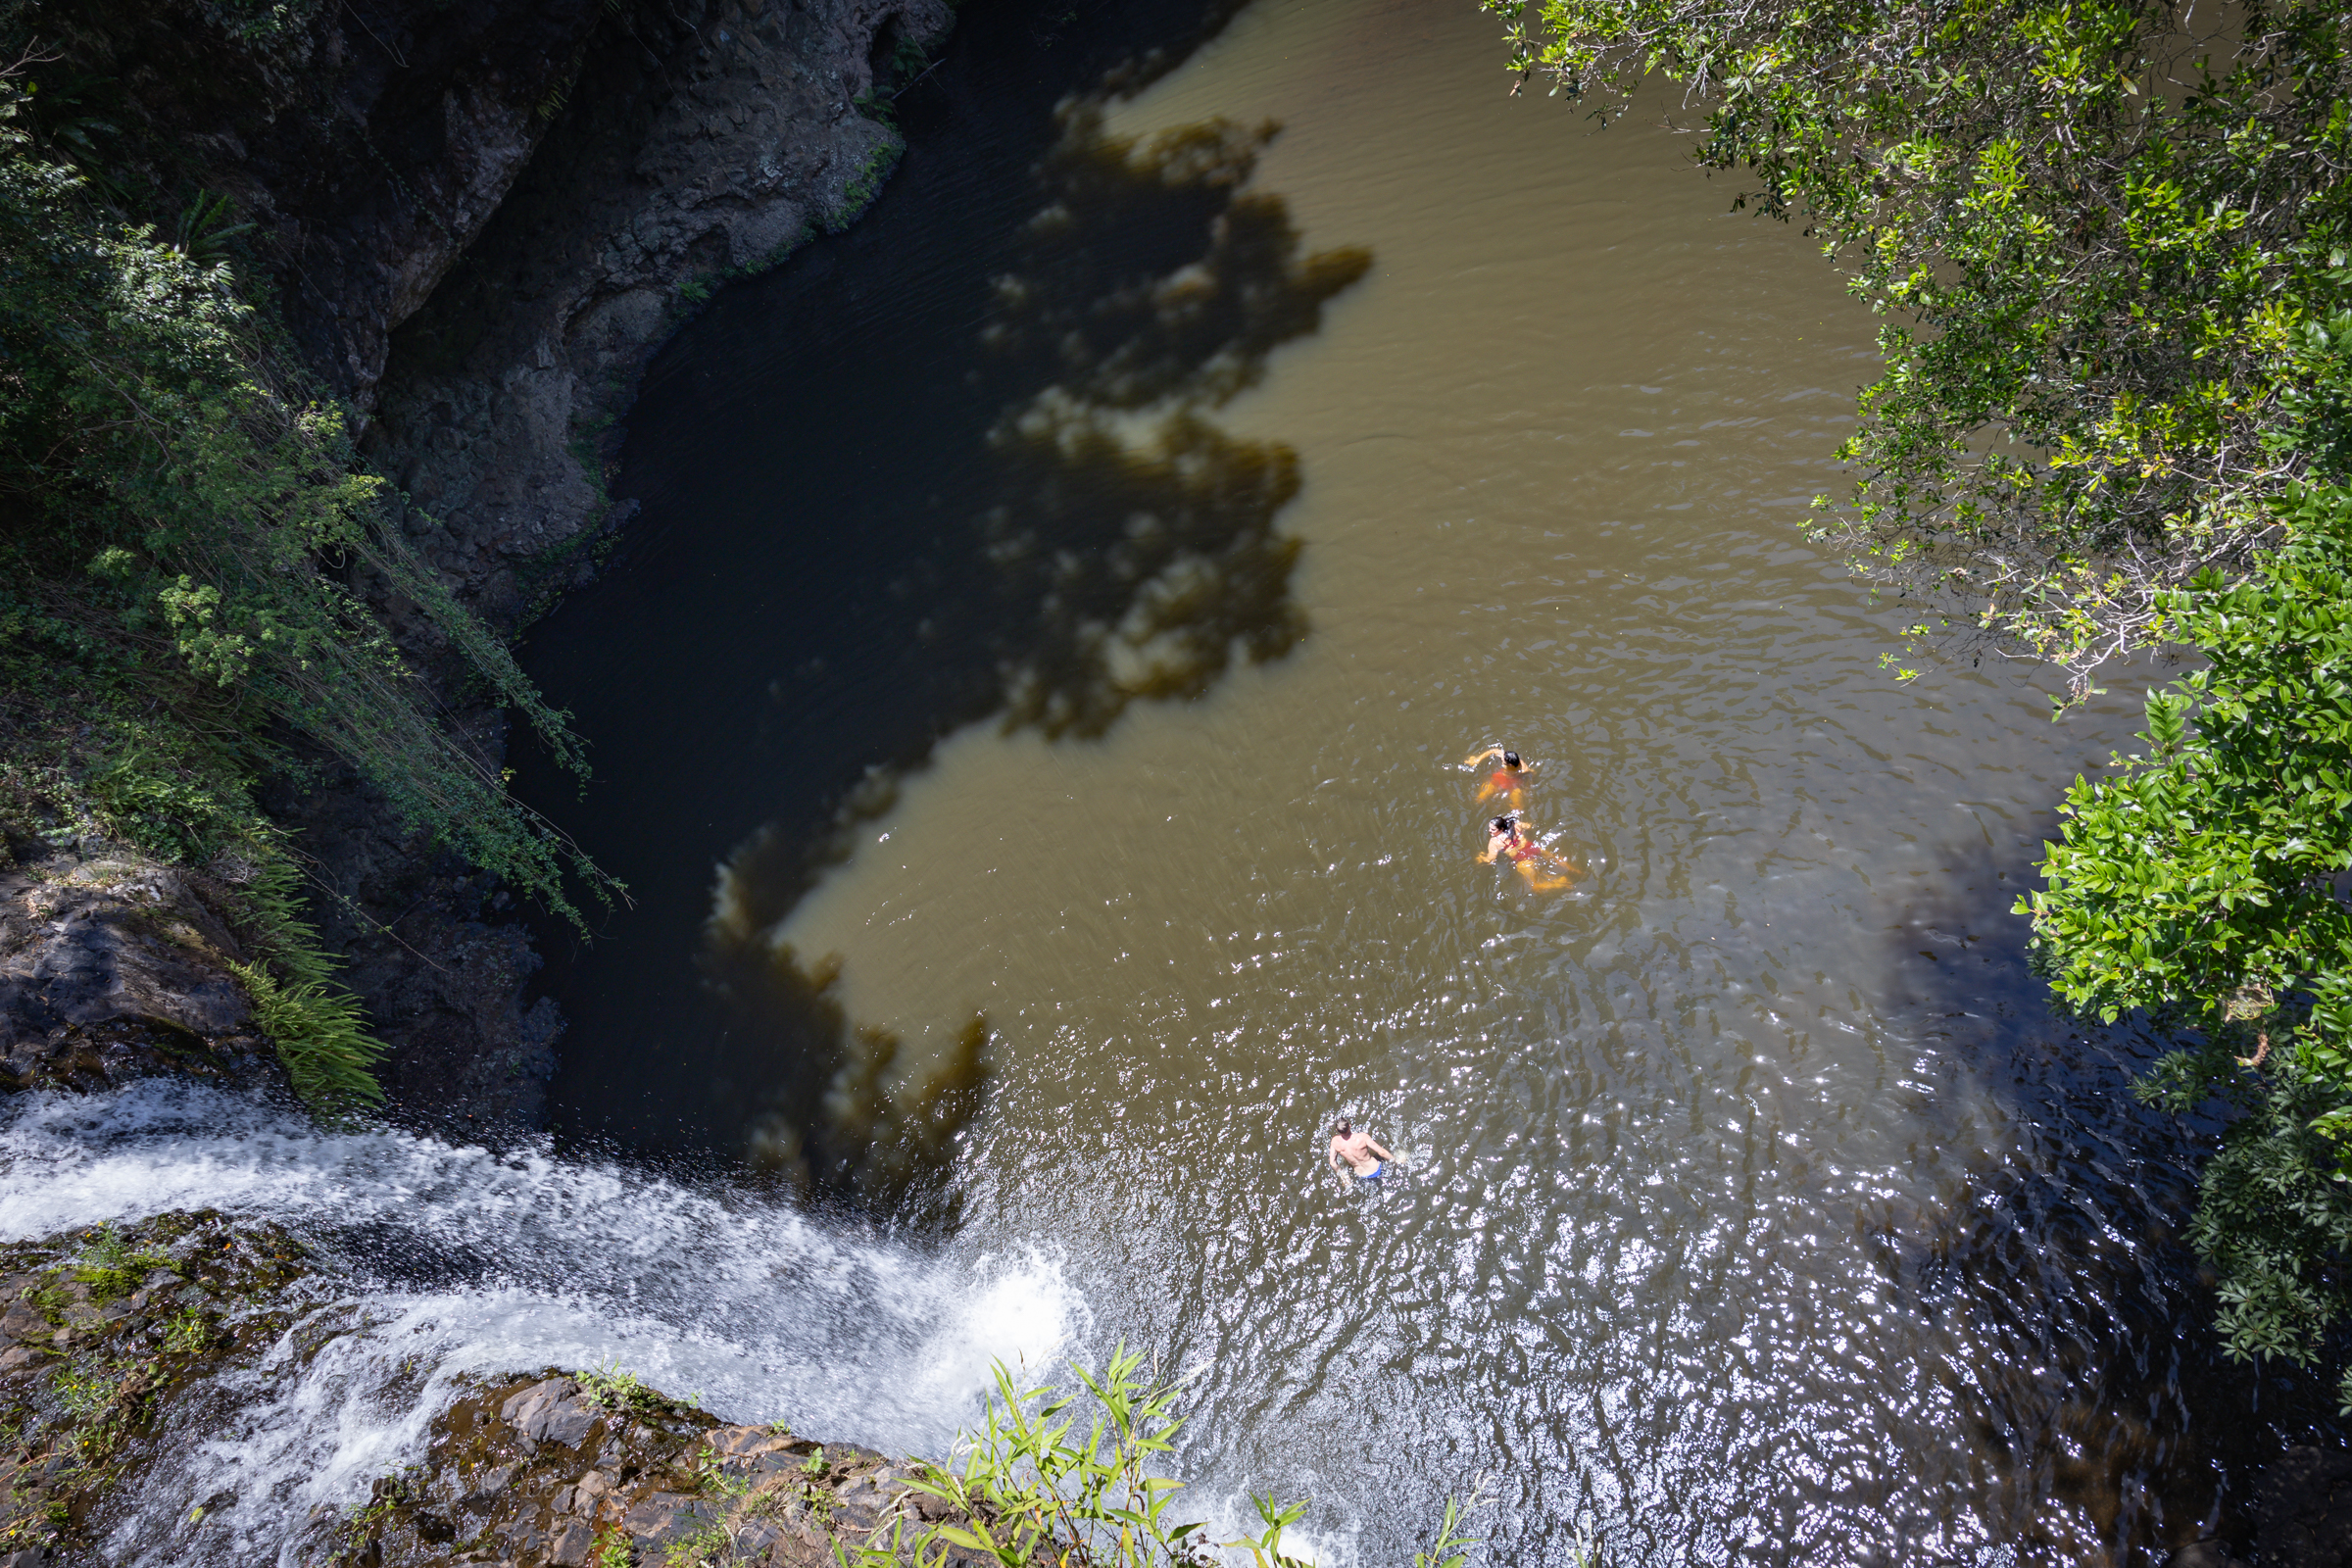
Veering slightly south we thought we’d check out Killen falls as a spot of cool off
Killen Falls if a nice little waterfall in Tintenbar, near Ballina. It’s very touristy but worth a look.
It’s accessed from Friday Flat road and there is plenty of signage to get you to the car park.
From there it’s about a 400m walk to the base of the falls along a nice tourist trail.
There’s a large plunge pool at the base that is a popular swimming hole.
Being use to the crystal clear waters of Blue Mountains canyons it’s little brown and agricultural run offy but it’s a nice enough spot to cool off on a hot day if you are over the beach
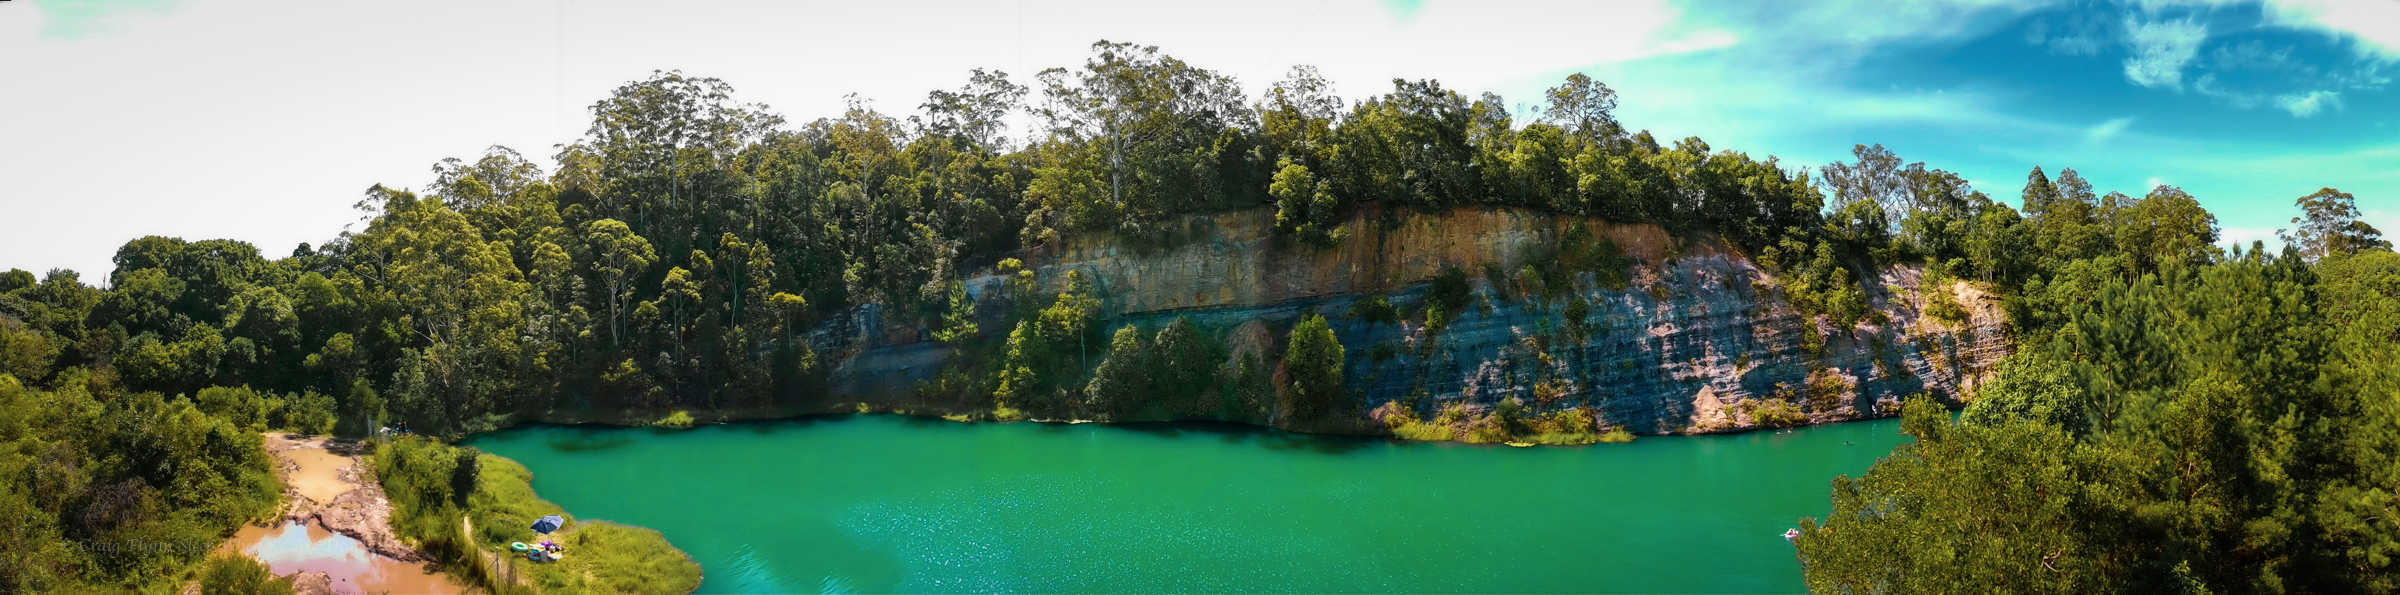
On the drive back Kylie asks, Have I shown you the quarry
No, says I
Yeah I have, says she
No you haven’t, said I
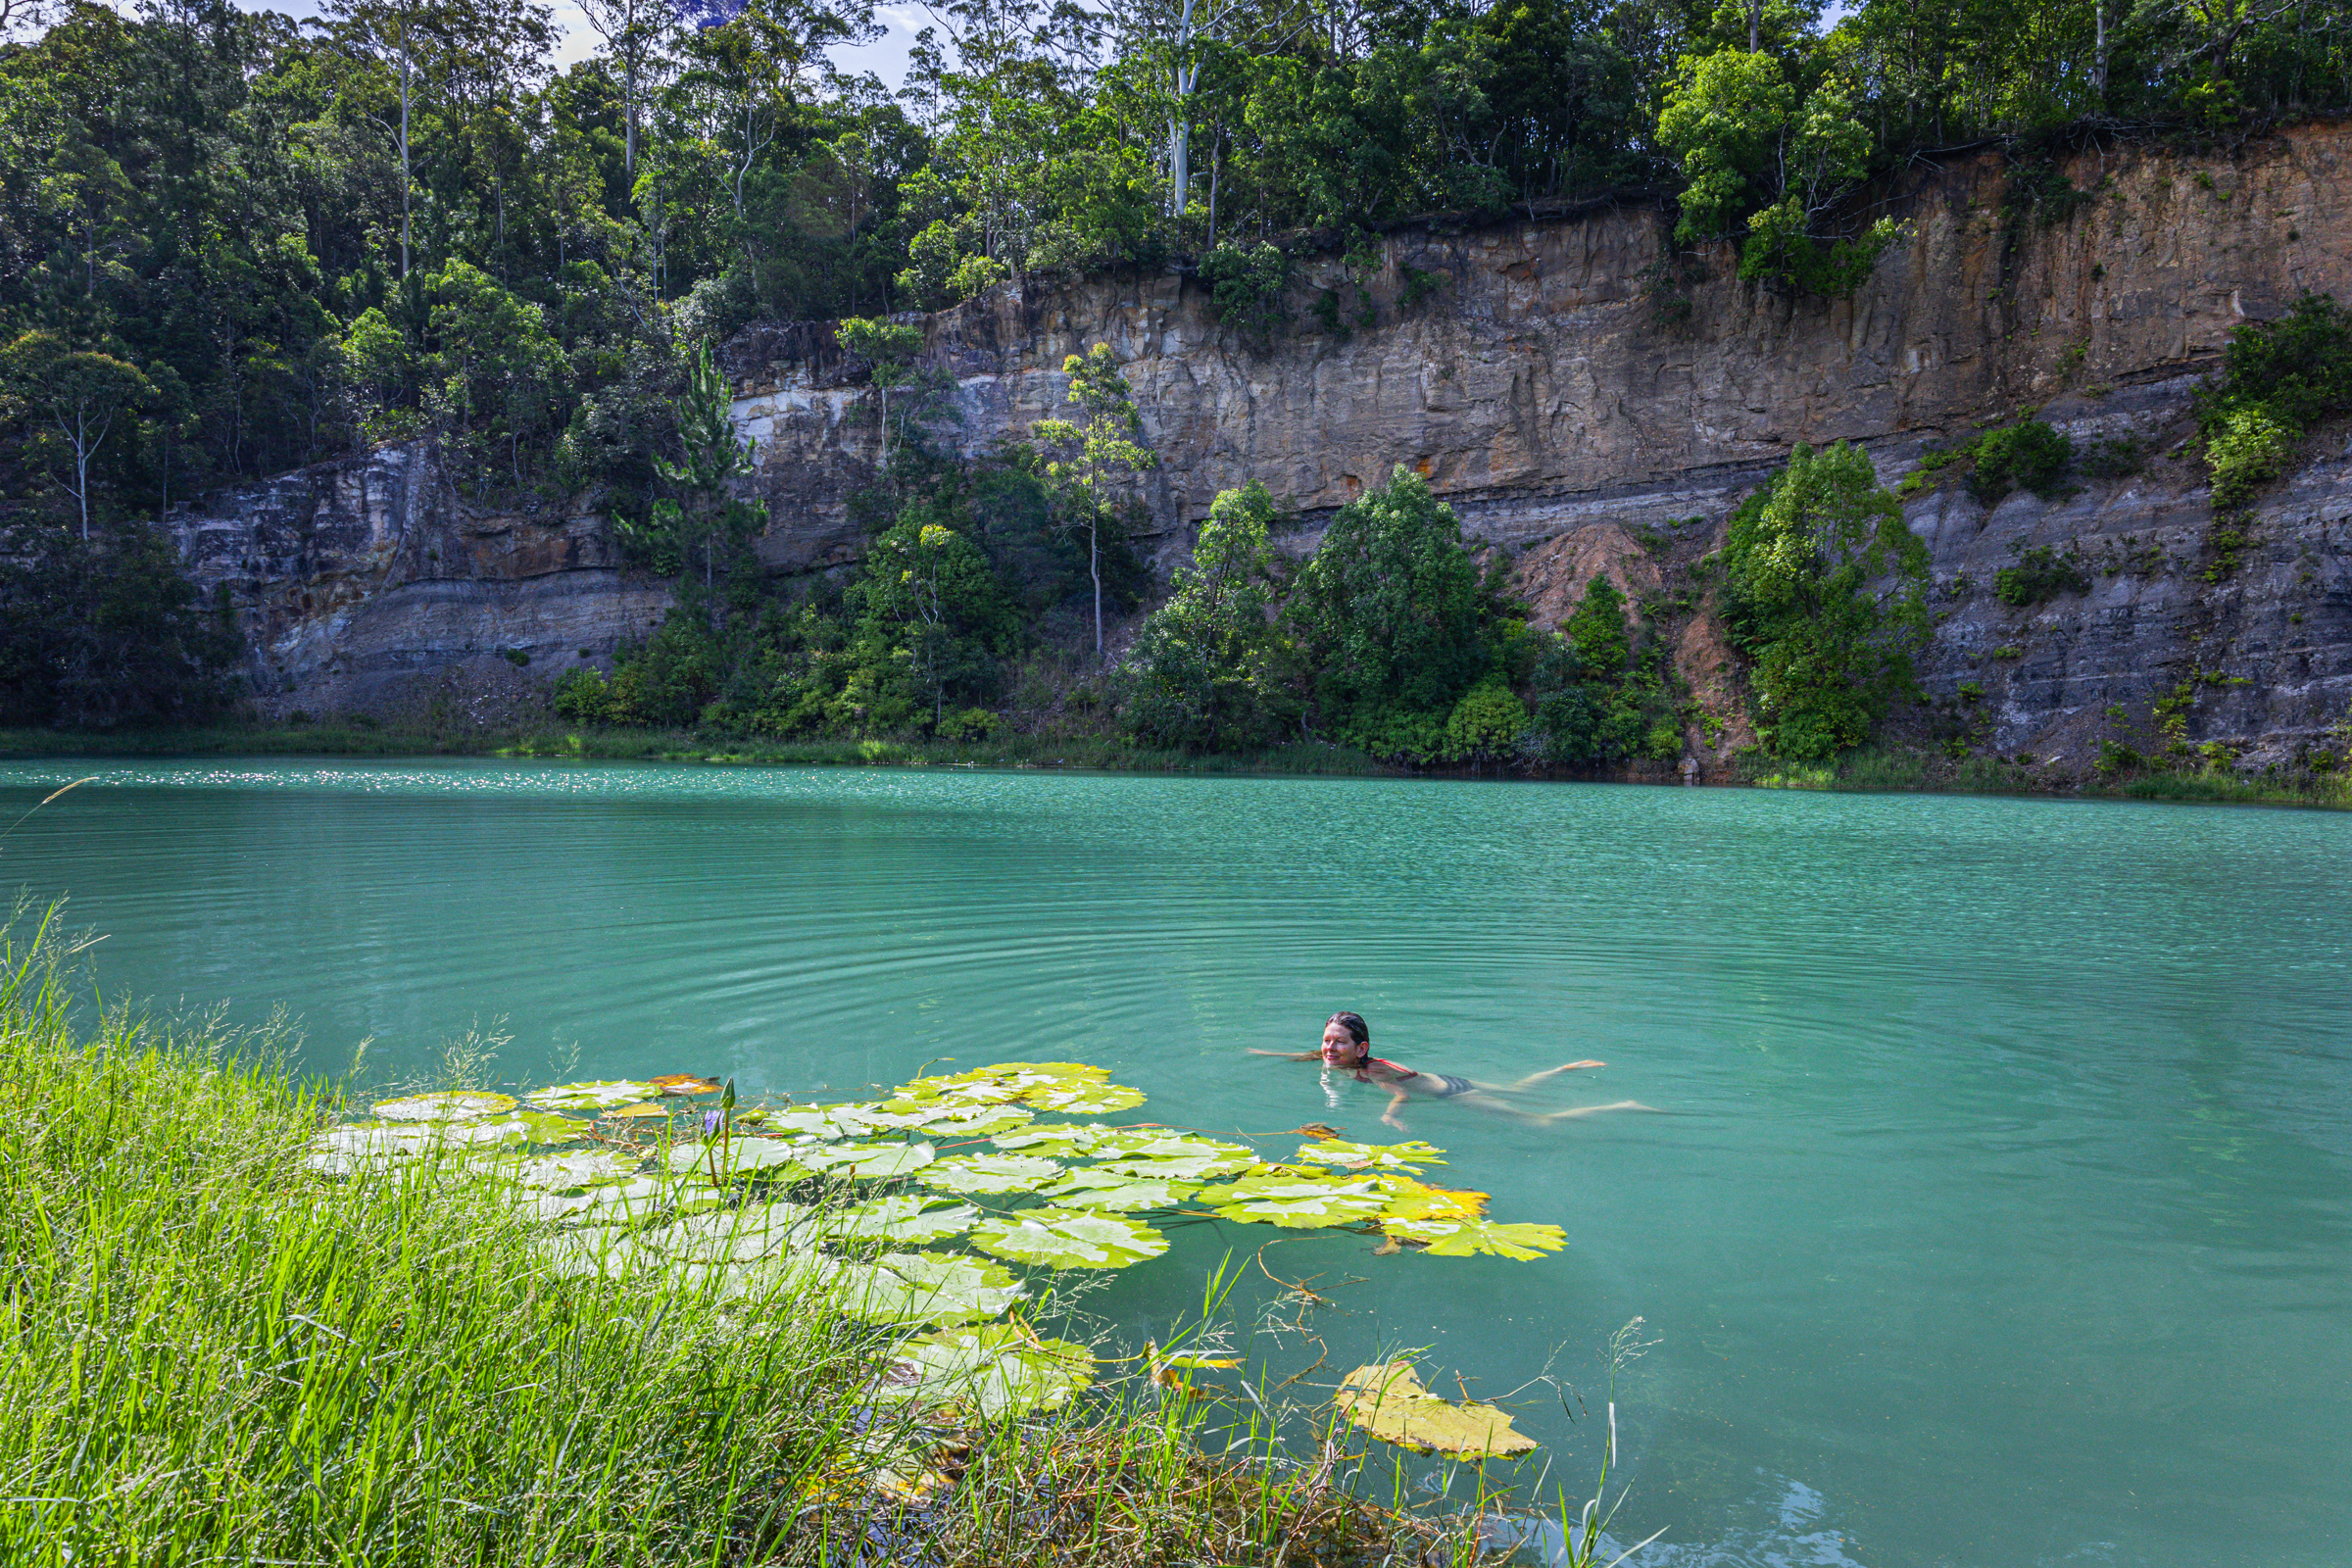
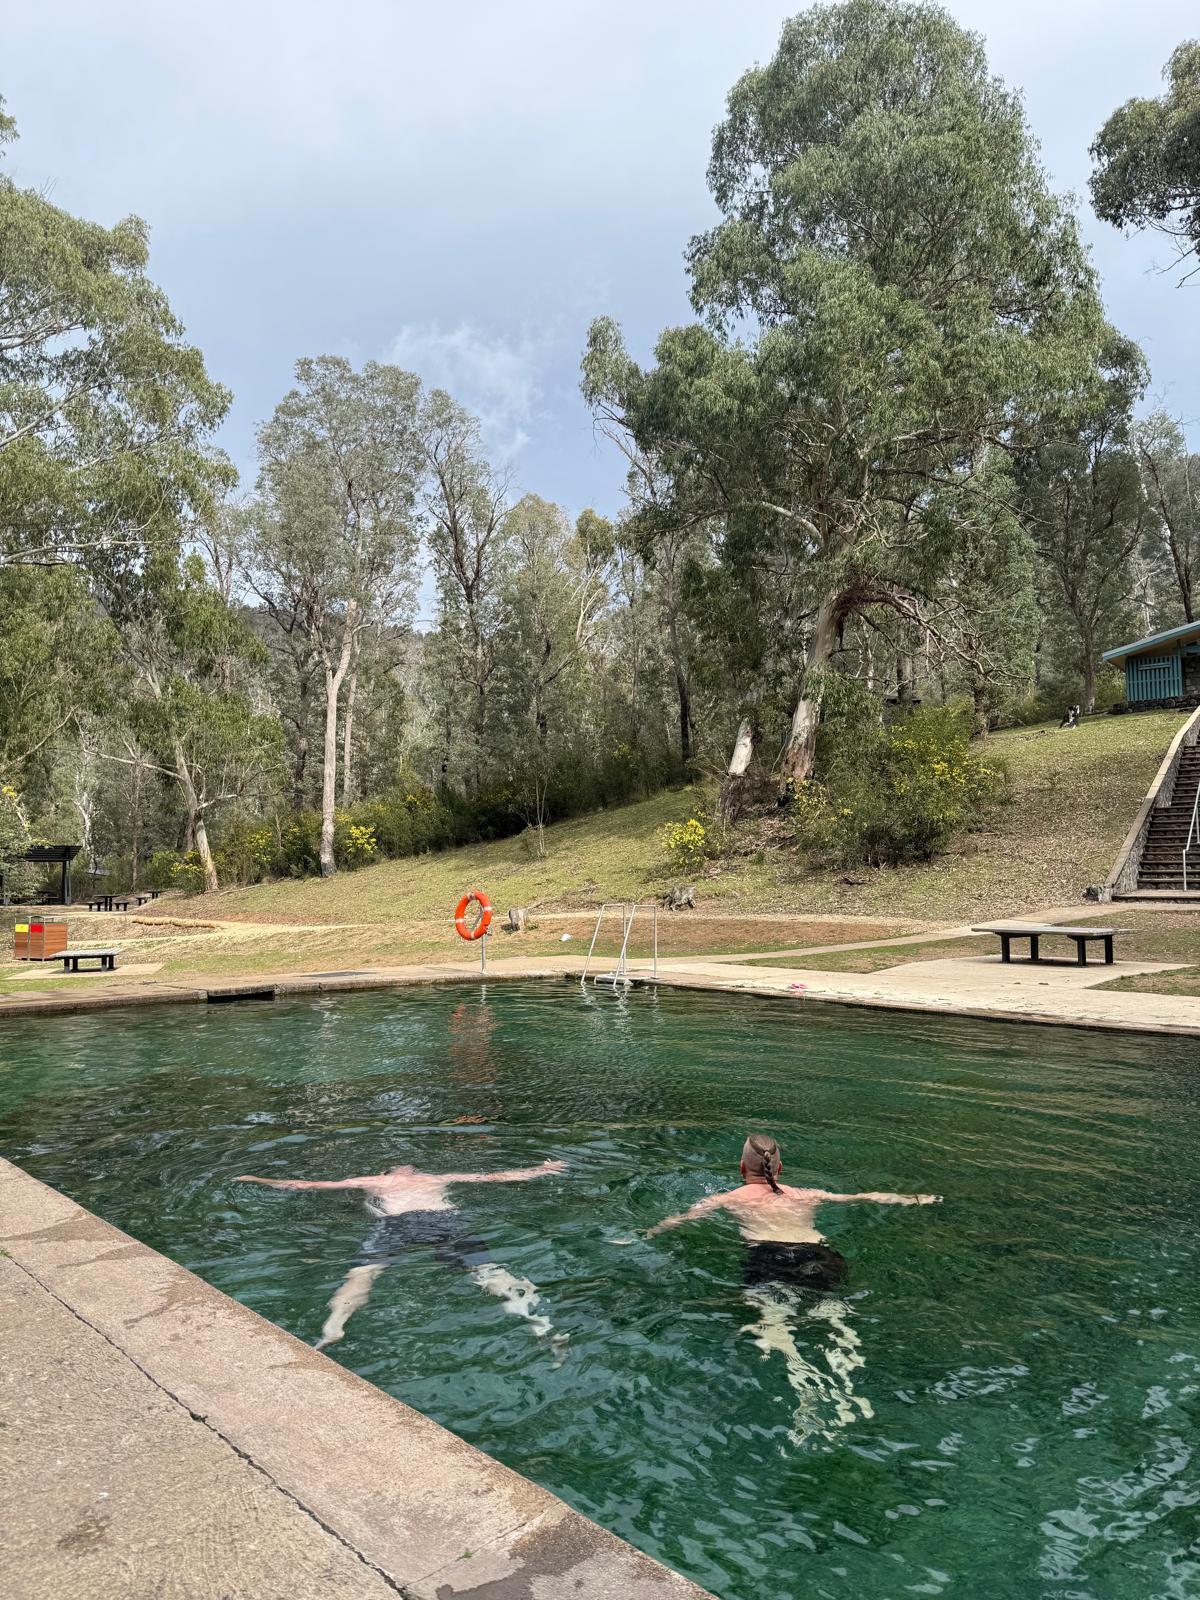
Bexhill quarry is an old brick quarry that operated from the 1890s through to the 1940s. When operations ceased it filled up with water and became a popular swimming spot.
With no through flow the water became quite acidic and was found to have high levels of dissolved metals, such as Aluminium and magnesium, so in 2016 it was shut off due to “safety concerns”.
No sooner had the fence gone up than locals cut holes in it…
But nature seems to have found it equilibrium, subsequent testing found acidity levels returning to normal(ish) levels and plans were submitted 2021 to turn the area into a public reserve.
That hasn’t happened yet so in the mean time you’ll still need to climb through the holes in the fence. To be fair though, it’s more hole than fence.
The Quarry is accessed of Coleman Street (Bangalow Road) Bexhill. About 10km from Lismore
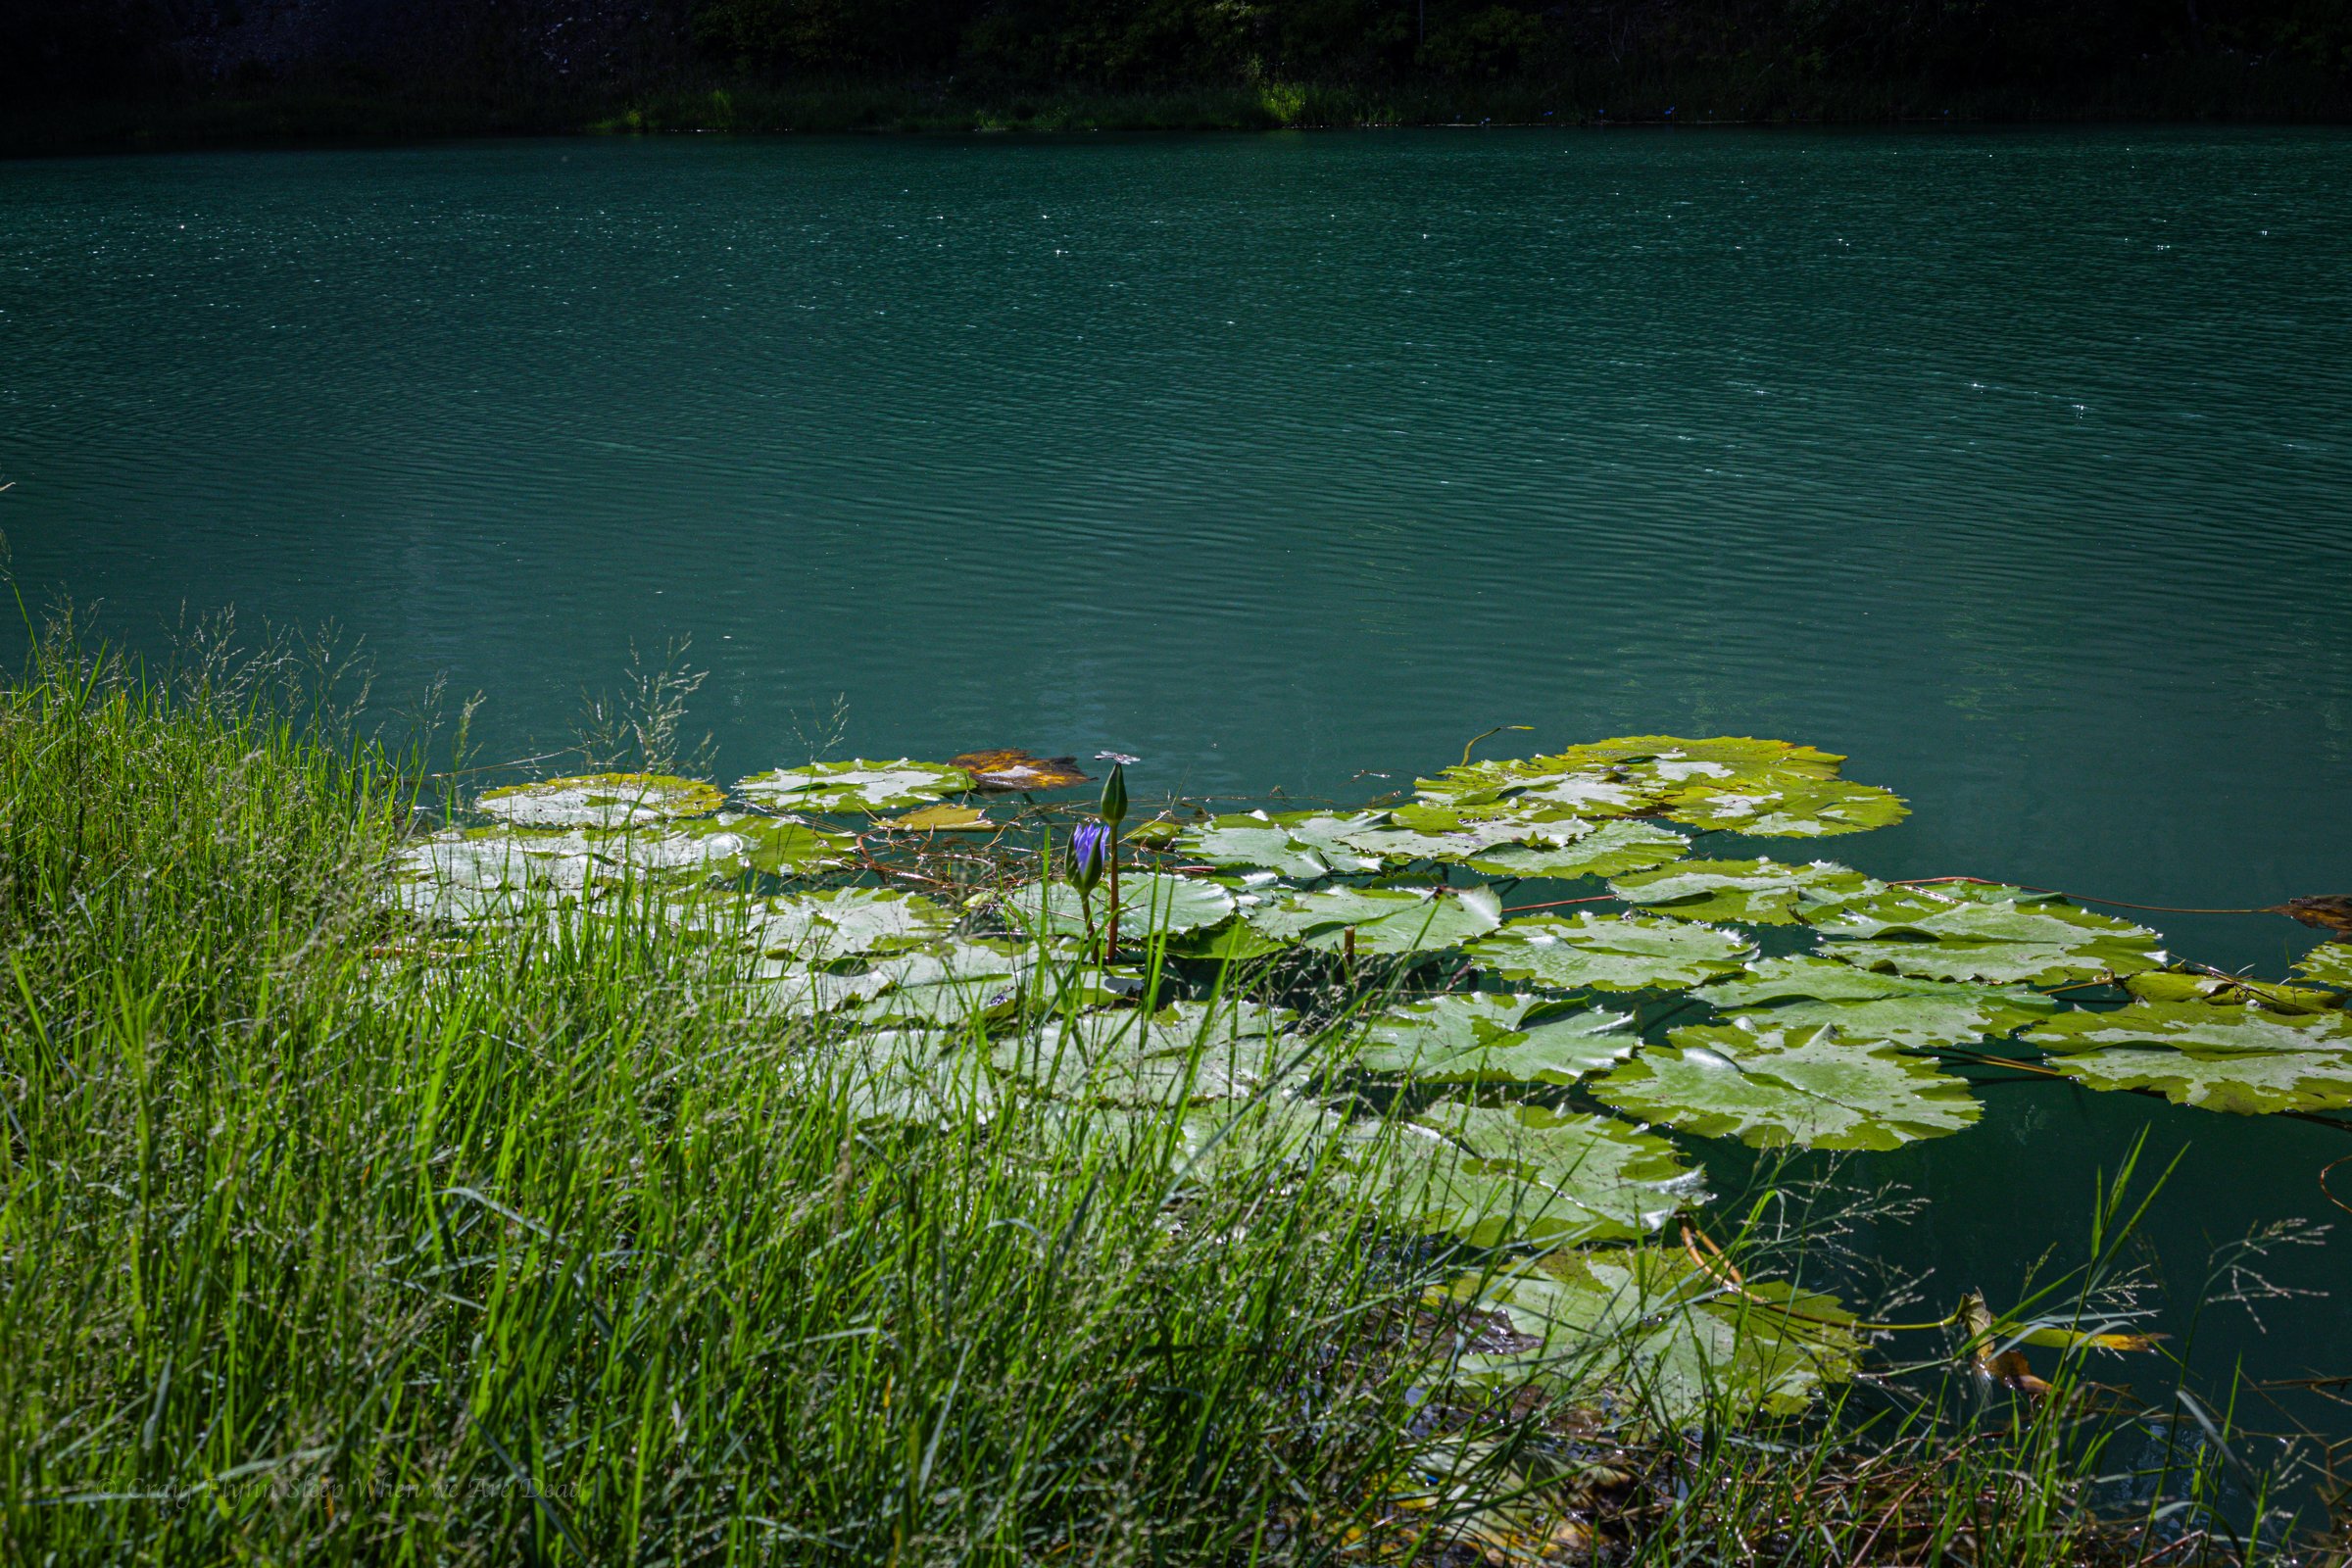
Not sure if the starling green water will give us superpowers or just melt the flesh from our bones..But the Lilly Pads and Dragonflys seem to enjoy it
And Kylie isn’t scarred
Water was quite pleasant indeed.
It’s a great spot for photography and a nice dip though, I recommend proficient swimmers only because I have no idea how deep it is.
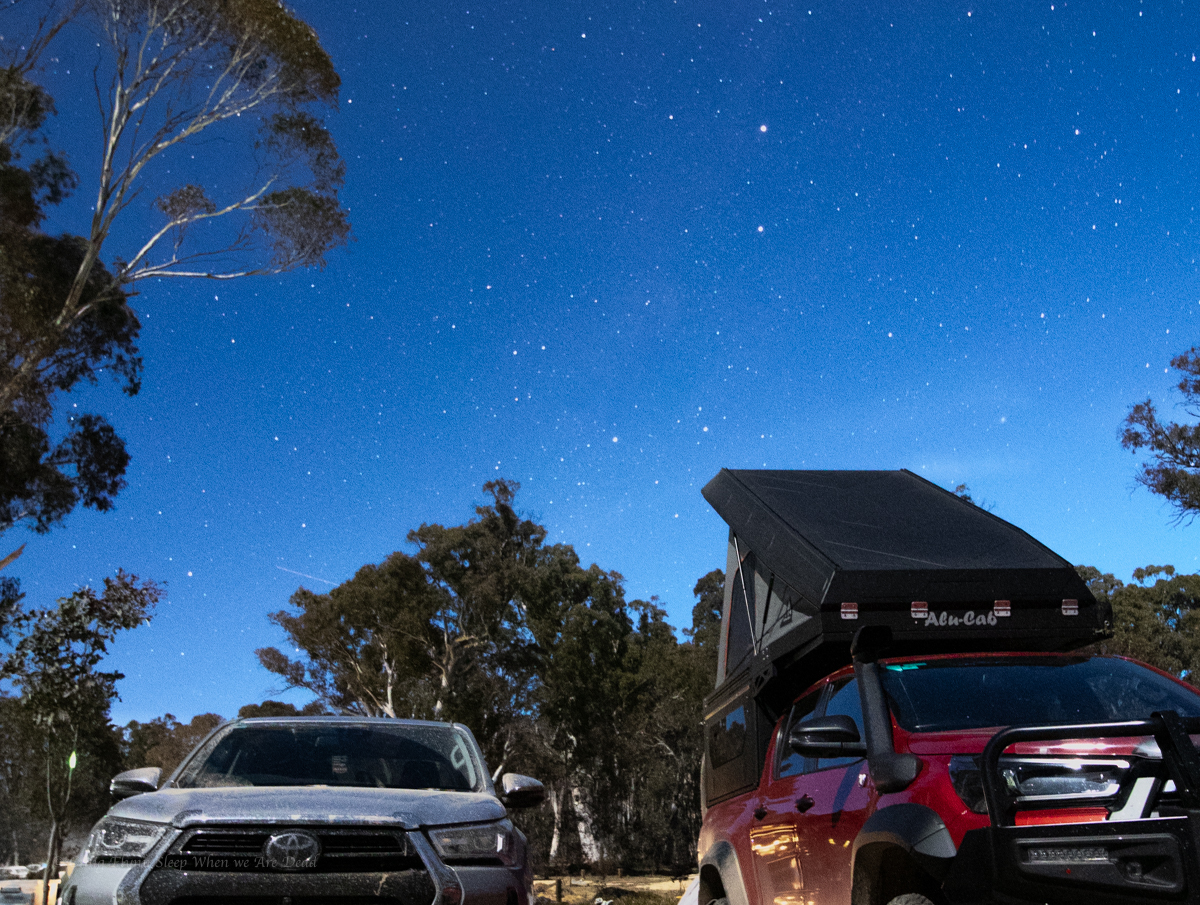
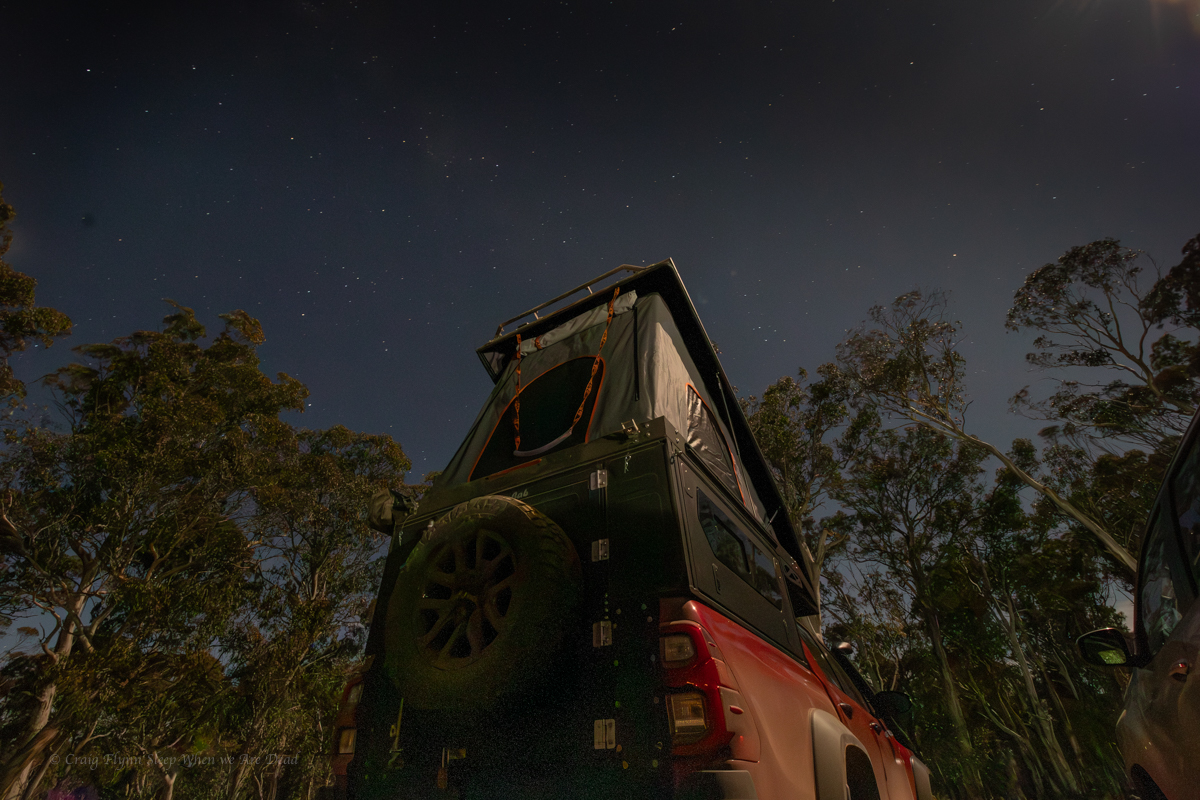
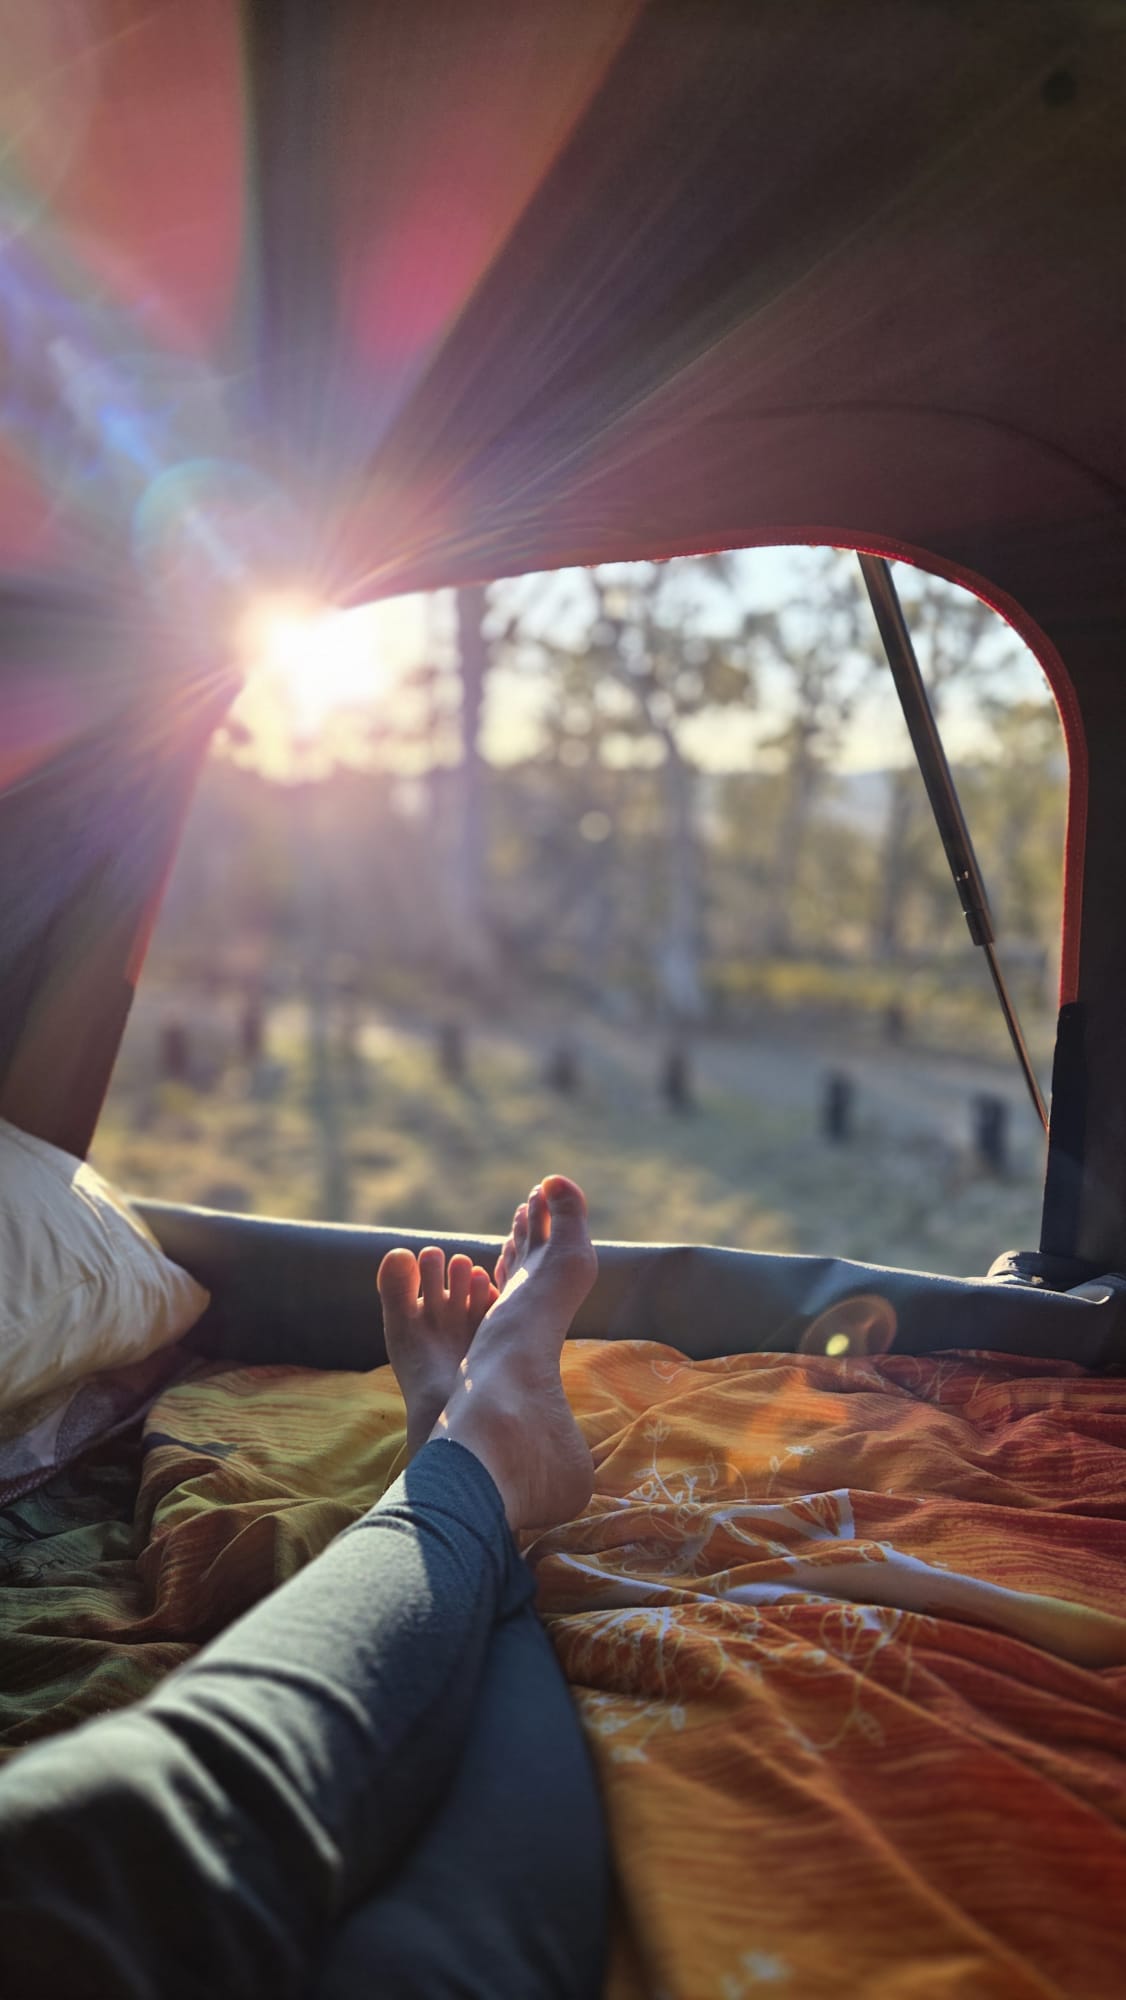
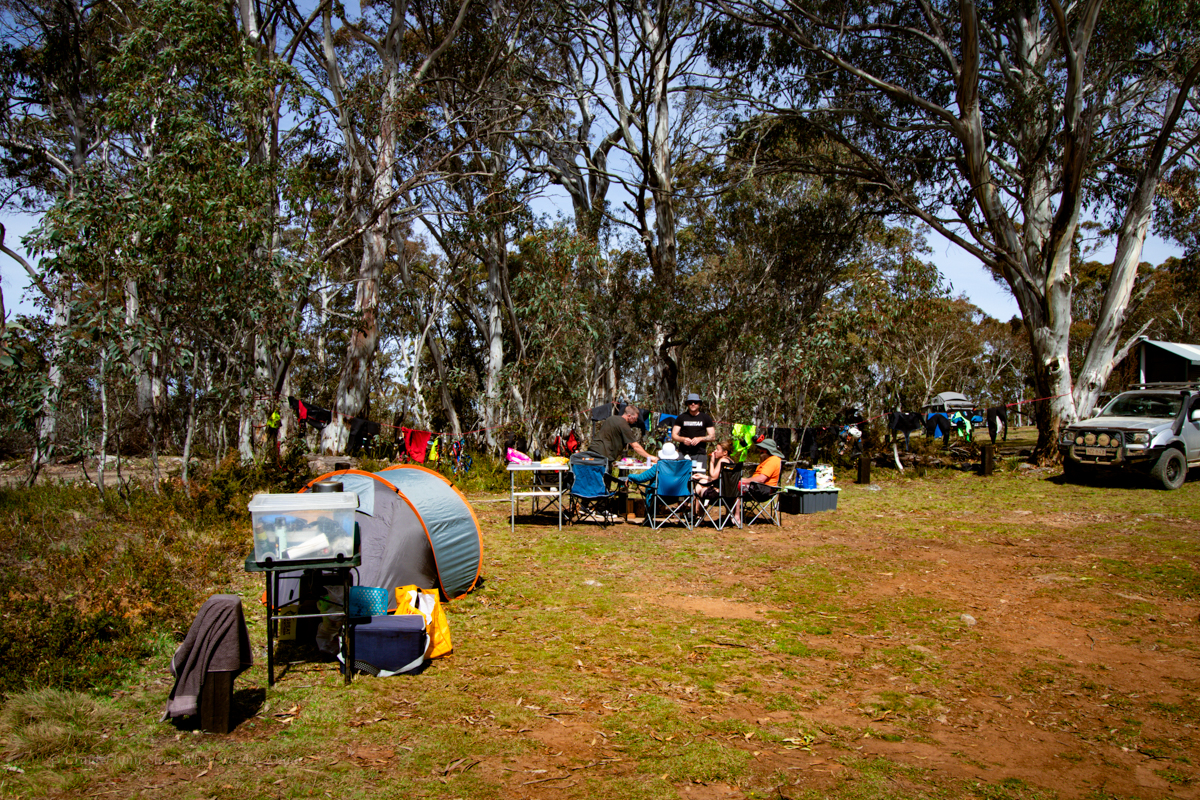
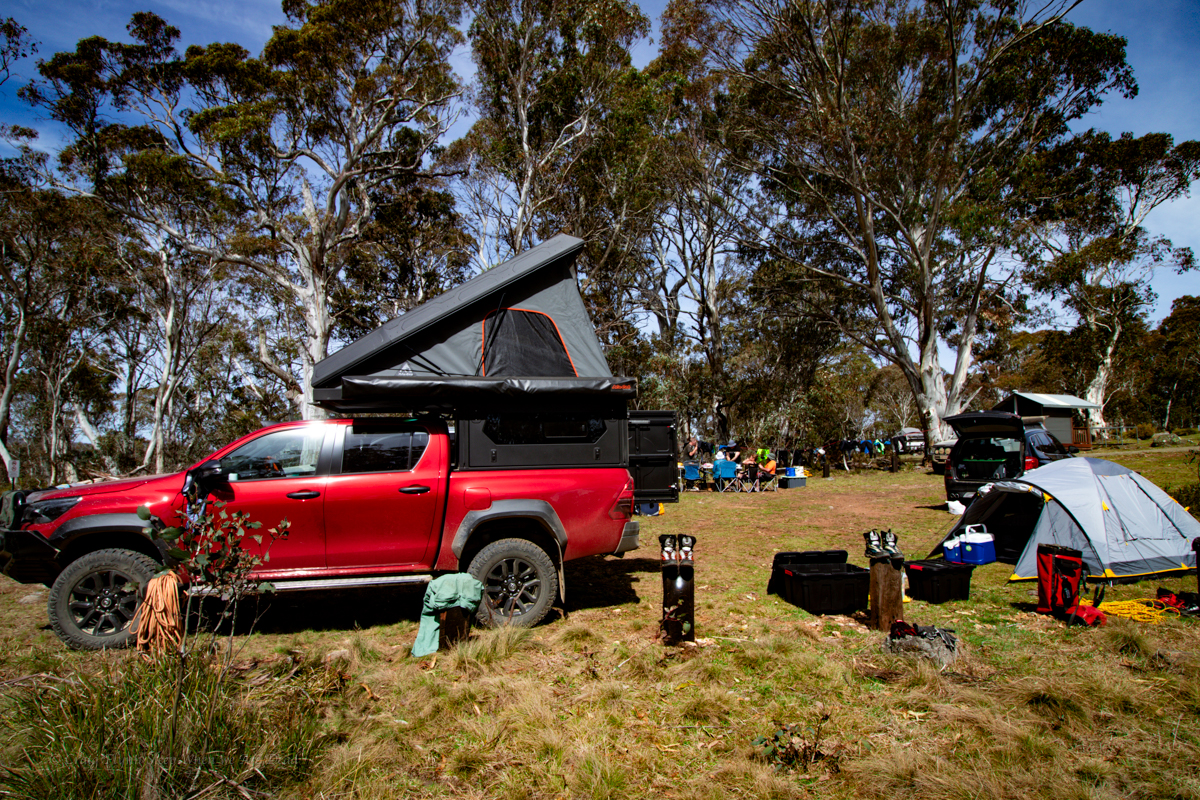
We were keen as mustard to give the new Alucab camper a proper test out and as luck would have it Kylie had organised a long weekend of adventures in and around Long Plain, Kosciuszko NP.
Rocking into Cooleman camp late Friday night it was so good to just pop the top and be able to crawl into bed
A near full moon blazed out potential milky way or comet shots.
We get a good night sleep but are up early for what would become and epic adventure in Landers Falls.
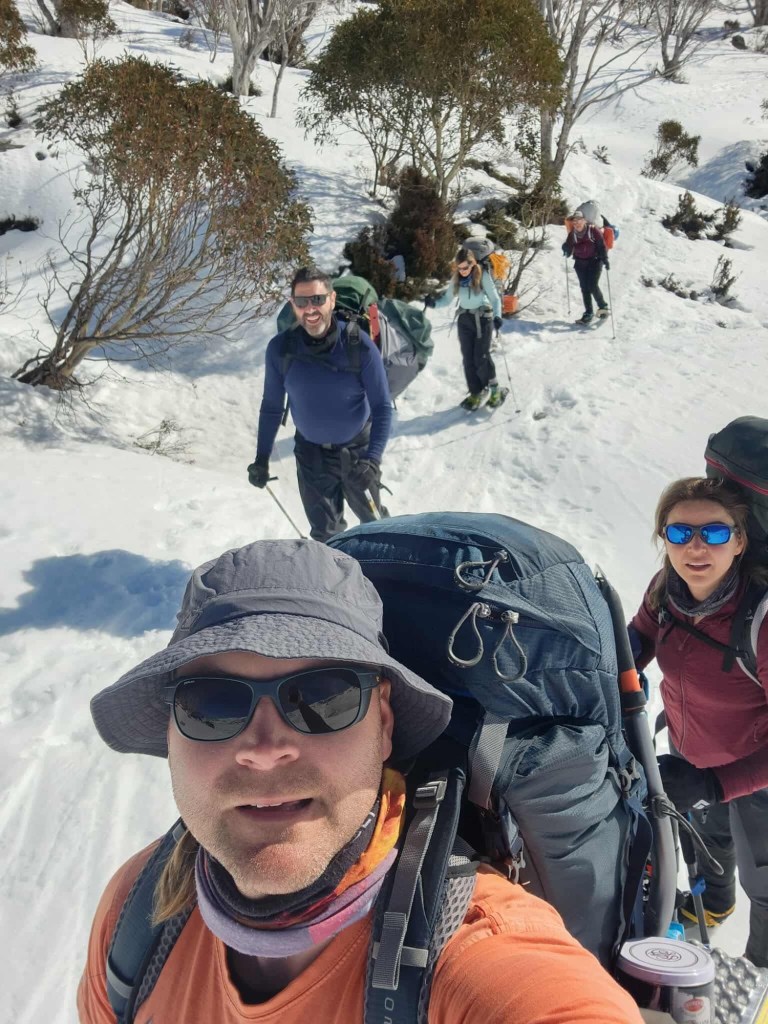
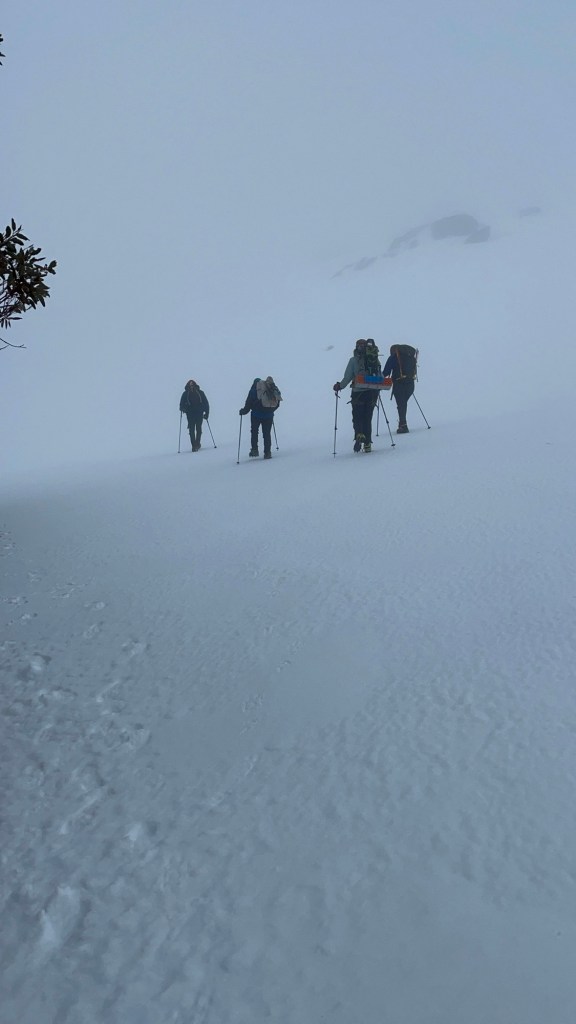
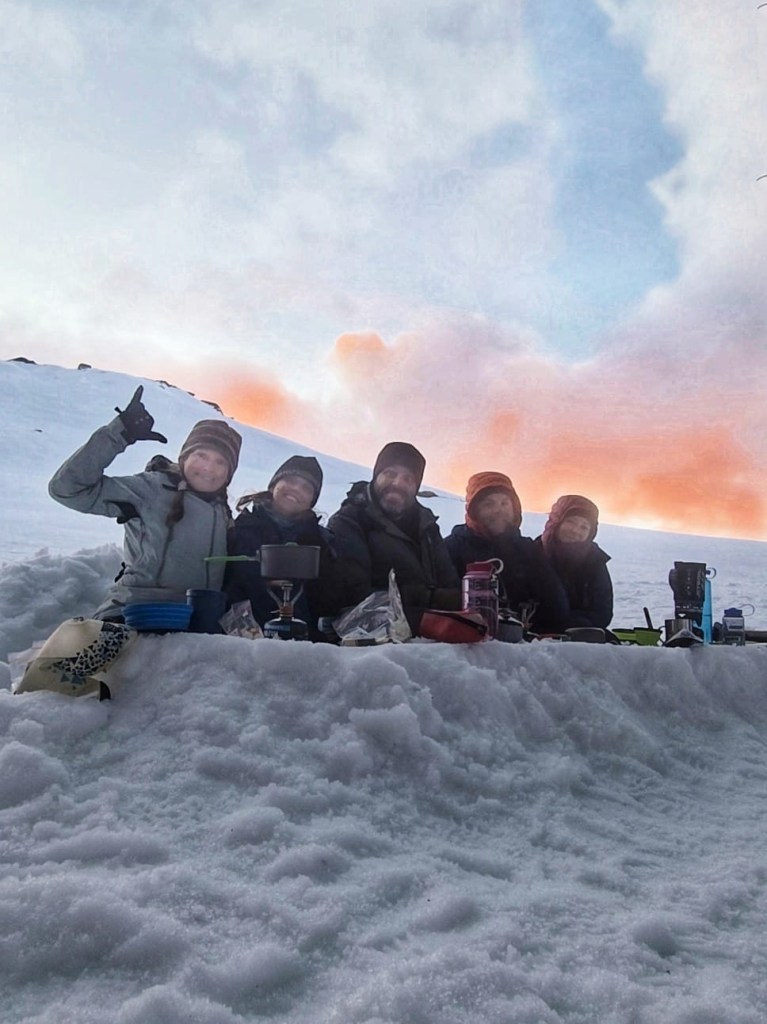
The gang have been doing an annual pilgrimage to Blue Lake for a while now. This is the second time I’ve got to join them.
We did a day at Charlotte Pass where I gave skiing a go for the second time and had fun rumbling down green runs.
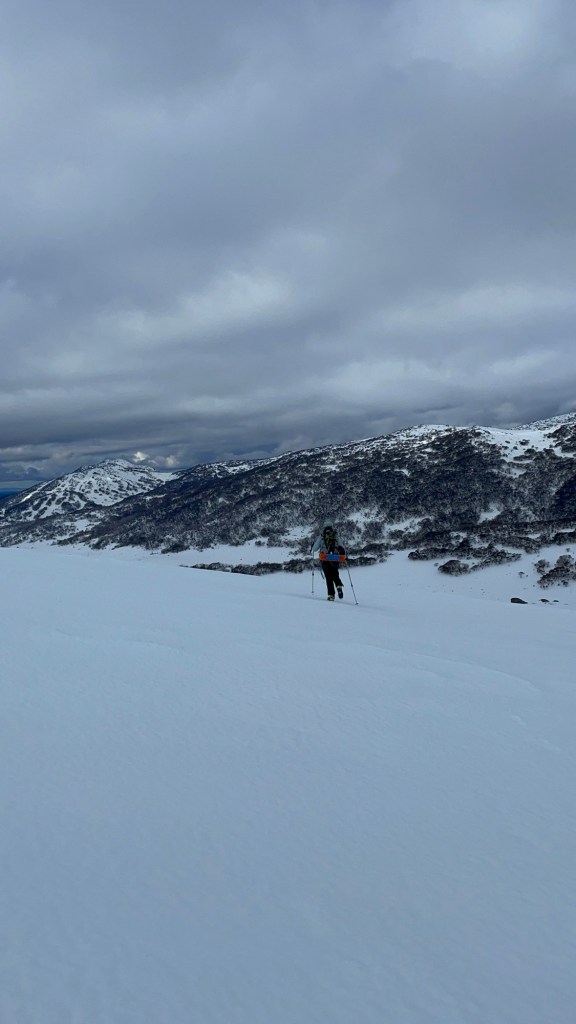
The following day we headed up to Guthaga, where it was like an random uni reunion for Kylie and her former class mates as well as a Blue mountains adventure crew hang out. Lots of coincidental trips with like minded people over the weekend.
We said our g’days and yakked then went our separate way and shoed out to little twynam.
Well, Sonya, Kylie and I shoed Kris and Hywaida decided it was icy enough to. Just use crampons. This proved a wise choice and one we’d all adopt for the rest of the weekend.
Blue bird days
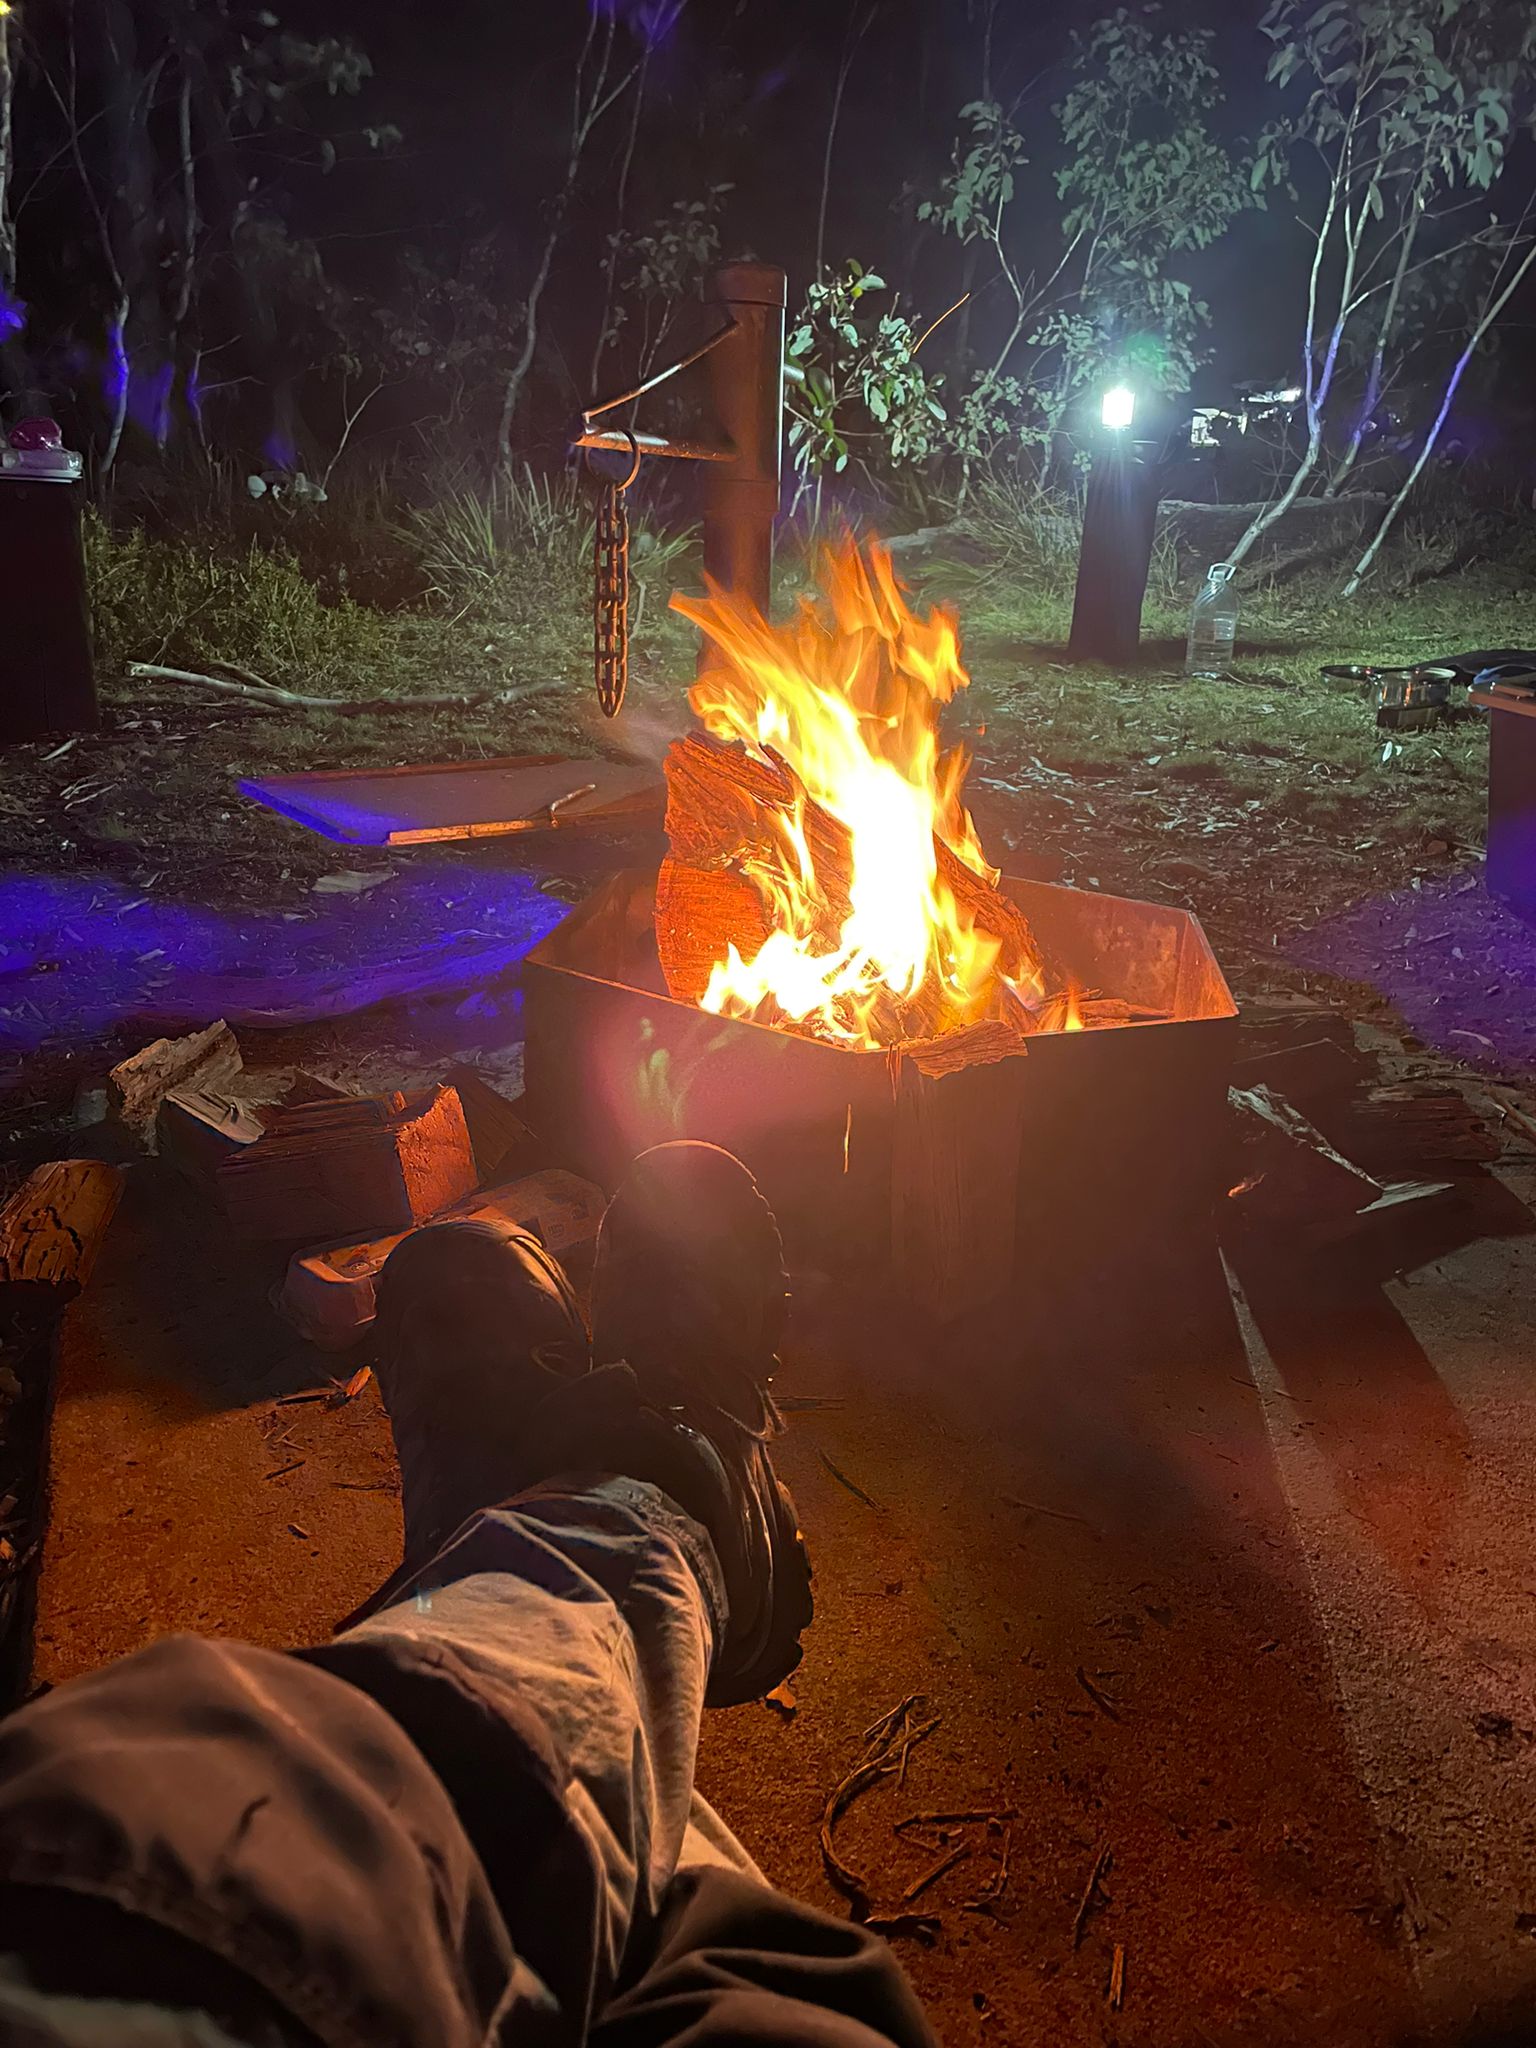
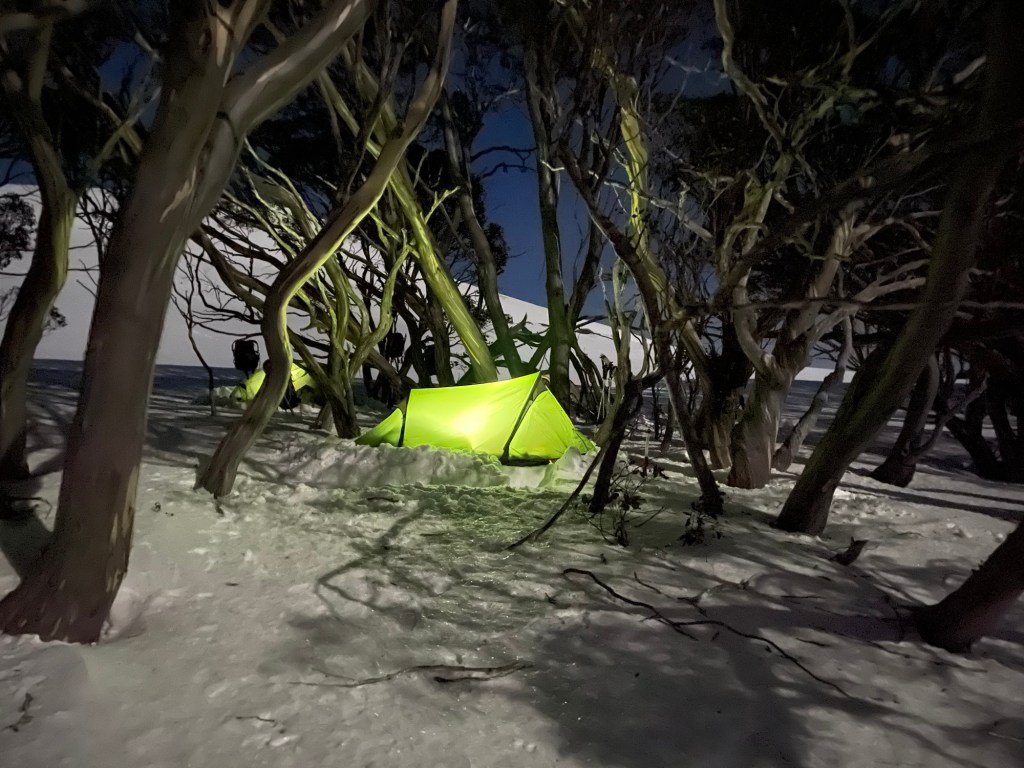
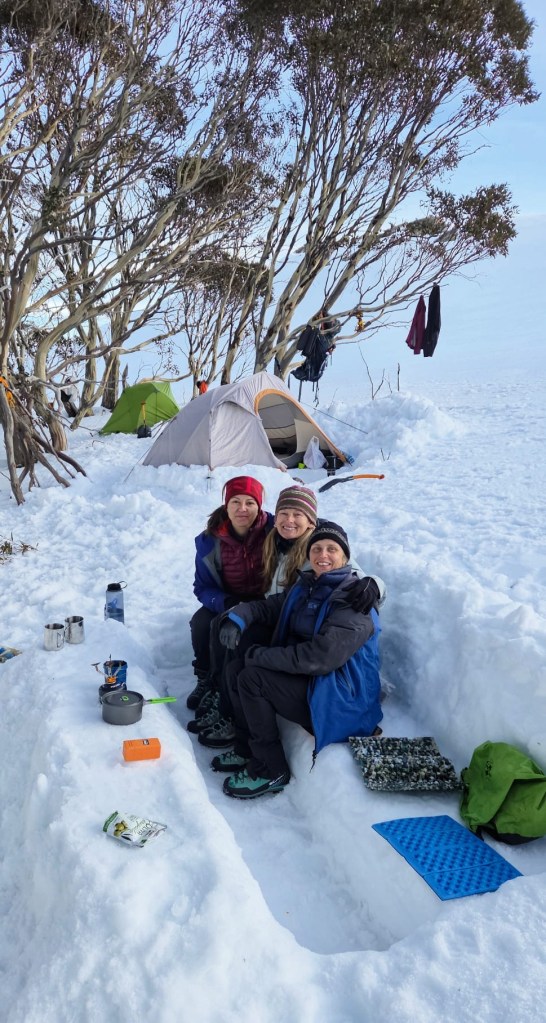
We dig the tents in and settle in for the night.
I say “we” but Kylie pretty much set up ours on her own. I was in a mind daze and struggling physically. Belatedly I realised I hadn’t had any thing to drink all day. Rooky mistake
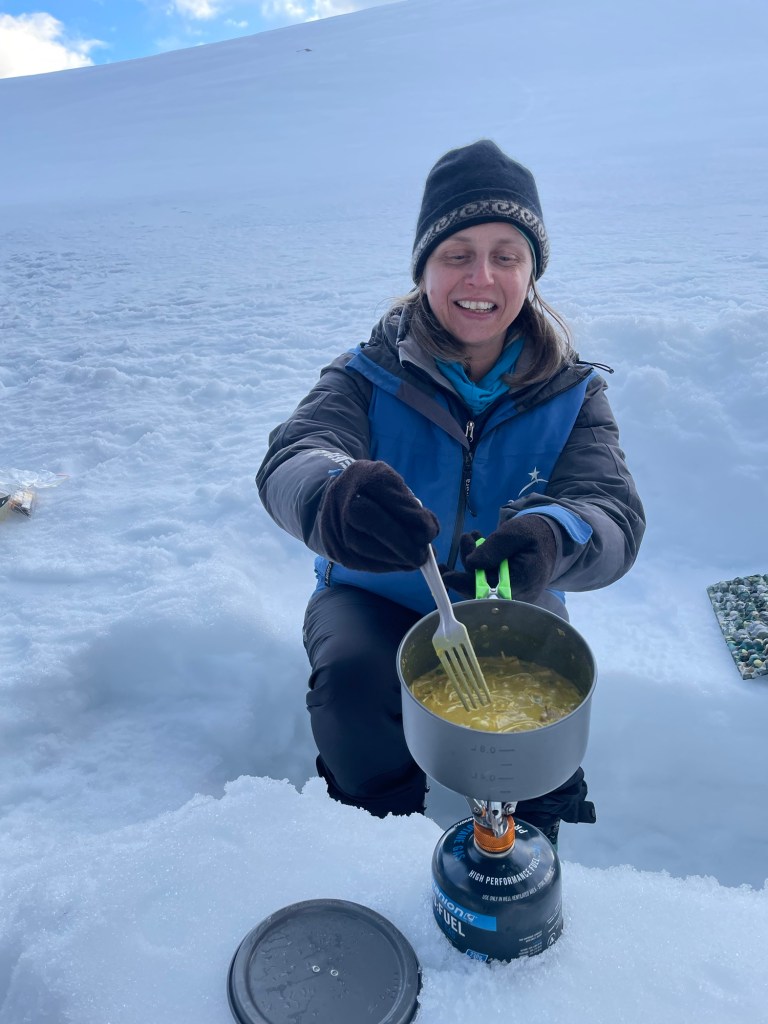
A shot of Thorzt in my water bottle and I came good and set about building a rough kitchen
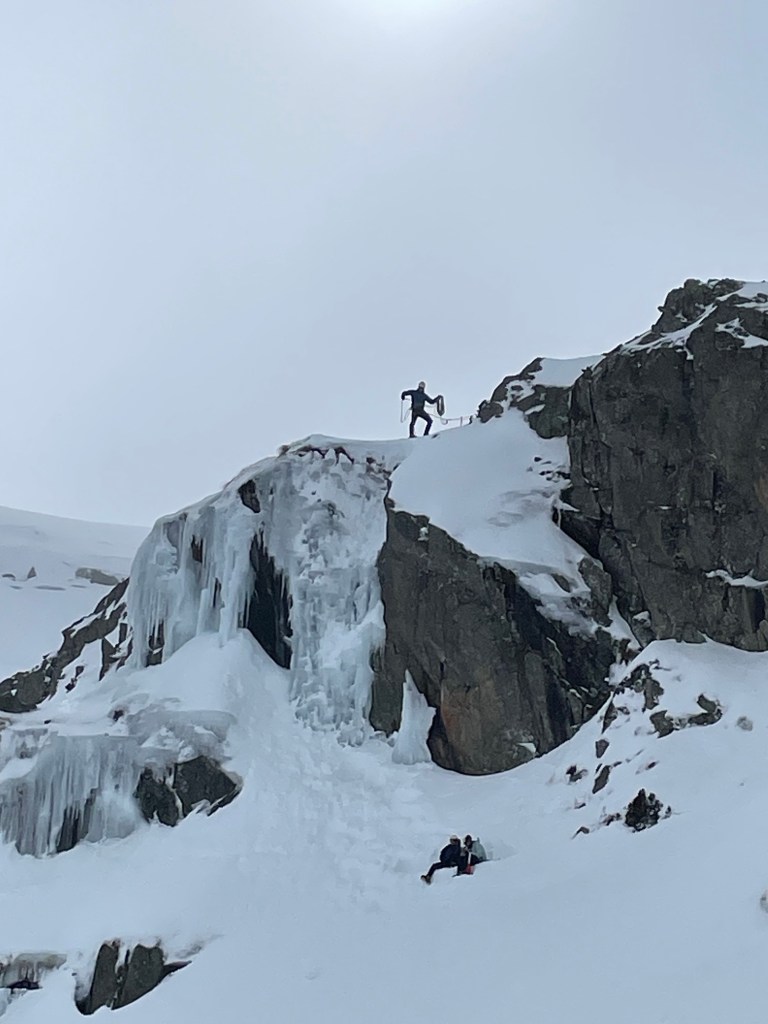
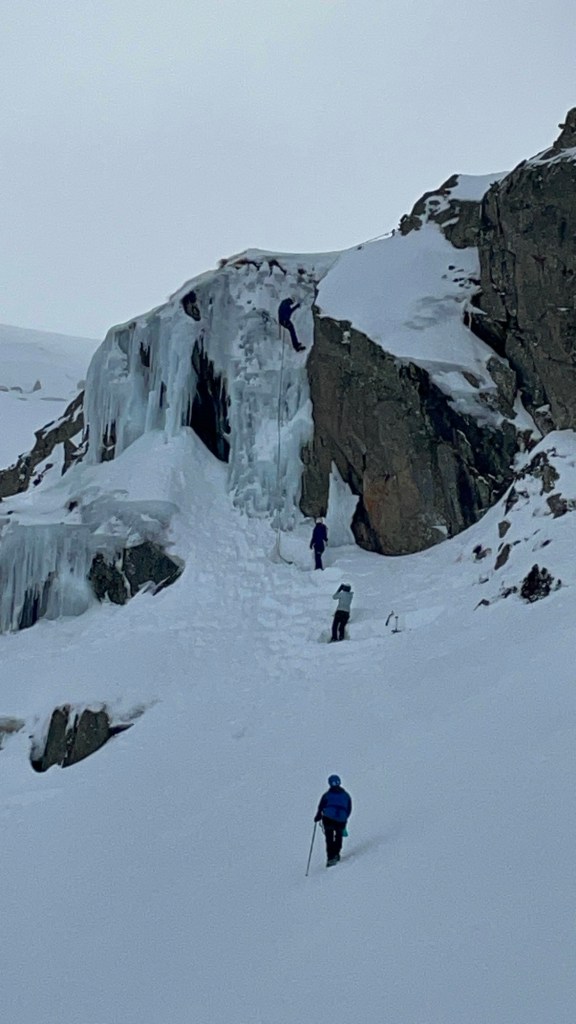
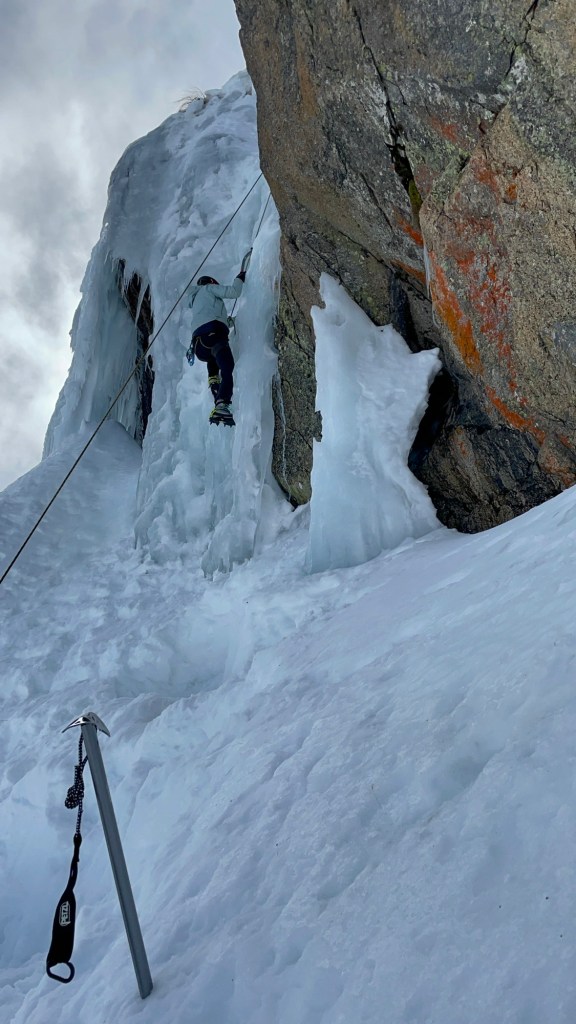
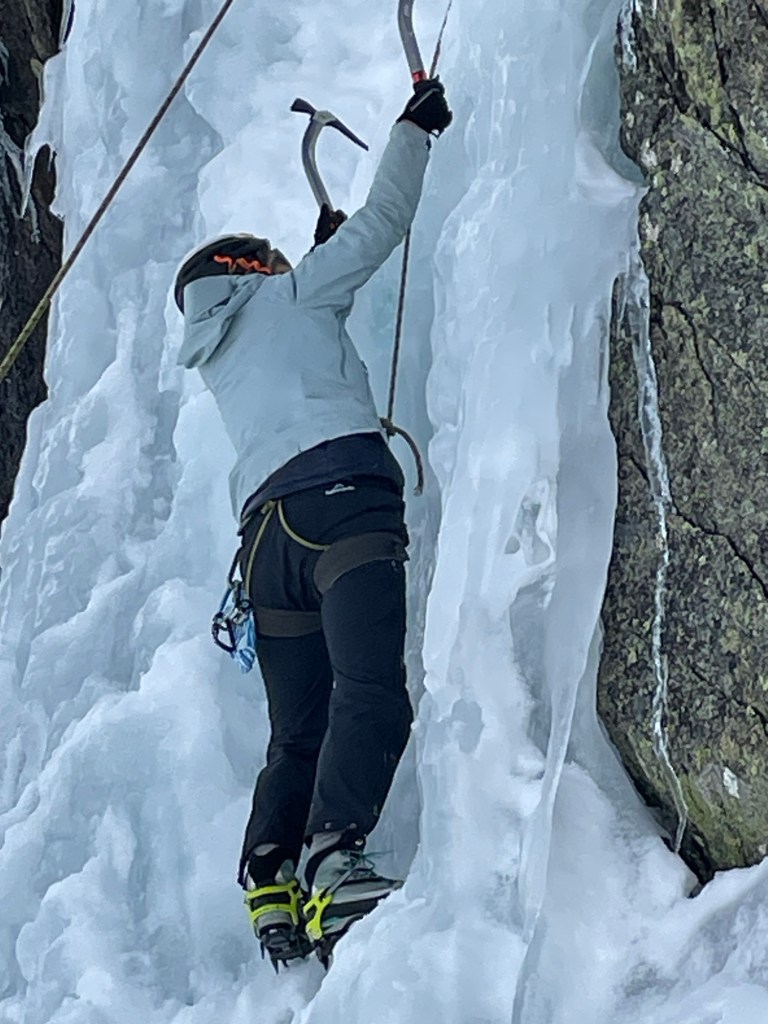
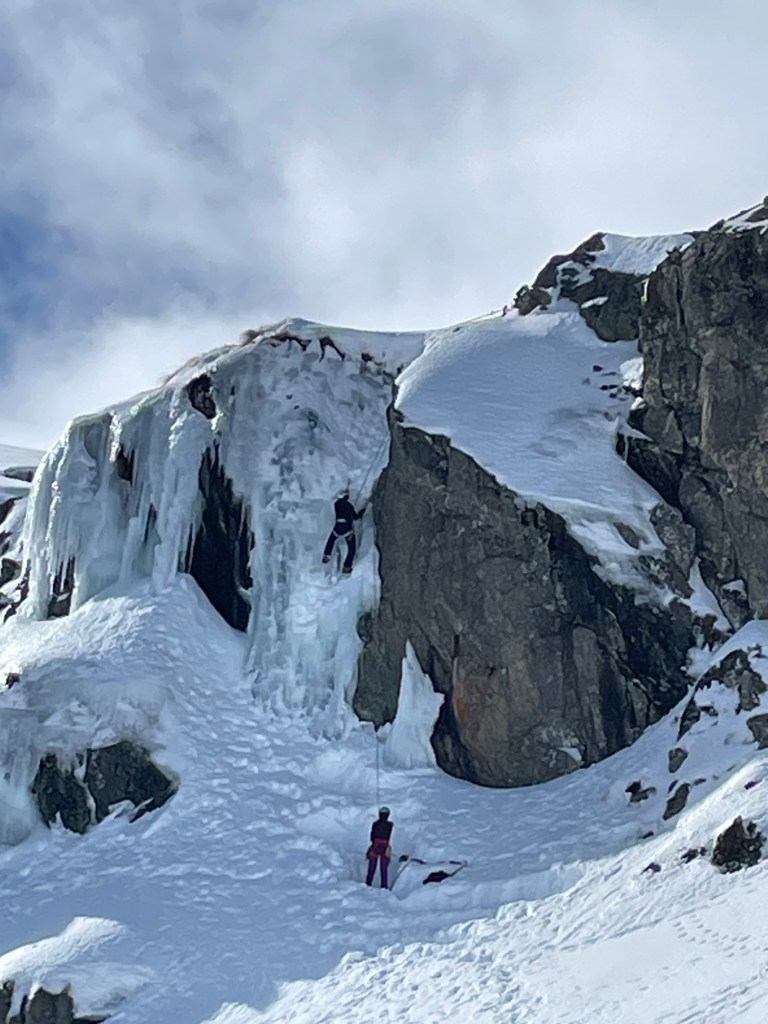
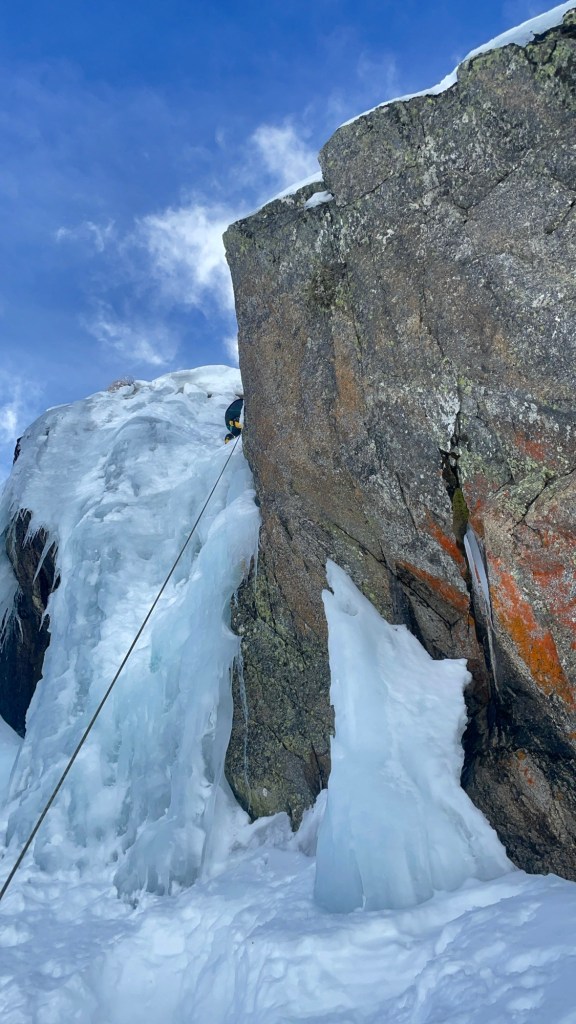
Next day we were up early to make the most of the good weather to play around on the ice walls.
Atmospheric Kris setting up a T anchor for us.
Back at camp
When your mate is the author of the best wilderness cook book on the market, Xtreme Gourmet. Sonya showing us how easy great food can be.
It’s not much but it surprising at how much more comfortable a simple bench and table make the experience.
I don’t generally bother blogging our Empress trips anymore. We’ve become Katoomba locals and a quick arvo dash through Empress is like a morning walk to the park. However I’ve just got a new Outex water proof case for my camera so I thought I’d test it out.
Oh, and Darcy was up and hadn’t done Empress before so Why not
Kylie leading the way
It was misty morning and the diffused light added to the charm
The Outex case uses a flexible shell with optical glass. It’s an interesting design though I was a tad nervous swimming with the camera.
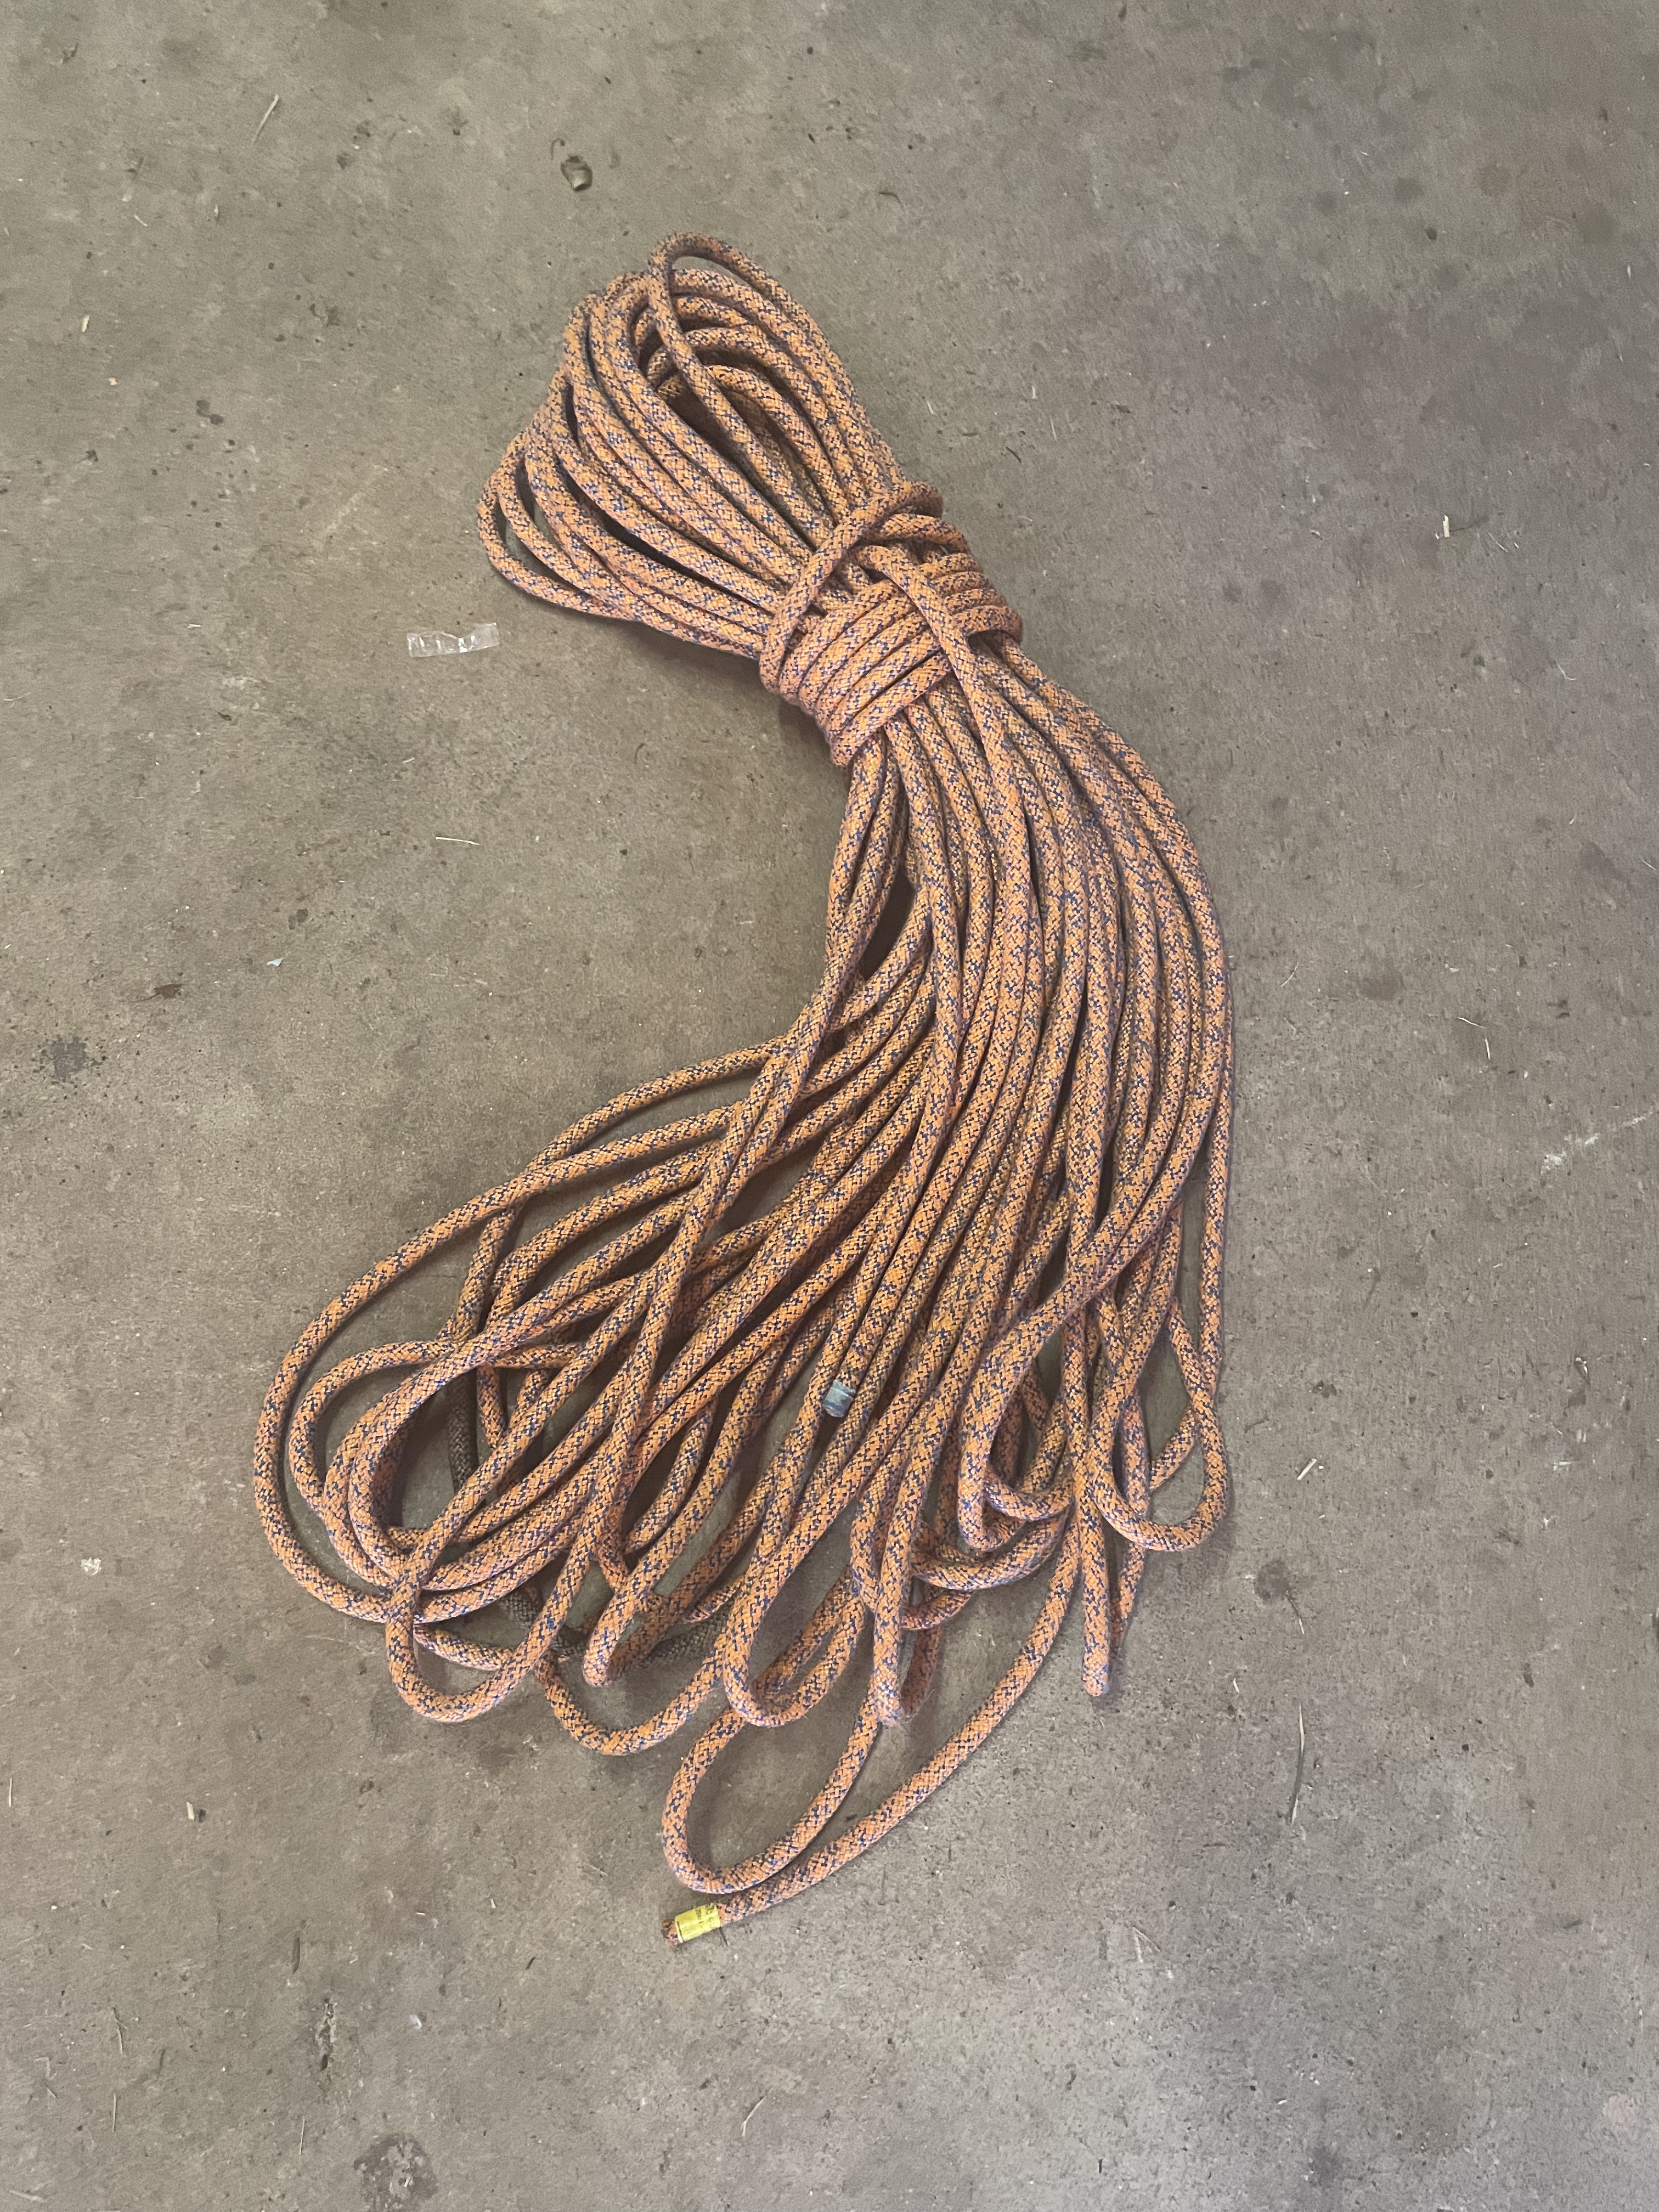
Oakie doakie. I’ve had this rope for a bit over 12 months now so it’s time for some updated thoughts.
And I’ll say right off the bat. I don’t think this is a good rope for beginners.
It’s a high performance rope.
Like any high performance thing it’s extremely good at what it sets out to achieve but the users need to know what they are doing.
You wouldn’t put an L plater who’d never riden before on a Ducati Streetfighter V4.
High performance generally = uncompromising
CE4Y makes light weight, super static, strong ropes.
To achieve this the sickline 8.7 uses a UHMPE (That’s dyneema to us uncouth types) and Polyester sheath and a Polypropylene core.
Using UHMPE in the sheath was a concern of mine when I bought it
Dyneema can be a bit melty when things get hot, so CE4Y ropes aren’t recommended for abseiling on while dry. That said CE4Y claim “tests have shown that abseils up to 50m on dry ropes with a standard sized figure-8 kind of device can not damage the rope fibers due to heat generated by the friction of the abseil device.”
Still if I’m doing a dry abseil to reach the start of a canyon I try to throw the rope in a puddle before setting up the abseil just to get it wet
OK. Let’s recap the important details.
Cost: At around $6:60 per metre It’s not cheap but not the most expensive either, being a lot cheaper than the CanyonLUX for example.
Specs: CE4Y lists the rope specs as
Model
Breaking Strength
Weight
Sick Line 8.7
20kN
42g/m
So on the weight and strength you’d give it a tick with it being in the ball park with the premium canyon ropes.
Colours: To paraphrase Henry “Model T” Ford, You can have any colour you like as long as its a weird rose taupe speckled with blue.
Handling: It’s soft and supple, knots easily. Not much else to say really
Control: She’s fast!!! Damn fast.
Long term thoughts: It’s still fast.
I wouldn’t recommend a beginner try it single strand with something like a Hydrobot or standard figure 8 set up. Experienced friends even found it difficult to control on a Pirana. Even double rope it needs a bit of caution.
On a more modern canyoning device such as a Crittr or Palikoa its fine but if we are on a trip with mixed ropes I make sure to remind people at the anchor “We are on the sick line, add friction.”
Also being a little concerned about the wear rate of the sheath against the abrasive sandstone we get in the Bluies for a while I was reserving the sick line as our back up rope or using it as the pull strand.
I’ve got over that now and have been using it as our main rope and most trips I take it. But again it’s high performance so to get the most out of it you need a good operator. Rope placement and having an abseil technique where you are not bouncing all over the place like Ice-T in tank girl is important.
Weight.
This is where the sick line excels
Using the dodgy bathroom scales my 43m sick line comes in at 2.2kg, comparable to my 32m Imlay Canyonfire at 2.1kg. (both numbers include the plastic container I used to hold them on the scale)
All good for the dry weight but my perception was it absorbed more water and took far longer to dry.
To test this I submerged both in a bucket of water for 10min and weighted them again. And was very surprised. The Sickline went up to 2.5kg while the Canyonfire climbed to 2.7kg. I would have swore the Sick Line held more water but that proves me wrong.
What about drying time. After hanging in the sun for 30min on a hot day even though the Pick Line felt wetter it was back down to 2.3kg while the Canyonfire was still at 2.4kg. 100g less for 10m more rope. Not bad CE4Y. Not bad at all.
Shrinkage: Another thing you need to consider.
No just in cold water.
All kernmantle ropes shrink a bit from new as the fibres settle in from use. Mine measured 45m when I bought it and now measures around 43m. Not big deal. I always allow for 5-10% reduction in length of my ropes over time.
Pro tip: remeasure your ropes every now and then especially if you tend to go light weight and have just enough for the longest drop. a 30m surveyors tape cost 4/5s of frack all at Bunnings.
Would I but it again?
Tough question. the weight saving makes it very appealing but not long after I brought the Sick Line I also purchased 60m of the Pick Line 9m. At 45g/m it’s a slight weight penalty over the 8.7mm but I feel it’s a more robust rope that doesn’t run quite as quick. It’s still high performance so again I wouldn’t recommend it as an all day every day work horse for beginners in dry(er) sandstone canyons. But I’d probably go this again over the Sick Line.
If you are after a durable work horse for use across a range of stuff including dry abseils go the Imlay.
However if you are an experienced canyoner after a light weight rope for areas with more water and smoother rock the Pick Line 8.7mm is an excellent choice.
Access: Short section of dirt road then an easy walk. Thanks to Ty N. for his hard work fixing up the old track it is an easy walk up to the falls, though as of July 2024 the trail is a little overgrown.
Navigation: Navigation is fairly straight forward.
Map: Lithgow 1:25000 These can be purchased at Lithgow Tourist information center or online for around $10 each though not really needed here
Time: It takes about 20 min to walk up to the falls
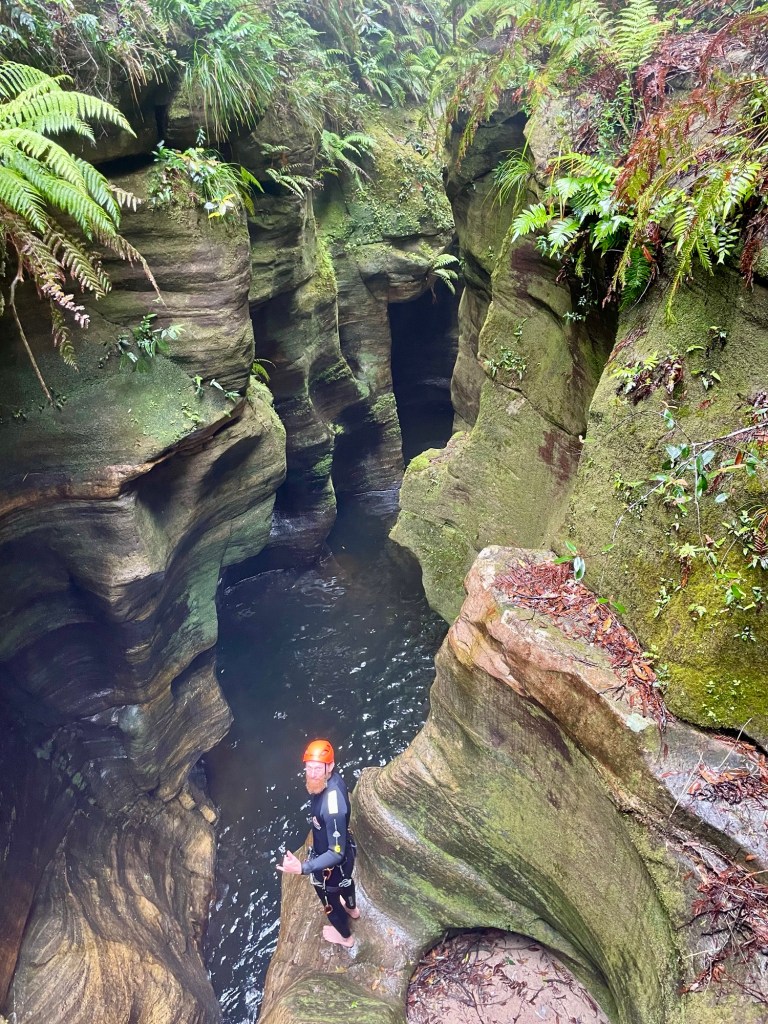
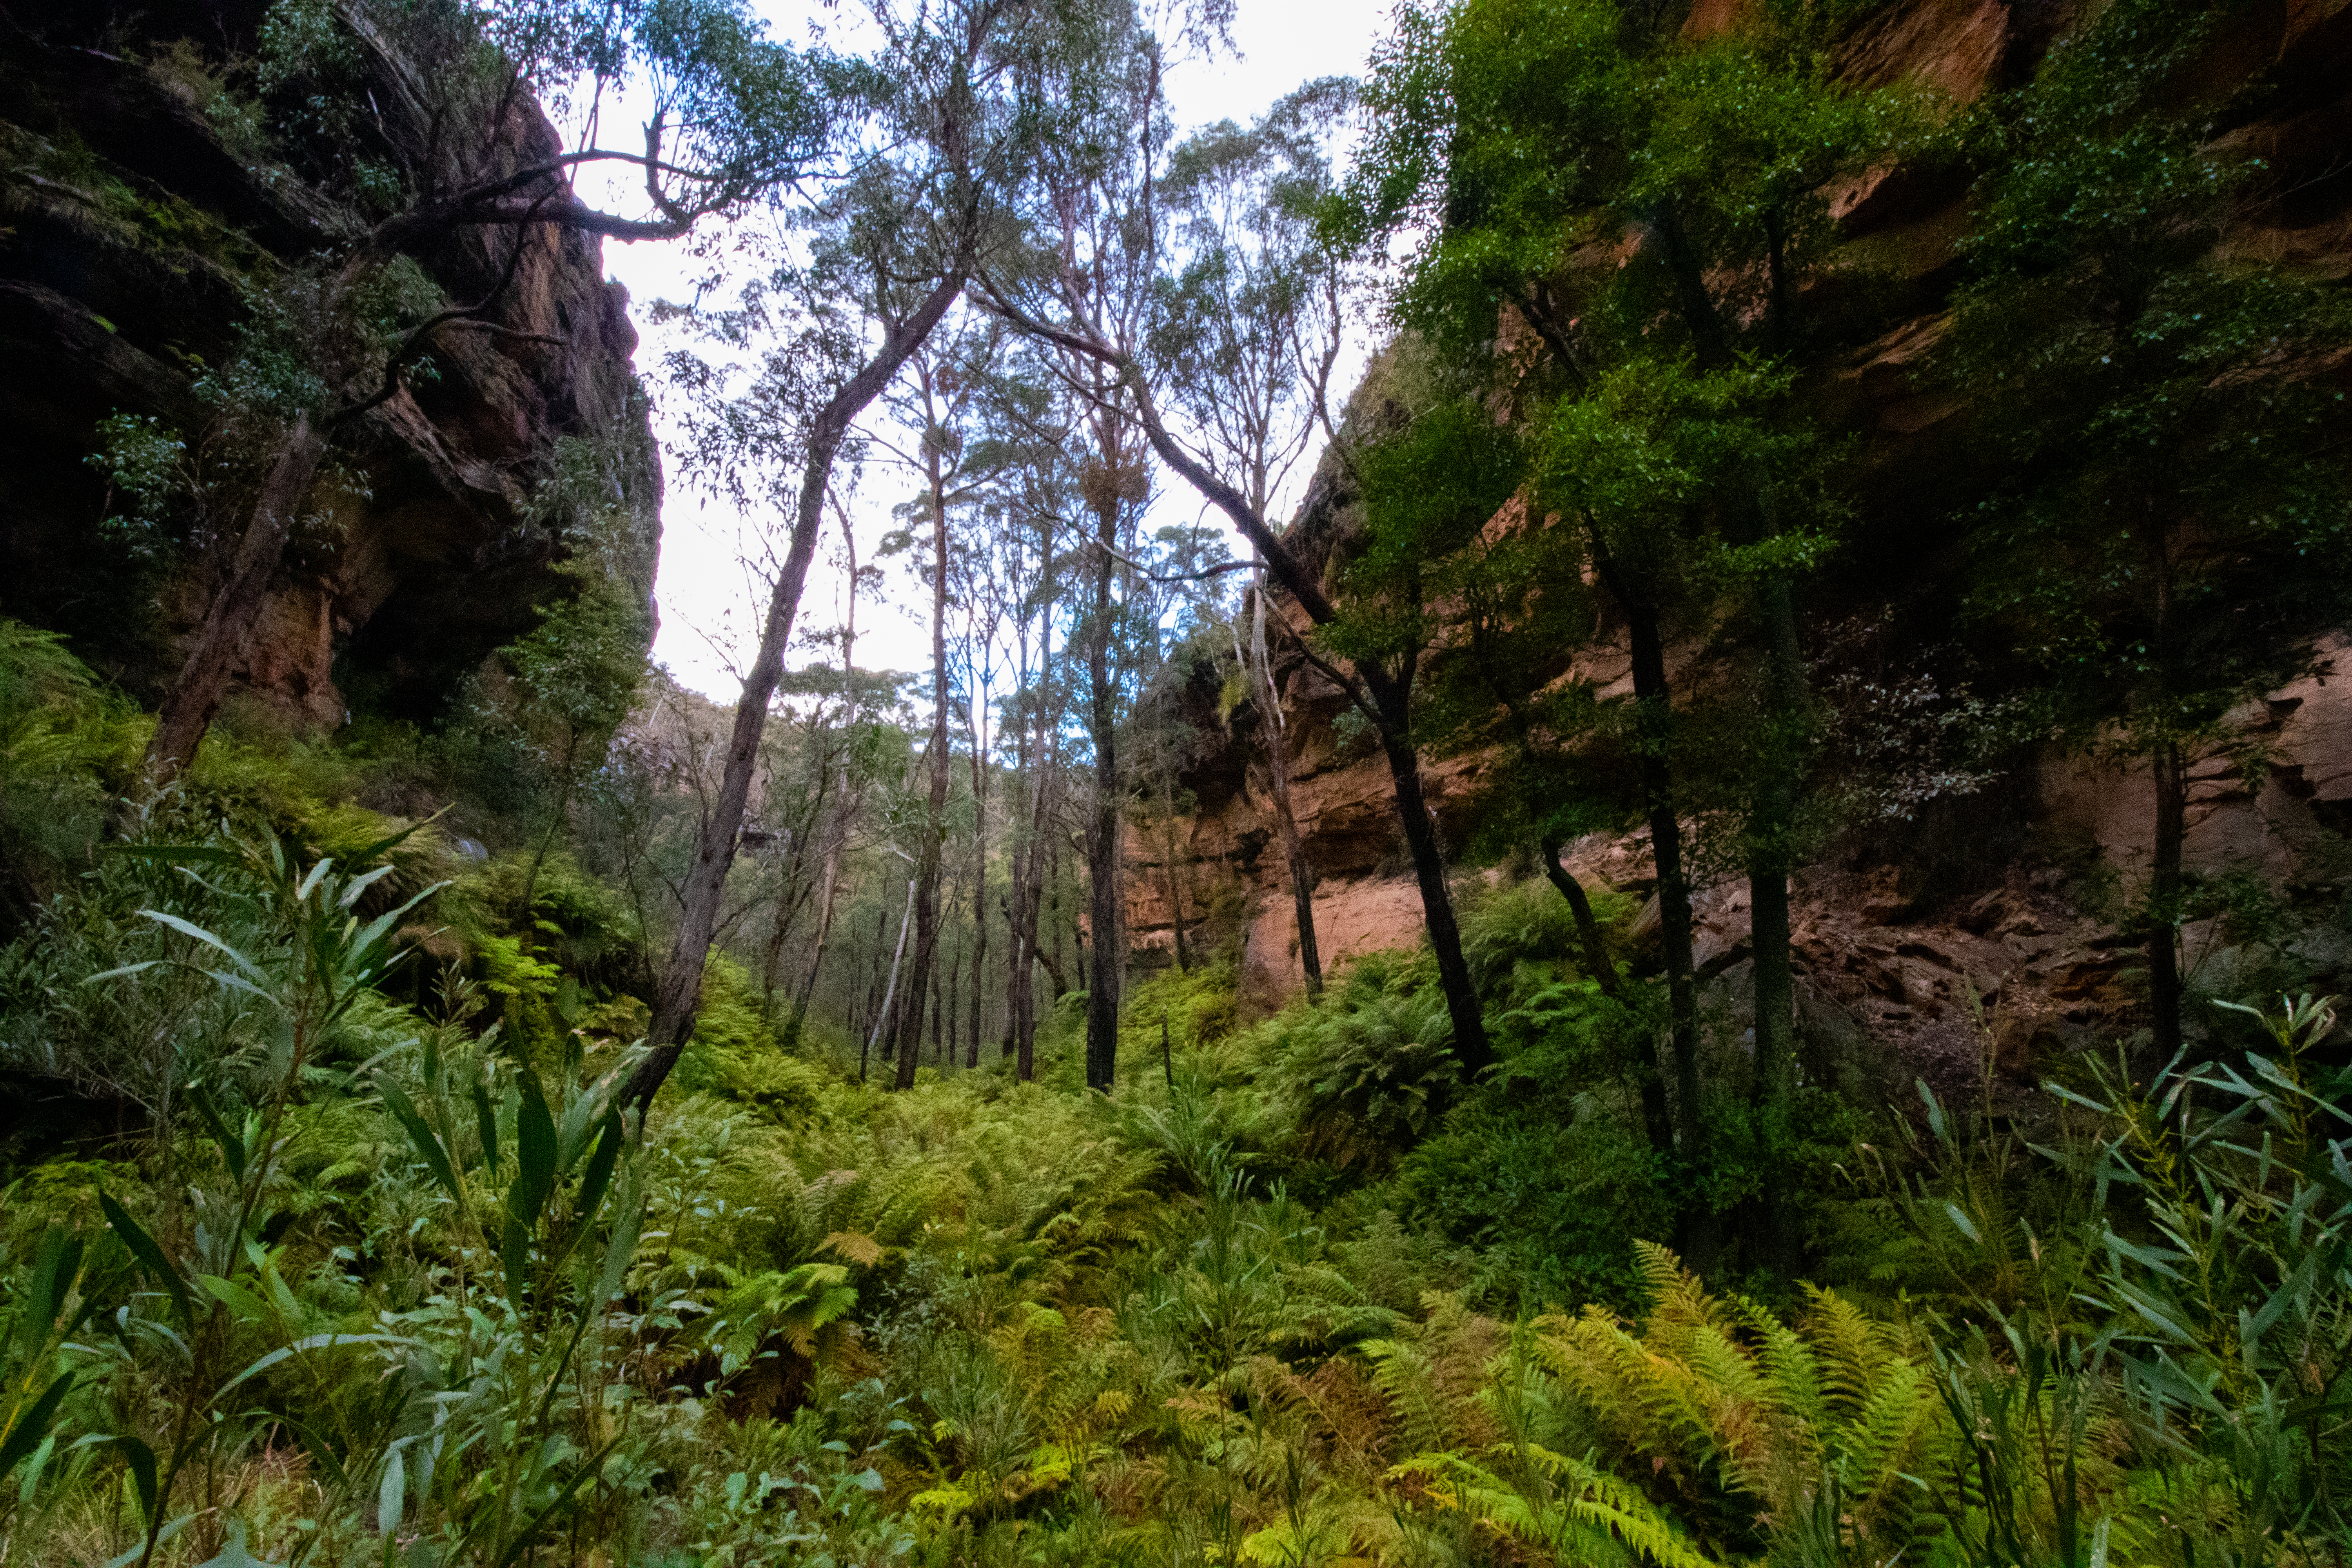
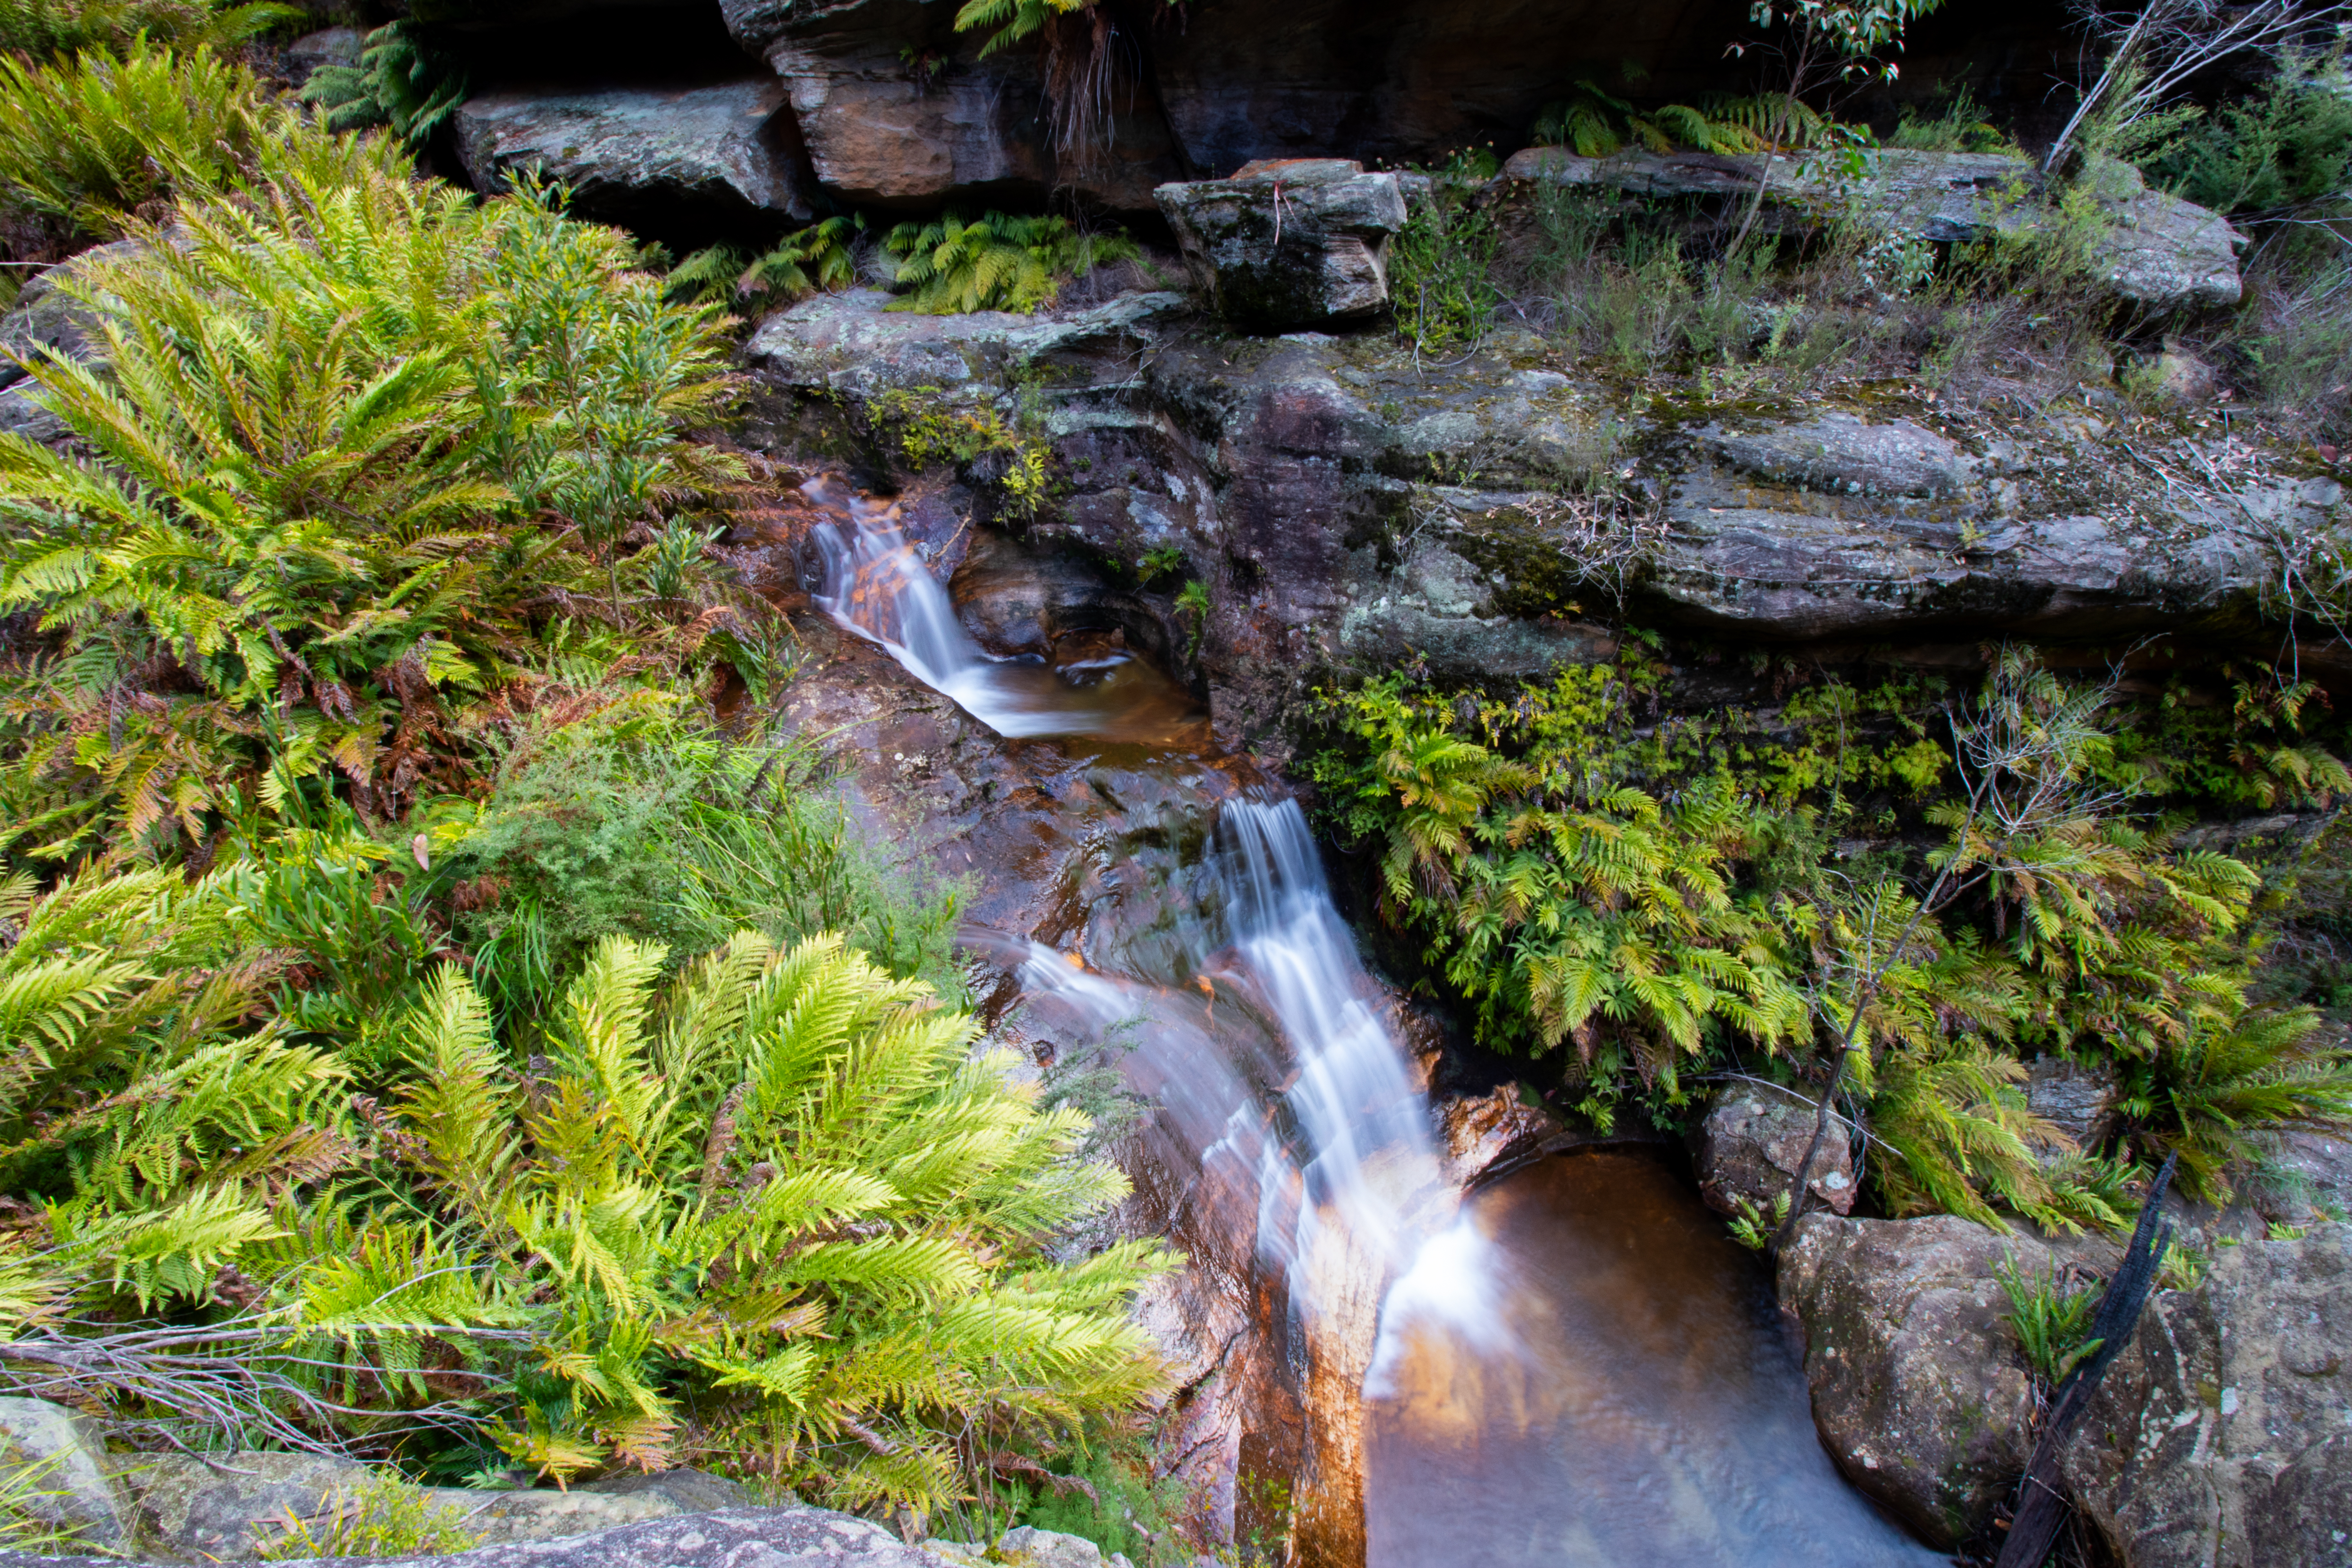
fern filled gorge leading up to the falls
Cicada Falls is a small waterfall in a very pretty gorge on the outskirts of Lithgow.
The walk up is straight forward on an informal trail, though there is some scrambling and exposure.
Getting There:
From the end of Inch street continue onto Bells road then past the water treatment plant onto the dirt road towards Water Works Gully. This can be a little rough with large puddles after rain.
Just before the first creek crossing look for a road up to the right (2wd vehicles will need to park here.) Turn right and follow the road up 100m and take the left option at the intersection. Follow this along the side of the creek. This road can get very boggy but walking on the right bank is easy going.
The walking track continues from the end of the road, slightly higher to the right. As of July 2024 the trail is over grown so can be hard to spot. A few large trees have fallen across the trail near the start, however it follows a flat bench above the creek and other than clambering over the trees it is easy going.
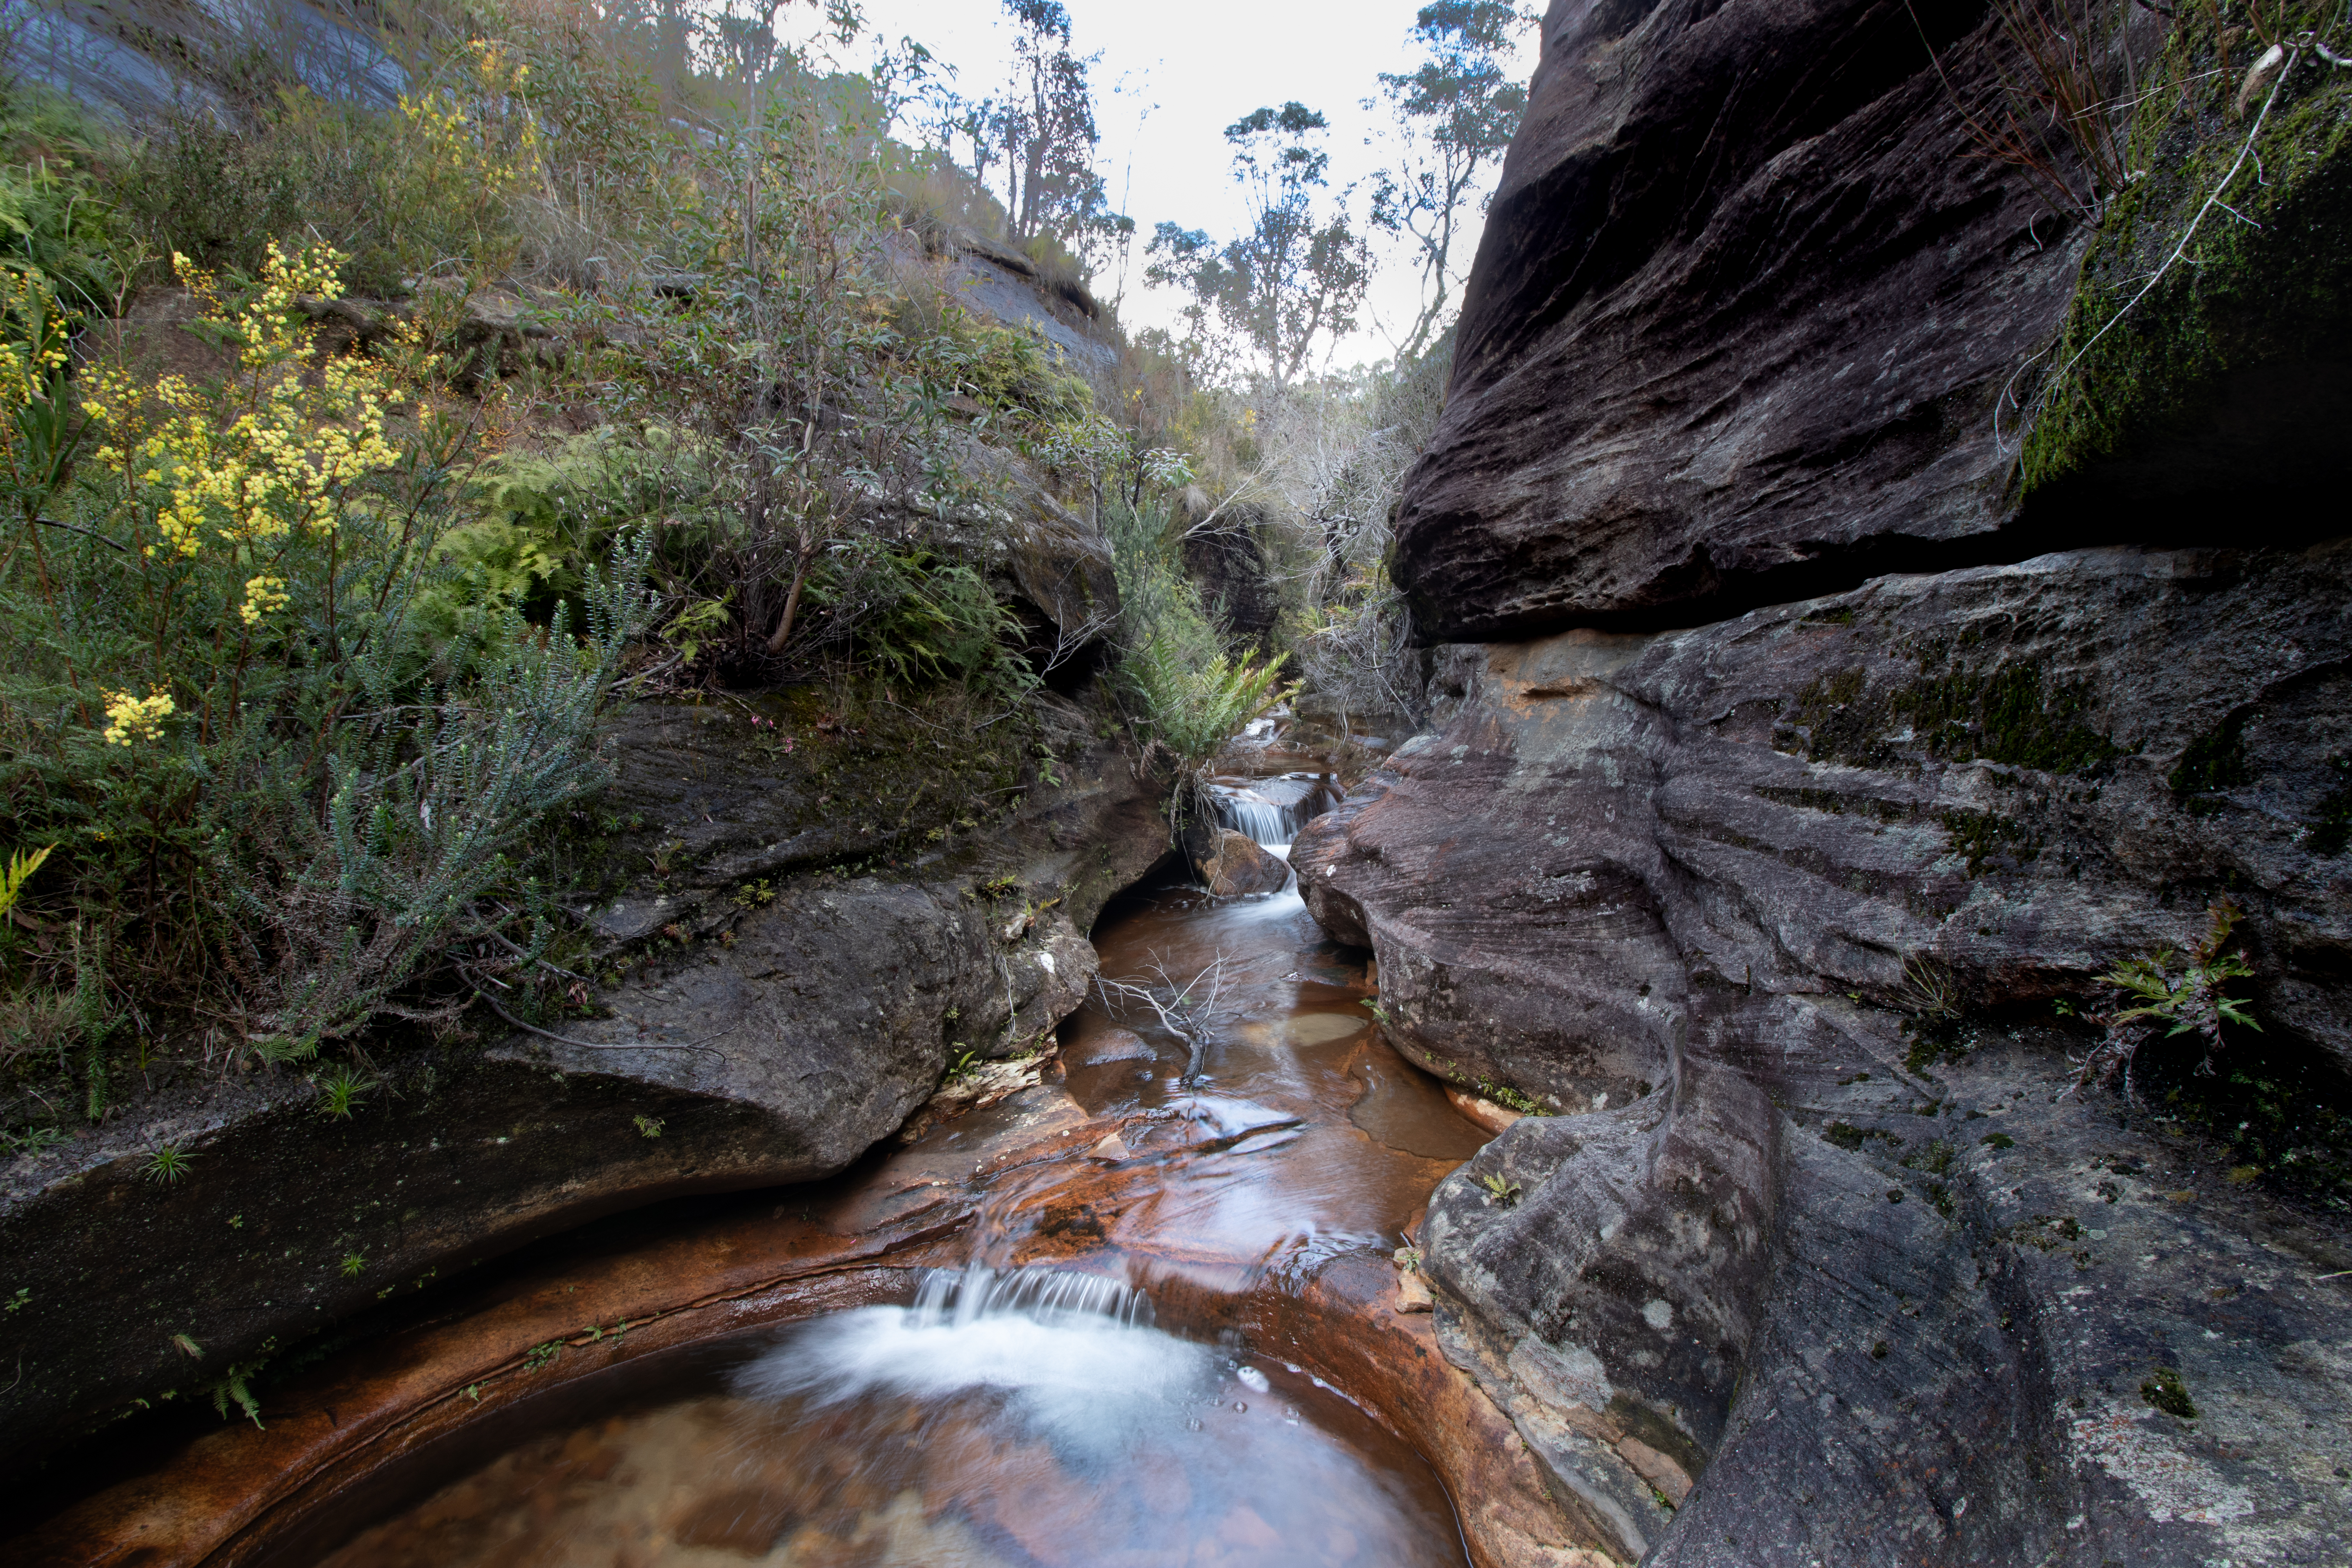
The trail crosses the creek at some industrial relics as the gorge starts to close in.
This section is the most over grown at the time at the time of writing, as you push through the ferns.
After another creek crossing the trail climbs slightly on a bench and then swings around to the right and the falls appear.
Above the falls is a cute little micro canyon that leads up to a small dam (now totally silted up)
And at the very top of the scrubby gully above is a low, wide horseshoe style falls that really only flows at more than a misty drizzle after good rain.
Note: The great outdoors is an ever changing place. Bush fires, changing weather, vegetation growth and forestry activities can all effect the trail conditions and thus the difficulty of the walk. These are a rough guide only and are by no means meant to be a definitive guide . They do not replace the need adequate map reading and navigational skills
Note 1: Taking care While reasonably well known these spots are still wild places and care needs to be taken around cliff edges and on the steep trails. Carrying the right gear as well as having adequate food, water and clothing is important. Always tell someone where you are going and when you expect to get back.
Emergency beckons (PLBs) can be hired from Katoomba Police for very little.
Note 2:First aid A basic first aid kit is essential bit of kit whenever heading into the Aussie bush. A basic first aid is highly recommended
Note 3: Maps and Navigation Having the right map, a compass and knowing how to read them is very important when heading into the bush. If you are new to bush walking joining a club or accompanying more experienced walker for you first few outing is a very good idea. I found practicing map reading on well defined trails was helpful when I started out.
The Maps mentioned are the 1:25000 series. They can be purchase at Lithgow tourism information center, from outdoors shops or online for around $10 each.
Note 4: These are wild and beautiful places, respect them. If you are able to carry something in you can carry it out. Don’ be a tosser. Leaving your rubbish behind is a sure way to ruin it for every one else.
Jasper has smashed far north QLD and the resulting weather systems are peppering the east coast with heavy rain events.
We keep an eye on the river gauges but the ones we are interested in are staying low.
A big storm rolled through the afternoon before and it seemed to rain steadily all night. The river gauge had gone up fractionally.
Drizzly rain was predicted all day with afternoon storms.
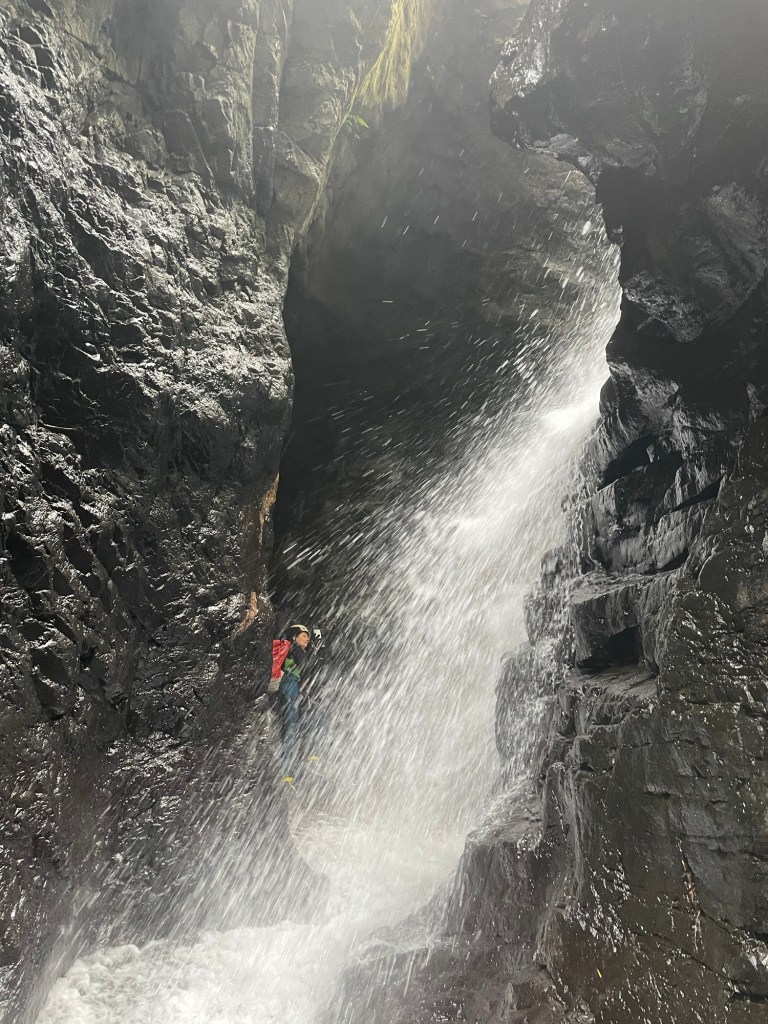
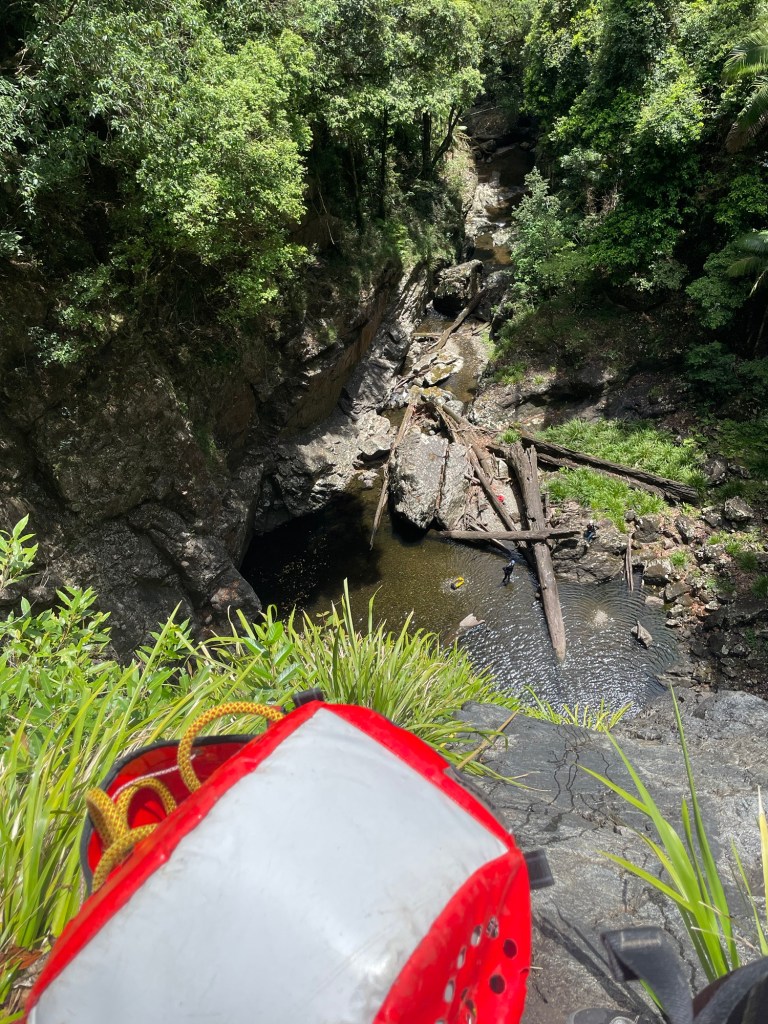
Jasons has done it before at batshit silly high flow so at the current water levels we knew had plenty of room to move and opted for an early start to get through the more committing sections before the afternoon storms.
We park the car, suit up and we are into the creek in good spirits. The drizzle has lifted and the sun is out. The rocks are slippery as a well oiled hag fish.
It was my first time meeting Vince in person but he slotted straight in to the group dynamic.
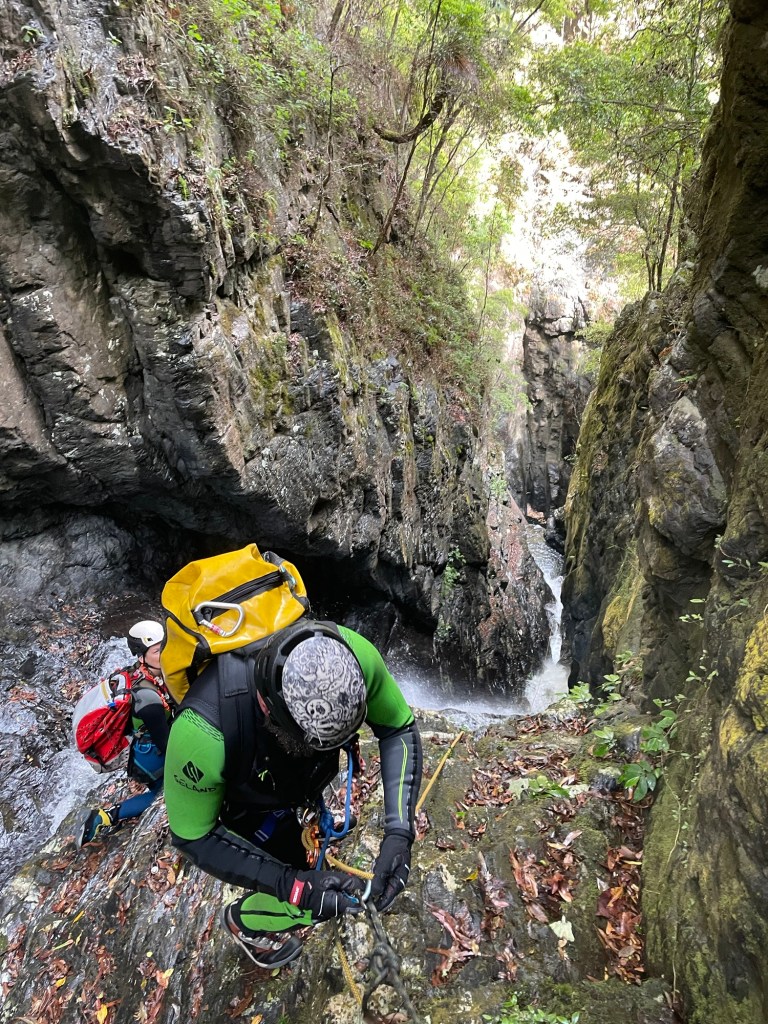
We get to the first drop. Setting up the rope I somehow ended up with an overhand knot around the anchor. I shrug at Vince. I’m really good at this canyoning caper, honest. says I
Luckily he laughs.
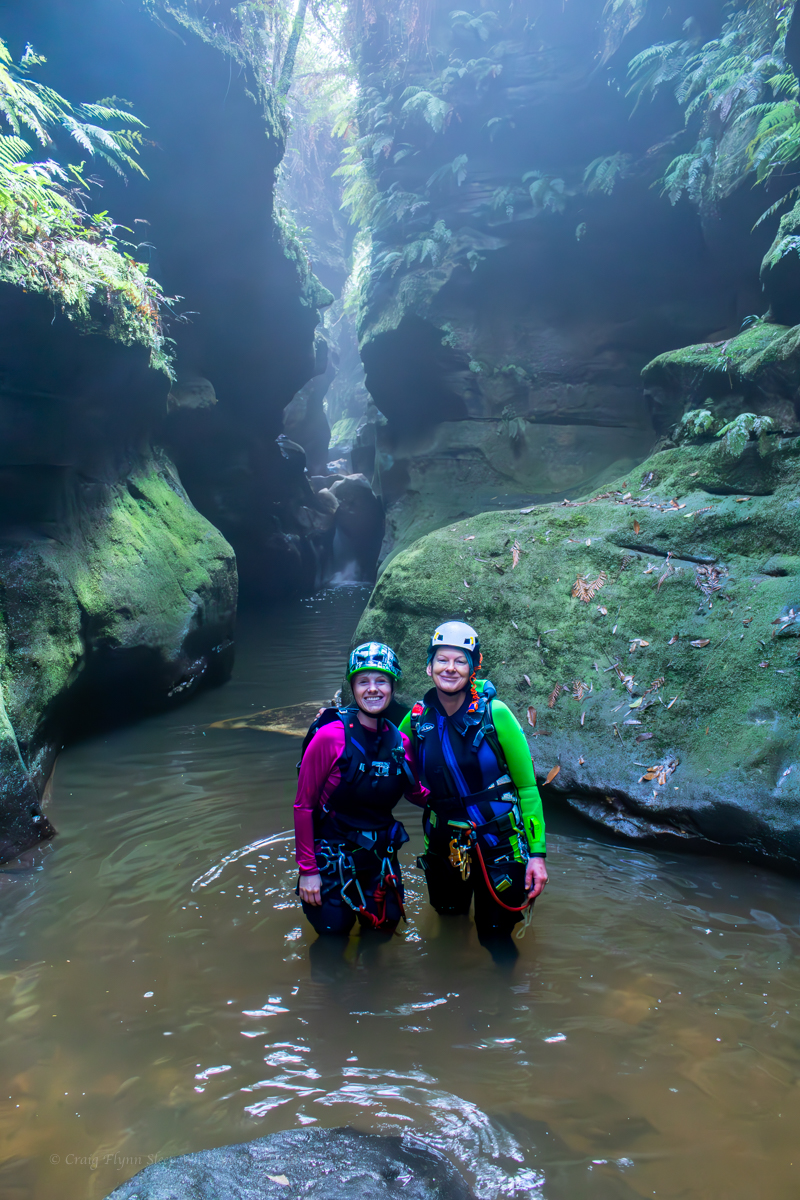
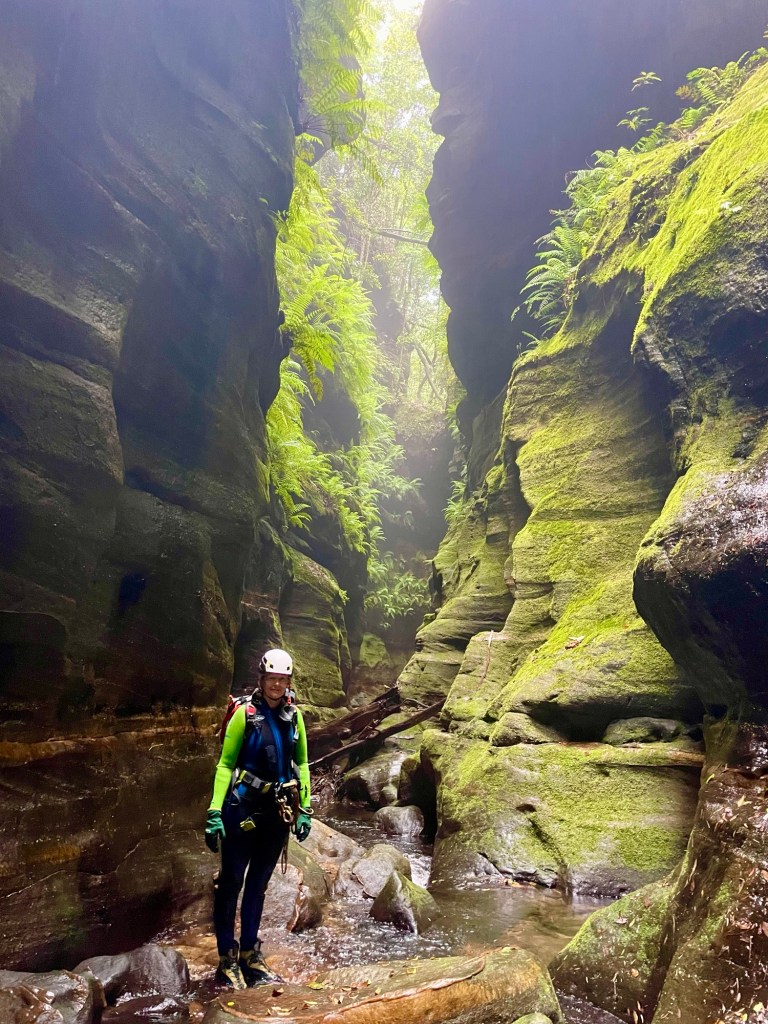
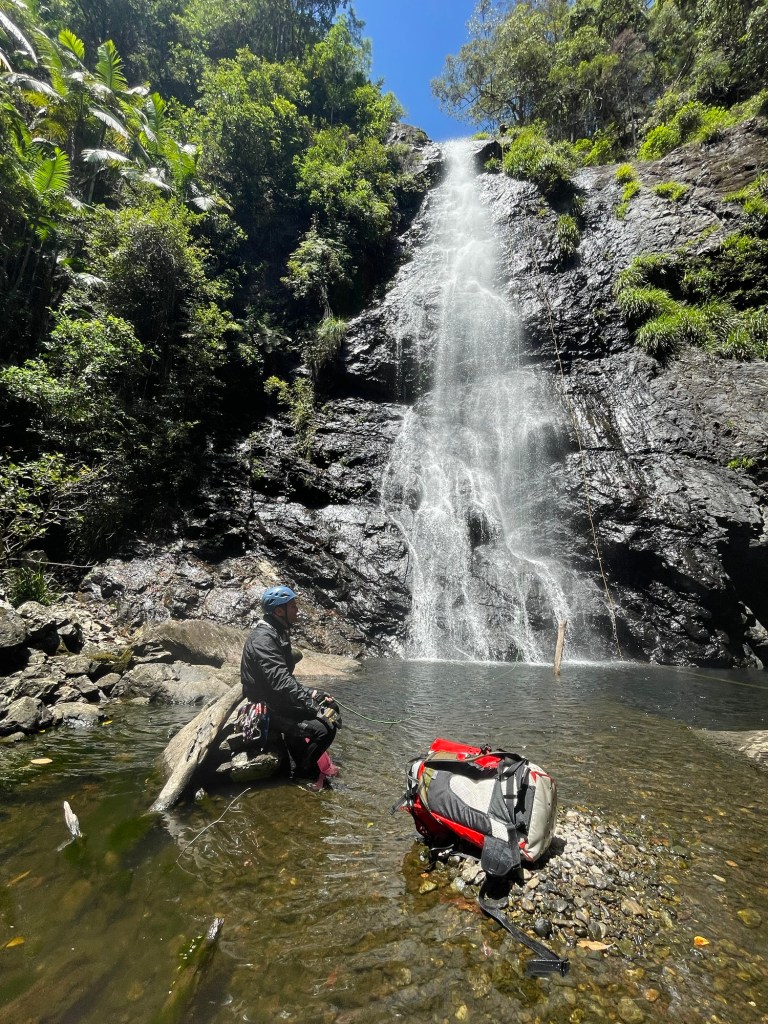
Kylie at the bottom of the first abseil
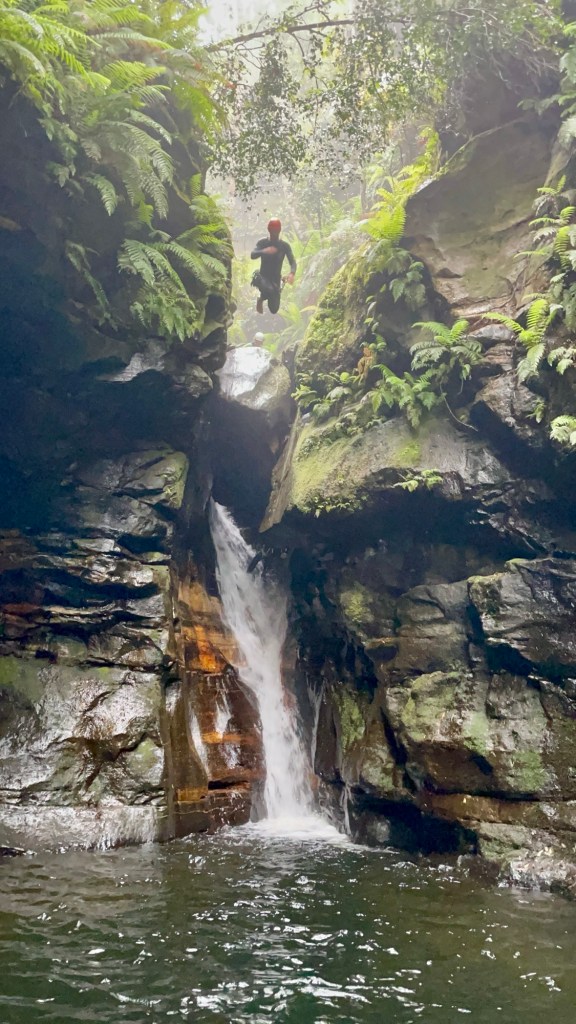
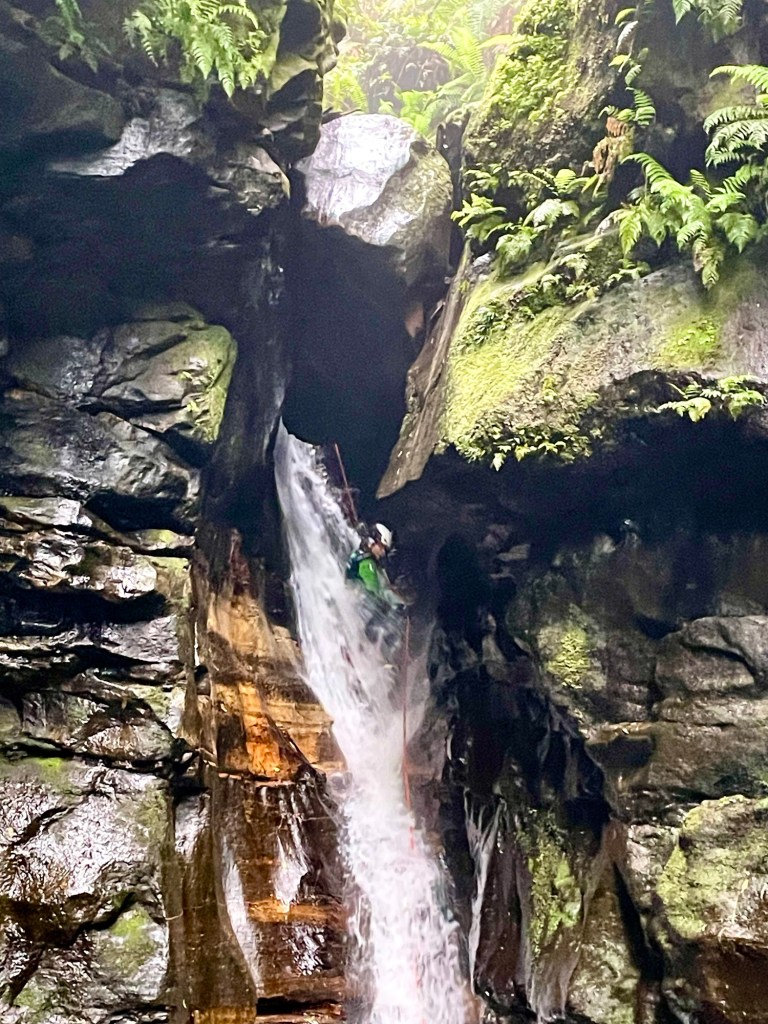
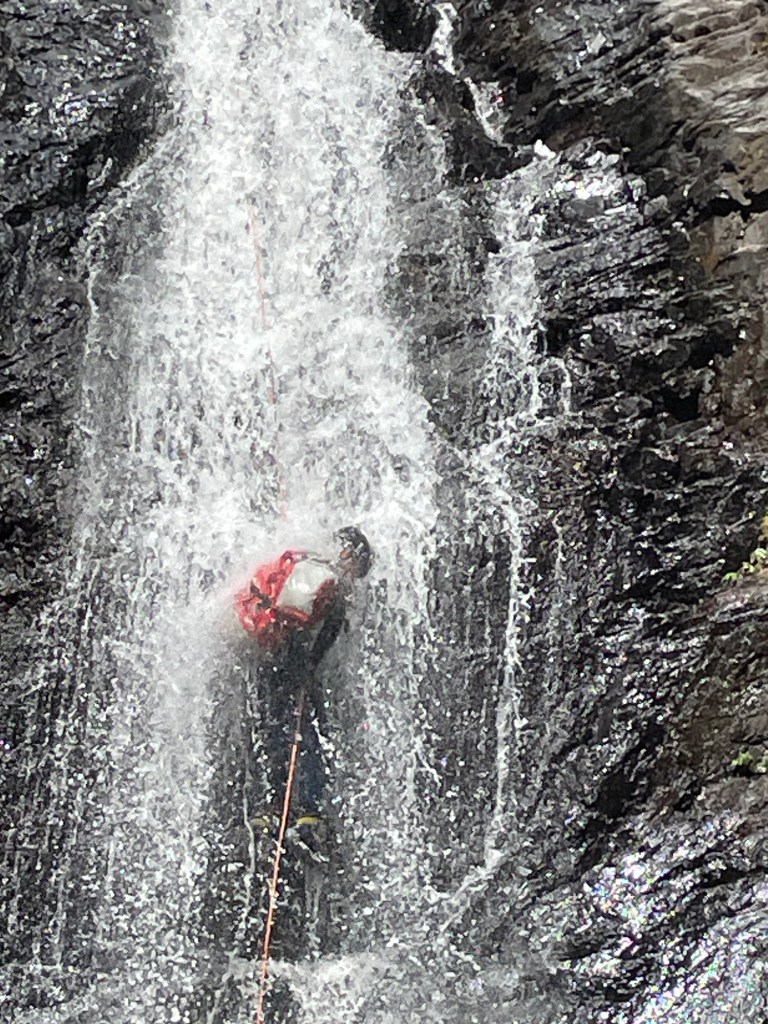
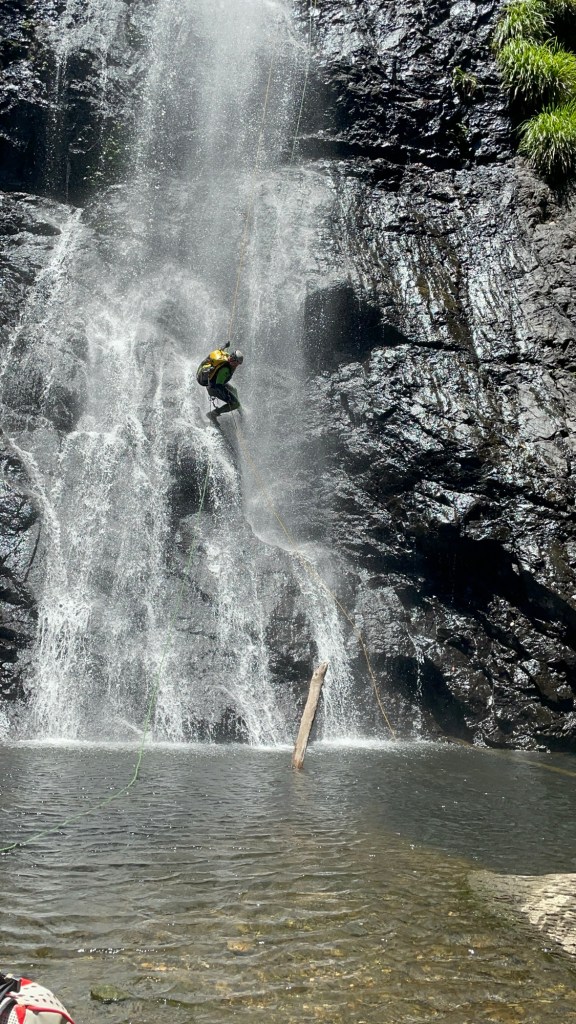
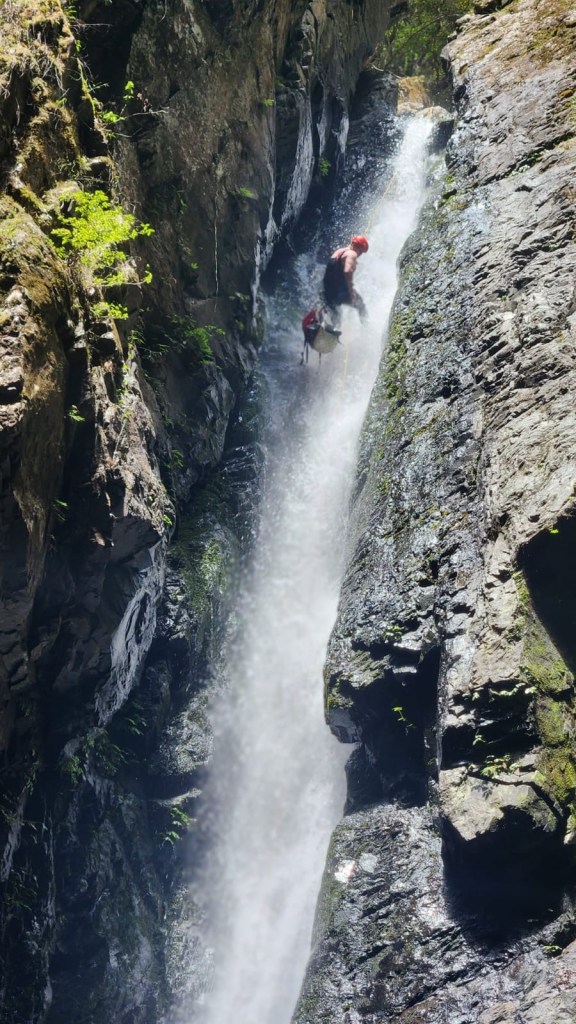
Jason getting ready to descend into the devilish slot. The water might be lowish but the excitement levels are high
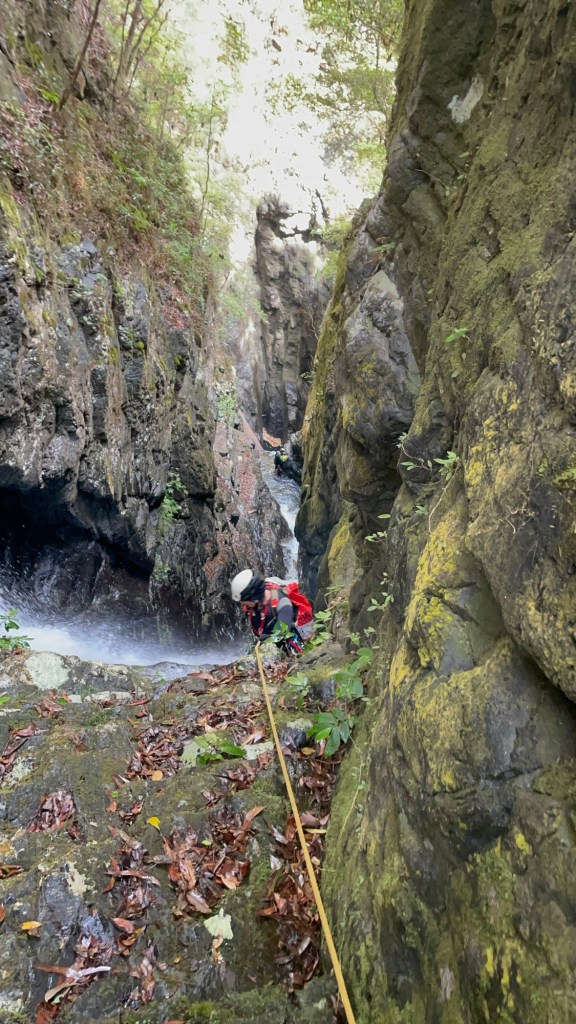
Kylie heading down
The top bit of Urumbilum is spectacular and at these water levels it’s fun without being overly spicy.
A couple of the abseils reminded me of Danae but overall it had more of a more Kalang on the wet line in high water feel.
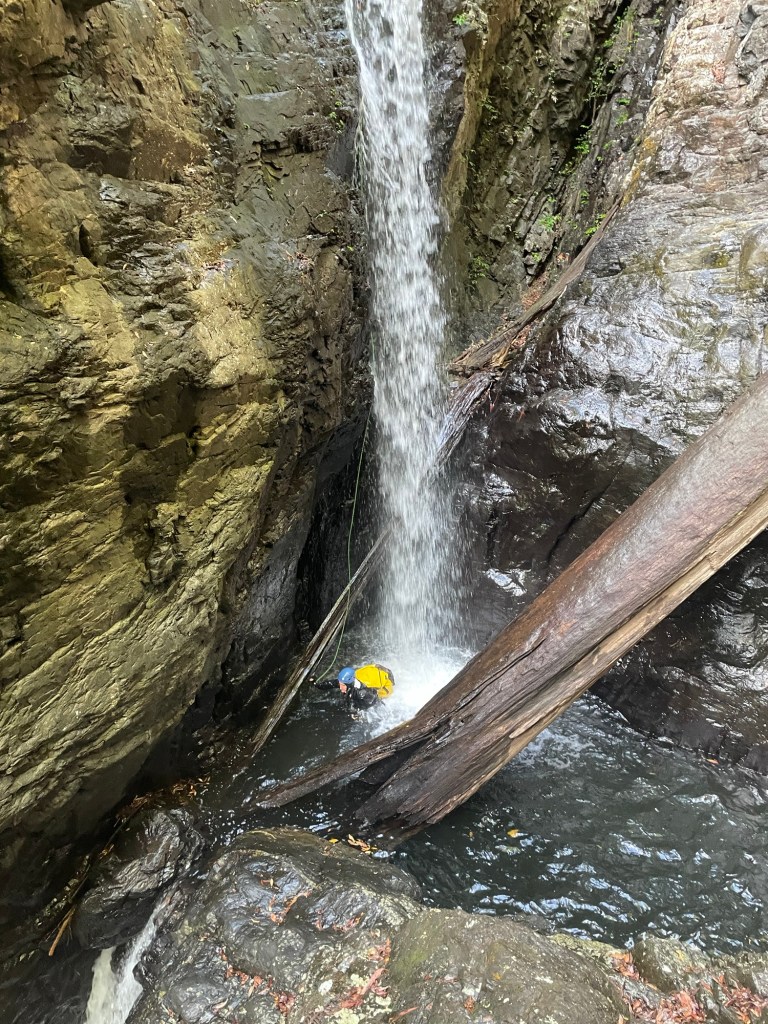
Vince having a shower
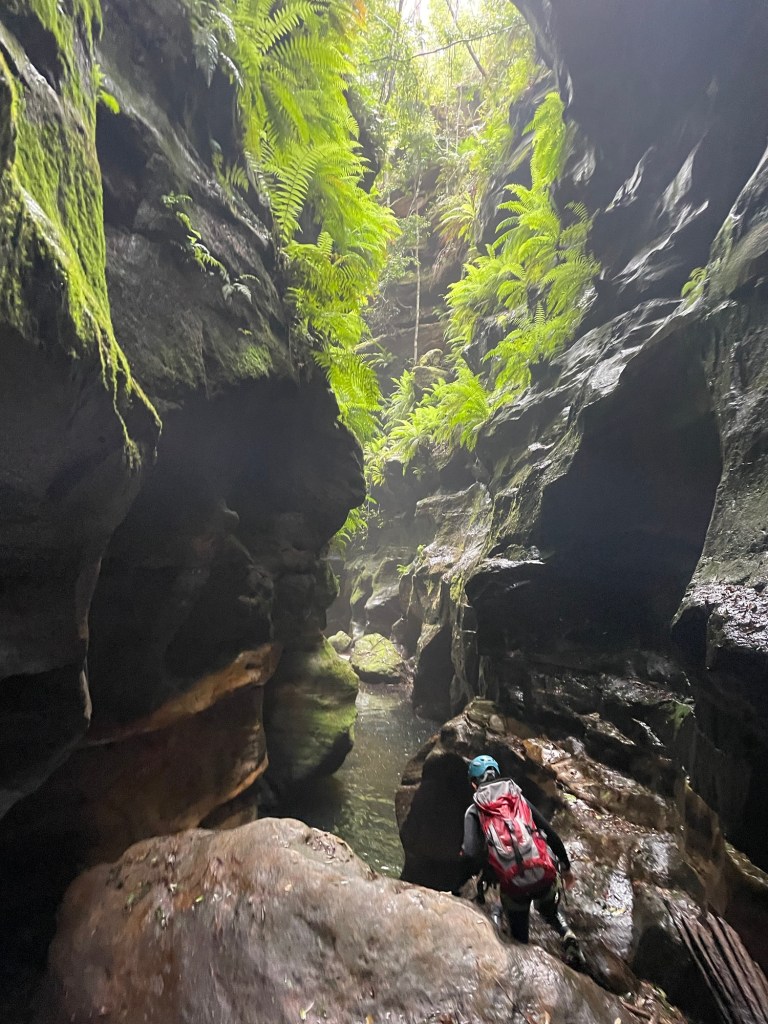
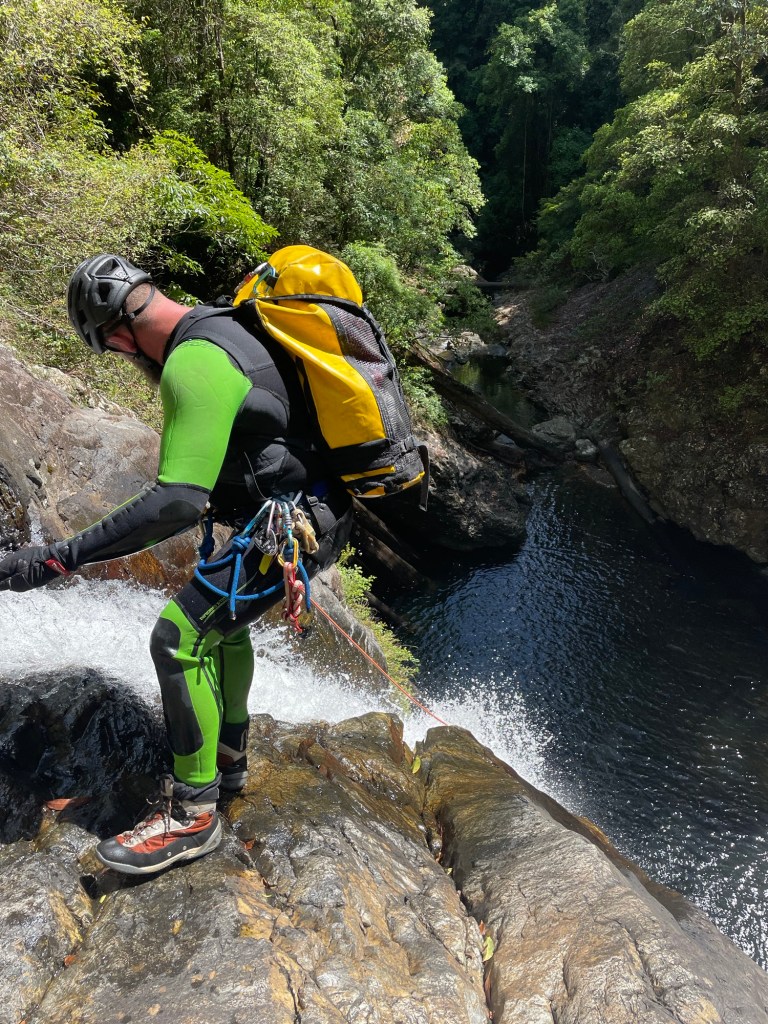
Jason on a more open abseil
Kylie cooling off
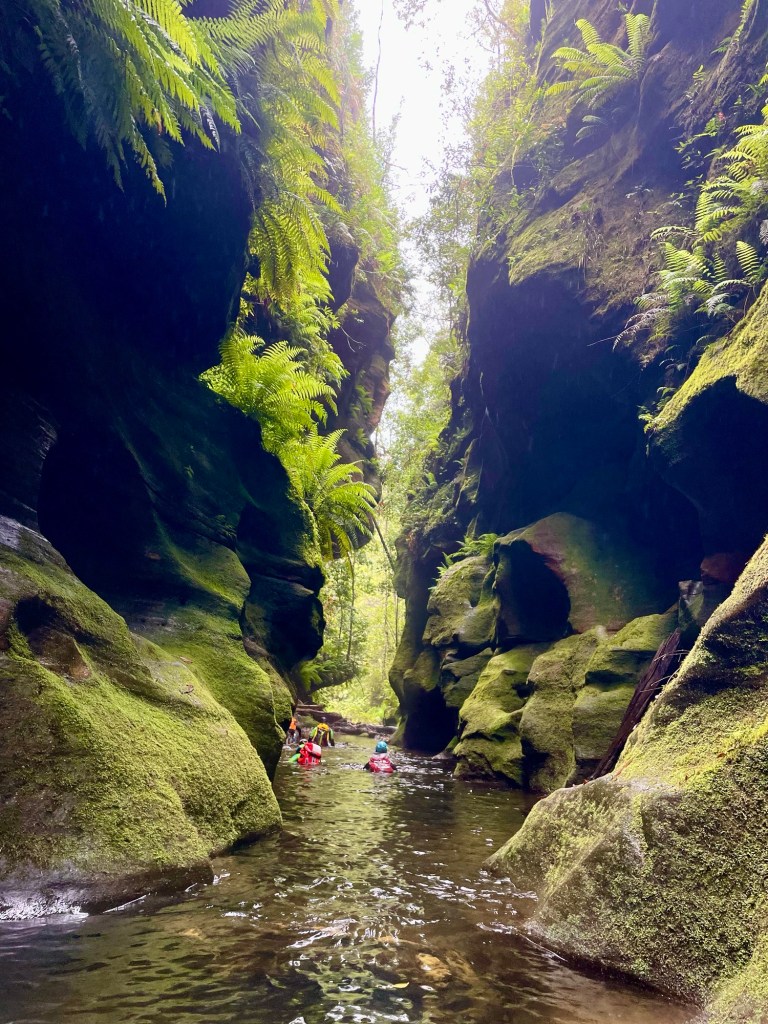
Vince and Kylie down below. It was suppose to rain all day. I’m getting sun burnt